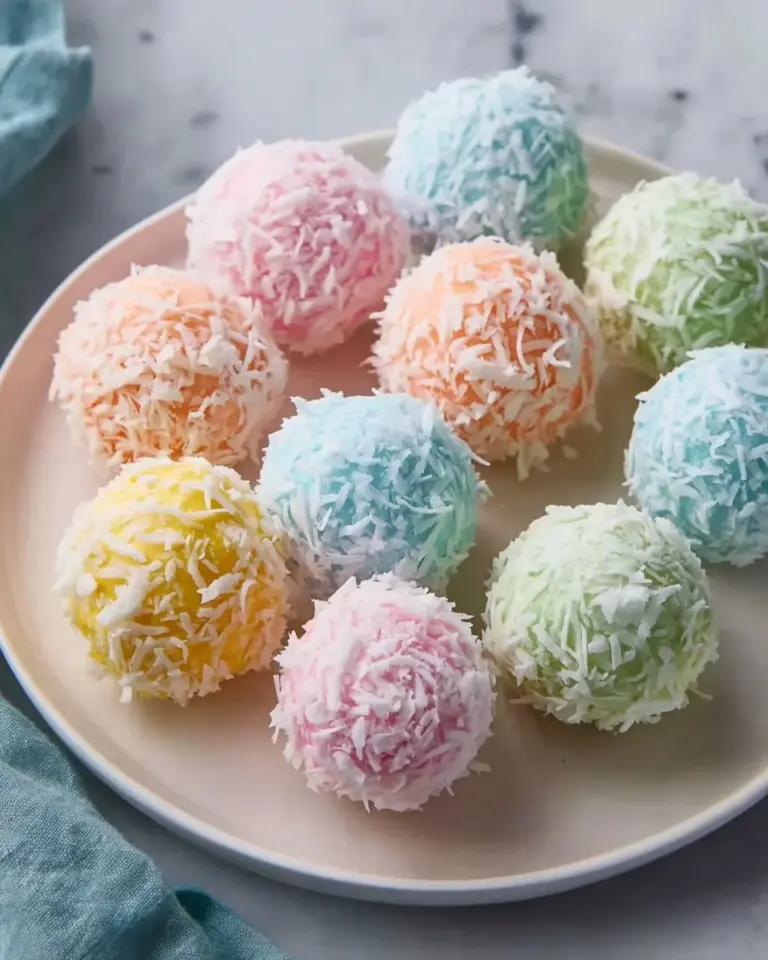
Irresistibly Soft Marshmallow Easter Eggs: A Sweet Spring Treat
When spring rolls around and Easter is just around the corner, my thoughts immediately drift to those delightful Marshmallow Easter Eggs that I remember from my childhood. Growing up, Easter was never complete without that sugary indulgence, bright colors, and fluffy texture nestled inside vibrant, painted shells. I can still remember my little hands eagerly prying them open, the sweet scent wafting through the air as I sank my teeth into those pastel treasures.
What makes these Marshmallow Easter Eggs truly special? Unlike their store-bought counterparts, which can be overly sweet and artificially flavored, this homemade version captures the joy of nostalgia while allowing you to customize flavors, colors, and decorations to your heart’s content. Plus, creating these eggs with loved ones can be a beautiful bonding experience—the laughter, the occasional sticky mess, and the delight in design makes it all worthwhile. Come along with me, and I’ll guide you through the process of creating these magical treats, so you can make your own sweet memories this Easter!
Here’s a promise: by the end of this post, you’ll not only understand how to craft these adorable marshmallow eggs, but you’ll also fall in love with the process and the delightful results!
What Are Marshmallow Easter Eggs?
Marshmallow Easter Eggs have an adorable and sweet evolution. Originating from various traditions that celebrate spring and renewal, these fluffy treats have roots that go back to the 19th century when homemade confections became a symbol of Easter festivities. Initially crafted from a simple mix of sugar, egg whites, and gelatin, they’ve undergone transformations across several cultures and kitchens.
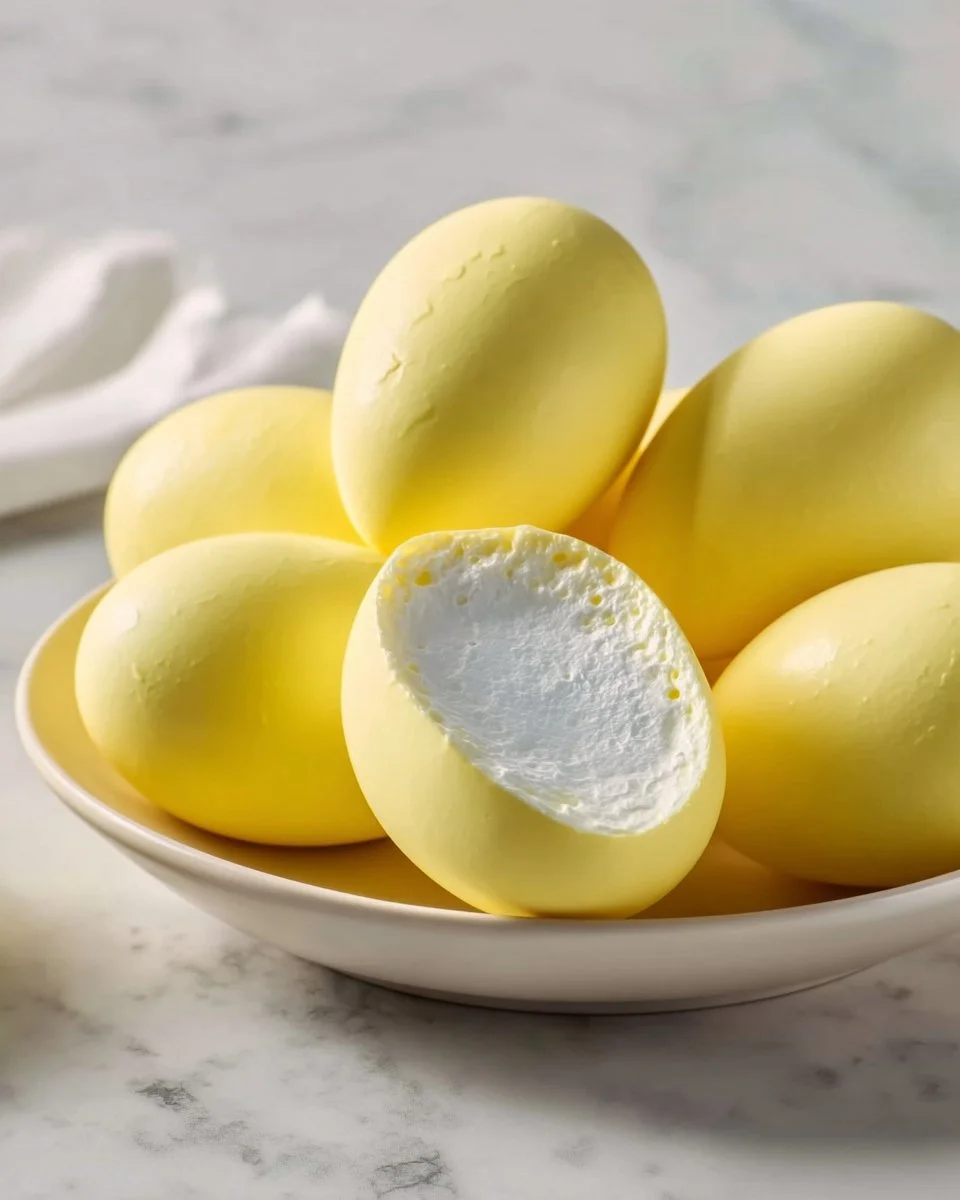
The moment you bite into one of these charming eggs, you’ll experience a cloud-like softness that melts in your mouth, paired with a subtle sweetness that evokes sheer joy. Their unique texture, a cross between fluffy meringue and soft candy, sets them apart from other Easter candies. You can make these eggs for Easter celebrations, candy-making parties, or simply to relive those childhood memories!
Why You’ll Love This Recipe
Nostalgic Charm: There’s nothing quite like making your beloved childhood treats from scratch! I find joy in reminiscing about times spent in the kitchen with my family, laughing as we filled molds with shimmering marshmallow fluff.
Customization Galore: This recipe offers a canvas as versatile as your imagination. You can play around with flavors—think raspberry, lemon, or even a chocolate fudge twist. Want to make some gluten-free? It’s totally doable!
Cost-Effectiveness: Did you know that homemade Marshmallow Easter Eggs are usually cheaper than their store-bought versions? With simple ingredients, you’ll save money while creating high-quality treats.
Satisfying Craftsmanship: Making these marshmallow eggs may take a little time, but the satisfaction of producing something from scratch is unbeatable! I promise, the thrill of pulling those eggs from the mold will be worth every minute.
Deliciously Different: Unlike store-bought varieties stuffed with chemicals, homemade eggs reflect your personal touch—imparting flavors and ingredients you can feel good about indulging in.
Let’s roll up our sleeves and get ready to create some delicious Marshmallow Easter Eggs!

Ingredients
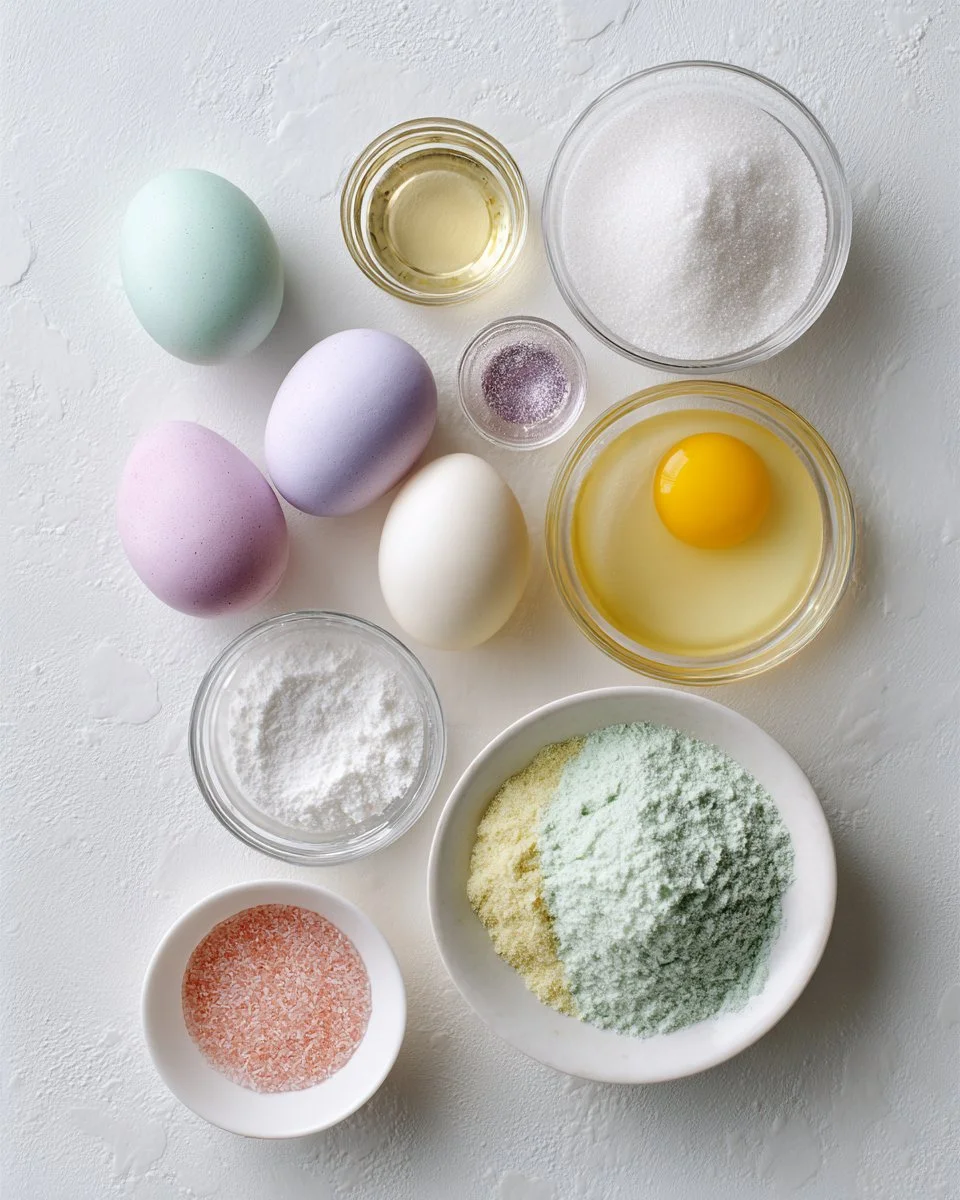
- 3 envelopes (21g) unflavored gelatin: Essential for that marshmallow fluffiness.
- 1 cup cold water, divided: Helps to bloom the gelatin and create the syrup.
- 1 ½ cups granulated sugar: Provides sweetness.
- 1 cup light corn syrup: For a smooth texture and to prevent crystallization.
- ¼ teaspoon salt: Balances the sweetness.
- 1 tablespoon vanilla extract (or almond extract): For added flavor.
- Yellow food coloring (or any pastel color): To create that festive look.
- Cornstarch and powdered sugar mix (equal parts, for dusting molds): Prevents sticking.
- Edible glitter or sanding sugar (optional): To add some sparkle.
- Edible wafer paper for stamping (optional): For a fun decorating touch.
Ingredient Notes:
- Always choose high-quality vanilla extract for a robust flavor. You can substitute almond extract for a twist!
- If you prefer a different sweetener, light agave nectar can be a wonderful alternative.
Prep Notes: Ingredients should ideally be at room temperature for better incorporation.
Step-by-Step Instructions
Prepare the molds: Begin by lightly dusting plastic or silicone egg molds with a mixture of powdered sugar and cornstarch to prevent sticking.
Bloom the gelatin: In the bowl of a stand mixer, add ½ cup of cold water and sprinkle the gelatin evenly over the surface. Let sit undisturbed for 10 minutes to bloom.
Boil the sugar mixture: In a medium saucepan, combine granulated sugar, corn syrup, salt, and remaining ½ cup of cold water. Stir to moisten the sugar, then bring to a boil without stirring until it reaches 240°F (soft-ball stage)—this usually takes about 8-10 minutes.
Whip it up: With the mixer on low speed, slowly pour the hot sugar syrup into the bloomed gelatin. Increase to high and whip for 10-12 minutes until thick, white, and glossy. Add vanilla extract and food coloring during the last 30 seconds.
Fill the molds: Transfer the marshmallow mixture to a piping bag or use a spoon to fill the prepared molds quickly. Smooth the tops and let sit uncovered at room temperature for at least 6 hours—resist the urge to peek!
Unmold and decorate: Gently remove the marshmallow eggs from the molds. Dust with cornstarch and powdered sugar if sticky, and decorate as desired.
Chef’s Tip:
Keep a close eye on your sugar syrup’s temperature—too long, and you risk it becoming candy, too short and it won’t set properly.
Expert Tips & Tricks
- Storage: Store your Marshmallow Easter Eggs in an airtight container at room temperature for up to one week. If you’d like to keep them longer, refrigerate for up to two weeks.
- Make-ahead: You can prepare the marshmallow mixture up to a day in advance. Just be sure to cover them well to prevent them from drying out.
- Troubleshooting: If your mixture doesn’t whip up to fluffy perfection, it’s likely due to the temperature of your sugar syrup or the gelatin not blooming effectively.
Serving Suggestions
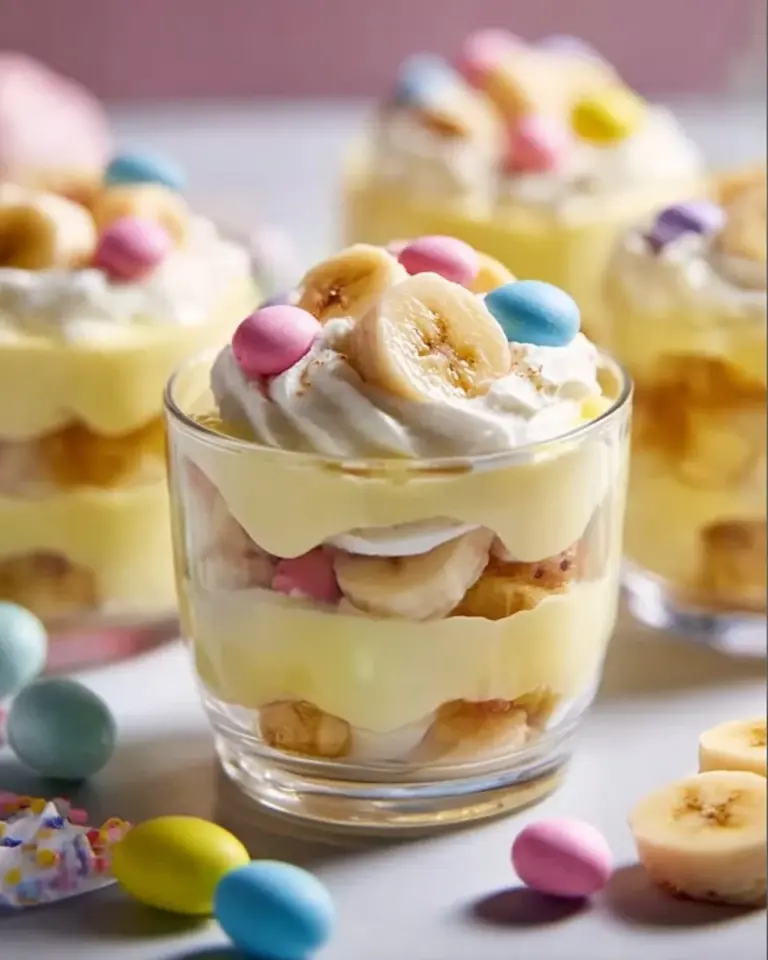
Pair these Marshmallow Easter Eggs with a nice cup of rich hot cocoa or a refreshing iced tea. They make for stunning centerpieces for your Easter brunch table and will surely impress guests with their whimsical presentation.
Variations & Substitutions
- Flavor Variations: Get creative! Consider blueberry extract, matcha green tea powder, or even peppermint for a holiday twist.
- Dietary Adaptations: For vegan marshmallows, consider using agar-agar instead of gelatin.
- Seasonal Variations: Pumpkin spice for fall, or berry flavors for summer—they’re versatile enough for any season!
Nutrition & Storage Info
- Prep Time: 30 minutes
- Cook Time: 20 minutes
- Total Time: 6+ hours (mostly hands-off!)
- Yield: Approximately 12 large eggs
- Estimated Calories Per Serving: Approximately 120 calories
- Storage Instructions: Air-tight at room temp or refrigerated, as mentioned above.
FAQ Section
Can I use flavored gelatin instead of unflavored?
- While you could, it’s recommended to stick with unflavored for the best results.
How can I make these gluten-free?
- This recipe is naturally gluten-free as it contains no flour or wheat-based products.
What if my marshmallow isn’t setting?
- It may need more time or could be an issue with either the temperature of the syrup or gelatin blooming properly.
Can I die the marshmallow mixture different colors?
- Yes! Feel free to divide the mixture and use different colors for a rainbow effect.
Do I need special equipment?
- A stand mixer is quite helpful, but you can use a hand mixer as well—more effort, but doable!
Can I freeze them?
- Yes, just ensure they are well-wrapped and protected from moisture.
Is there a way to make these less sweet?
- You could reduce the amount of sugar slightly but be cautious as it might affect the texture.
What can I do if it’s too sticky?
- Dust with a cornstarch and powdered sugar mixture to make them easier to handle.
How do I make them more festive?
- Use edible glitter, ribbons, or wafer paper stamps to add some sparkle and personal touches!
Can I use chocolate molds?
- Yes, chocolate molds can be used but make sure to coat them well with cornstarch to avoid sticking.

Conclusion
These homemade Marshmallow Easter Eggs are more than just a sweet treat; they’re a way to create lasting memories with family and friends. I highly encourage you to try this recipe and indulge in the process! Don’t forget to share your experiences in the comments below, as I love hearing about your baking adventures. Check out some of my other favorite recipes on the blog for more delicious inspirations just in time for spring!

Marshmallow Easter Eggs
Ingredients
Method
- Begin by lightly dusting plastic or silicone egg molds with a mixture of powdered sugar and cornstarch to prevent sticking.
- In the bowl of a stand mixer, add ½ cup of cold water and sprinkle the gelatin evenly over the surface. Let sit undisturbed for 10 minutes to bloom.
- In a medium saucepan, combine granulated sugar, corn syrup, salt, and remaining ½ cup of cold water. Stir to moisten the sugar, then bring to a boil without stirring until it reaches 240°F (soft-ball stage)—this usually takes about 8-10 minutes.
- With the mixer on low speed, slowly pour the hot sugar syrup into the bloomed gelatin. Increase to high and whip for 10-12 minutes until thick, white, and glossy. Add vanilla extract and food coloring during the last 30 seconds.
- Transfer the marshmallow mixture to a piping bag or use a spoon to fill the prepared molds quickly. Smooth the tops and let sit uncovered at room temperature for at least 6 hours.
- Gently remove the marshmallow eggs from the molds. Dust with cornstarch and powdered sugar if sticky, and decorate as desired.