Festive Holiday Cookies: The Ultimate Joyful Treats for Every Occasion
Growing up, my fondest memories of the holiday season involved the aroma of freshly baked cookies wafting through our home. My mom would gather me and my siblings in the kitchen, our hands dusted with flour, eagerly waiting for the first batch of Holiday Cookies to emerge from the oven. Those golden brown delights were more than just desserts; they were symbols of family togetherness and love.
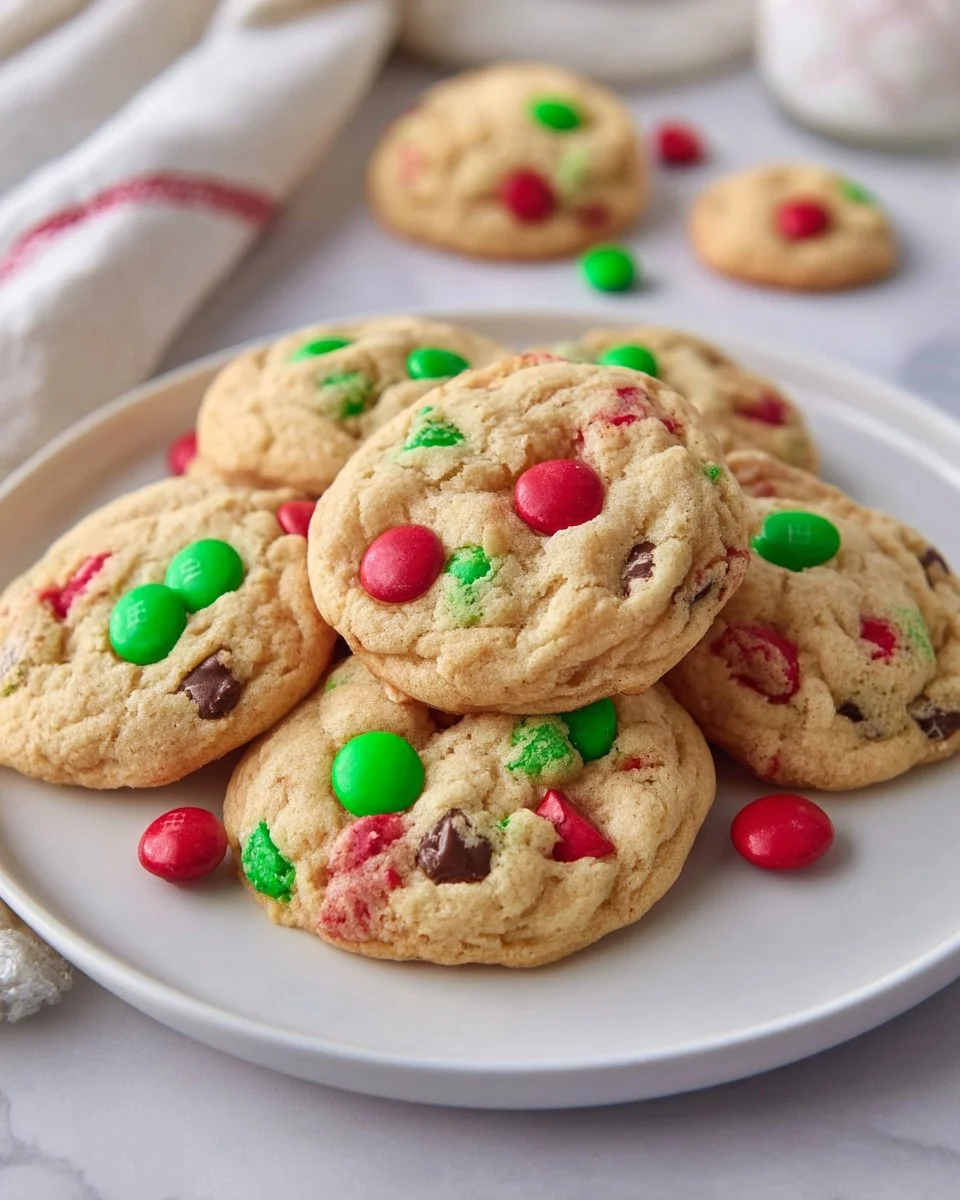
What makes these cookies so special is their perfect balance of crispy edges and chewy centers, packed with colorful M&M’s or festive sprinkles that sparkle like the joy of the season itself. Unlike store-bought versions that often lack personality and flavor, this recipe is better because it invites you to customize and express your creativity. You can experiment with flavors and decorations, making each batch a heartfelt gift to family and friends.
In this post, I promise to share not only an easy recipe that brings holiday cheer but also tips that will make your baking experience delightful. So grab your apron, and let’s make some magical memories together!
What Are Holiday Cookies?
Holiday Cookies are a treasured tradition that traces back through generations. They often feature a mix of festive flavors and textures, traditionally combining brown and white sugars to create a rich, caramel-like sweetness. The result is a soft, chewy center enveloped by a delicately crispy edge that melts in your mouth.
What makes these cookies unique, you might ask? It’s the way they bring people together during celebrations. These cookies can be decorated lovingly and displayed on a table, bringing anticipation to family gatherings. Typically made during the holiday season, but delightful any time of the year, they’re a perfect treat to share during celebrations like birthdays, weddings, or even just for an afternoon snack.
Why You’ll Love This Recipe
Easy Preparation: This recipe is straightforward and suitable for bakers of all levels. You won’t need any fancy equipment—just a stand mixer will do!
Save Money: Why splurge on store-bought cookies when making these scrumptious Holiday Cookies at home is cost-effective? Homemade treats often cost less and taste way better.
Customizable: Everyone’s taste preferences vary. Feel free to swap M&Ms for chocolate chips, nuts, or dried fruit to create your perfect cookie. Have fun with seasonal variations!
Do-it-at-Your-Pace: The recipe doesn’t require extensive time in the kitchen. It’s easy to double or halve the ingredients based on how many you need, and you can even make dough ahead of time and freeze it for later.
Taste Like a Bakery Treat: After a quick bake, you’ll end up with cookies that taste so much better than anything you find in the store or at bakeries—crispy, chewy, and oh-so-satisfying!
Ingredients Section
{image_template}
Here’s what you’ll need to bring your Holiday Cookies to life:
- 1 stick butter, softened (Use high-quality unsalted butter for the best flavor. If you’re dairy-free, coconut oil works well as a substitute!)
- 1/3 cup white sugar (Granulated sugar adds sweetness and a delightful crunch.)
- 1/2 cup brown sugar (Light or dark brown sugar gives them a rich, molasses flavor; feel free to use either based on what you have.)
- 1 egg (Ensure it’s at room temperature for the creamiest batter.)
- 1 teaspoon vanilla extract (Quality vanilla makes all the difference; I recommend using pure vanilla extract.)
- 1/2 teaspoon baking soda (This is essential for leavening your cookies.)
- 1 pinch salt (A little salt enhances all the flavors.)
- 1.5 cups all-purpose flour (For the best results, avoid scooping flour straight from the bag. Instead, spoon it into your measuring cup.)
- 1/2 cup M&Ms or festive sprinkles (These make your cookies pop with color and fun!)
Prep Notes: Let your butter come to room temperature for easier mixing, and make sure your egg is also at room temperature to create a smoother batter.
Step-by-Step Instructions
Preheat the oven to 350 degrees F. Preheating ensures that your cookies bake evenly.
Cream the butter and sugars: In a stand mixer, combine the softened butter, white sugar, and brown sugar. Cream until the mixture is light and fluffy—about 3 minutes. A fluffy mixture creates airy cookies.
Add the egg and vanilla: Incorporate the egg and vanilla extract. Mix for another minute until well combined.
Mix dry ingredients: Gradually add the flour, baking soda, and salt, mixing until a tacky dough forms. If your dough is too sticky, add a little more flour, one tablespoon at a time.
Fold in the M&Ms: Gently fold in your M&Ms or sprinkles, ensuring they are evenly distributed throughout the dough.
Scoop the Cookies: Using a cookie scoop or tablespoon, drop 24 small portions of dough onto a parchment-lined baking sheet. For larger cookies, use a larger scoop and only bake 12 at a time.
Bake: Pop them in the oven and bake for about 12 minutes or until the edges are golden brown but the centers look slightly underbaked. They will continue to cook as they cool.
Cool down: Allow the cookies to cool on the baking sheet for 5 minutes before transferring them to a wire rack to cool completely.
Chef’s Tips:
- Keep an eye on your cookies towards the end of the baking time. The larger they are, the longer they’ll take to bake.
- Avoid overmixing your dough after adding the flour to keep them tender.
Expert Tips & Tricks
Use High-Quality Ingredients: The better the ingredients, the better your cookies will be. I highly recommend organic or non-GMO flour and sugar.
Swap Mix-ins: Experiment with different combinations! Try butterscotch chips, white chocolate, or even nuts for a twist on the classic recipe.
Storage: To keep your cookies fresh, store them in an airtight container at room temperature for up to a week. You can also freeze the dough for up to three months—just roll it into balls, freeze on a baking sheet, and then transfer to a freezer bag.
Bake in Batches: If making a larger quantity, keep the dough in the fridge between batches to maintain its chill for optimal baking.
Make Ahead: Prepare the cookie dough a day in advance and let it chill in the fridge overnight. This helps deepen the flavors and can make for a more flavorful cookie.
Serving Suggestions
These Holiday Cookies are perfect for enjoying alongside a glass of cold milk or hot cocoa. You can also serve them at festive gatherings on a beautifully arranged platter or simply place them in a festive tin as a thoughtful gift. They’re versatile and will fit in perfectly for holiday parties, cookie exchanges, or any cozy gathering.
Variations & Substitutions
Try Different Flavors: Add citrus zest for a refreshing twist or a dash of cinnamon or nutmeg for a warm, festive feel.
Dietary Restrictions: For a gluten-free version, swap the all-purpose flour for a gluten-free blend cup for cup. Change the M&Ms for dark chocolate chips (or dairy-free alternatives) to accommodate lactose intolerance.
Seasonal Variations: For spring or Easter, try adding pastel-colored candies or for Halloween, use themed sprinkles. During summer, why not incorporate crushed freeze-dried fruits?
Nutrition & Storage Info
- Prep time: 15 minutes
- Cook time: 12 minutes
- Total time: 27 minutes
- Yield: 24 small cookies or 12 large cookies
- Estimated calories per serving: Approximately 150 calories (for one small cookie)
Storage Instructions:
- Room Temperature: Keep in an airtight container for up to 1 week.
- Fridge: If you want them extra chewy, you can store them in the fridge.
- Freezer: Freeze baked cookies for up to 3 months.
FAQ Section
Can I use margarine instead of butter?
- While it can work, it may change the cookie’s texture and flavor. Butter creates a richer taste.
Can I make these cookies without an electric mixer?
- Absolutely! You can cream the ingredients by hand using a sturdy spoon. Just put in some extra elbow grease!
Why are my cookies flat?
- This can happen if the dough was too warm or if you didn’t include enough flour. Ensure your butter is softened, not melted, for the perfect texture.
How can I tell when the cookies are done?
- Look for golden edges with a soft center. Remember, they’ll continue cooking once you take them out of the oven.
Can I chill the cookie dough?
- Yes! Chilling helps the flavors develop and can make for thicker cookies.
What’s the best way to store cookies long term?
- Freeze the cookies in a single layer on a baking sheet, then transfer them to a Ziploc bag for long-term storage.
How do I make gluten-free cookies?
- Substitute an equal amount of gluten-free flour for the all-purpose flour, and ensure your mix-ins are also gluten-free.
Can I add nuts to the cookie dough?
- Certainly! Chopped walnuts or pecans can add a lovely crunch.
How do I prevent cookies from sticking?
- Use parchment paper or a silicone baking mat, and ensure your baking sheets are lined.
What can I do with leftover cookie dough?
- Cookie dough can be frozen for later baking, or you can bake any excess dough and enjoy the treats now!

Conclusion
These Holiday Cookies are not just a recipe; they are a gateway to creating cherished family memories. With their perfect combination of sweetness and fun, they are sure to become a staple in your kitchen for many holidays to come. I encourage you to try this recipe, share it with your friends and family, and spread the joy of baking! I would love to hear your thoughts—comment below once you give them a try! Also, check out my other delightful recipes for more ways to indulge your sweet tooth. Happy baking!

Holiday Cookies
Ingredients
Method
- Preheat the oven to 350 degrees F.
- Cream the butter and sugars until light and fluffy—about 3 minutes.
- Incorporate the egg and vanilla extract and mix until well combined.
- Gradually add the flour, baking soda, and salt, mixing until a tacky dough forms.
- Gently fold in the M&Ms or sprinkles.
- Using a cookie scoop or tablespoon, drop 24 small portions of dough onto a parchment-lined baking sheet.
- Bake for about 12 minutes or until the edges are golden brown but the centers look slightly underbaked.
- Allow the cookies to cool on the baking sheet for 5 minutes before transferring them to a wire rack.