As the holiday season rolls around, the scent of fresh cookies wafting from the oven evokes cherished memories of my childhood. Growing up, my Italian grandmother and I would spend countless afternoons kneading dough, her laughter ringing through the kitchen as we created our family’s signature Italian Christmas cookies. These cookies, with their delicate almond flavor and colorful sprinkles, were not just treats; they symbolized love, heritage, and comfort.
What sets my family’s recipe apart is the infusion of love and unique flavors that simply can’t be replicated with store-bought options. From the moment you take a bite, the soft and chewy texture paired with a sweet glaze transports you back to those joyful moments spent with family.
In this blog post, I’ll guide you through my tried-and-true recipe for Italian Christmas cookies, with all the insider tips you need to make them just right. We’ll celebrate traditions together, with each delicious cookie standing as a reminder of love, laughter, and the joy that the holidays bring. Get ready to bake up a storm and make some beautiful memories!
What Are Italian Christmas Cookies?
Italian Christmas cookies, also known as “biscotti natalizi,” come from a long-standing culinary tradition that infuses the holiday spirit into every bite. Originating in Italy, these cookies vary from region to region, often reflecting local flavors and ingredients.
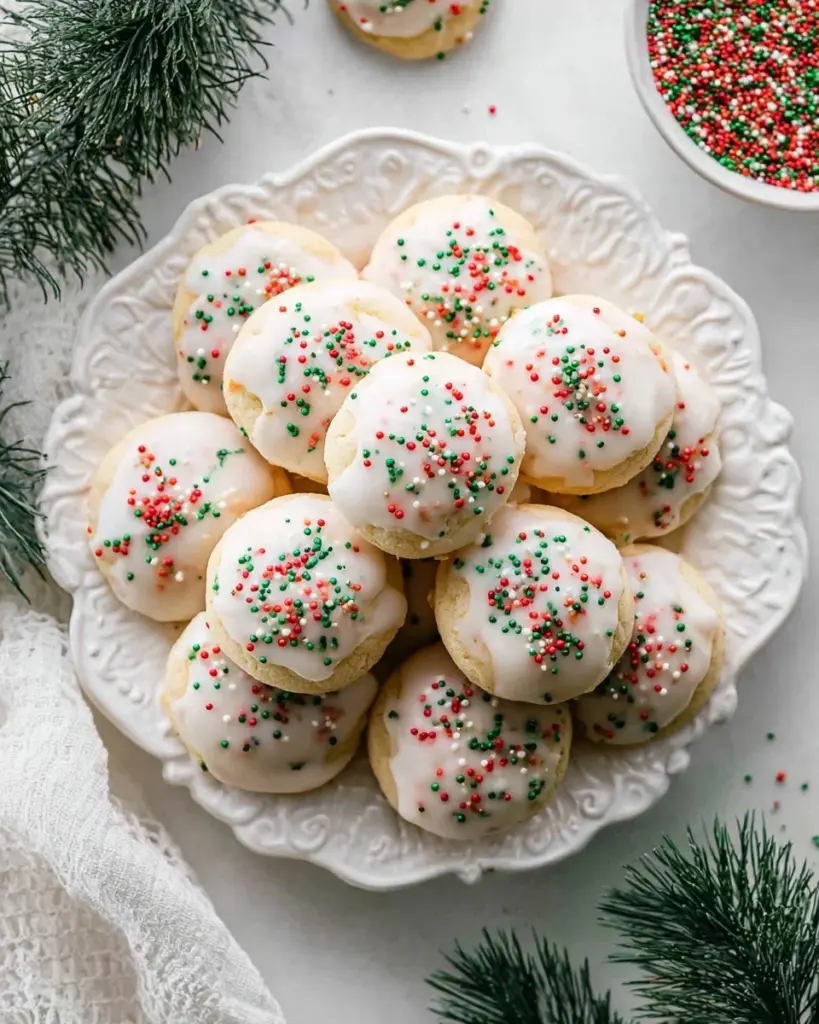
These delightful treats are typically soft and chewy, with a hint of nuttiness from almond or anise extract. They are often finished with a sweet glaze and festive sprinkles, making them as pleasing to the eye as they are to the palate. What makes them truly unique is the celebration of flavors that pay homage to Italian heritage, bringing warmth and joy during festive gatherings.
You might find these cookies gracing tables at family gatherings, holiday parties, or Christmas cookie exchanges—any occasion where love and togetherness are key. Each cookie is more than just a dessert; it’s a way to share a piece of culture and tradition.
Why You’ll Love This Recipe
Authentic Flavor: My recipe features the classic combination of almond and vanilla, creating a rich taste that rivals any bakery. You won’t find this flavor profile in store-bought cookies!
Family Tradition: This recipe has been passed down through generations. Each bite shares a piece of my family history, connecting you to timeless traditions.
Cost-Effective: Why break the bank on fancy confections when you can make these delicious cookies at home? This recipe is not only affordable but also yields a large batch, so you can share with loved ones or freeze some for later.
Customization Options: Love chocolate? drizzle some melted chocolate before adding sprinkles. Want a citrus twist? Add zest from your favorite seasonal fruit! The possibilities are endless.
Easy to Make: Don’t worry if you’re a beginner in the kitchen—this recipe is straightforward and requires minimal effort. With just a few simple steps, you’ll be on your way to cookie bliss.
Ingredients

Here’s what you’ll need to whip up your own batch of irresistible Italian Christmas cookies:
- 2 cups (250 g) all-purpose flour: Swap with whole wheat for a slightly nuttier flavor.
- 2 teaspoons baking powder: A must for making those cookies rise and stay soft.
- 1/4 teaspoon kosher salt: Enhances the sweetness.
- 6 tablespoons unsalted butter, softened: Ensure it’s at room temperature for easy creaming.
- 1/2 cup (100 g) granulated sugar: Sweetens the deal!
- 1 1/2 teaspoons almond extract or anise extract: Choose your favorite flavor for that quintessential Italian taste.
- 2 large eggs, room temperature: Room temp helps them blend better into the batter.
- 1 cup (125 g) confectioners’ sugar: For a smooth, sweet glaze.
- 2-3 tablespoons whole milk: Adjust for glaze consistency.
- 1/3 cup Christmas sprinkles (nonpareils): Dress your cookies with festive cheer!
Note: When baking, ingredient quality matters. I recommend using brands like King Arthur Flour for your all-purpose flour and Land O’Lakes butter for the best results.
Step-by-Step Instructions
Line a baking sheet with parchment paper. This prevents sticking and makes cleanup easy.
In a medium bowl, whisk together the flour, baking powder, and salt. Set aside.
In the bowl of a stand mixer, cream together the butter and sugar until light and fluffy. This will take about 3-5 minutes. The mixture should be pale and airy.
Add the almond extract and then the eggs, one at a time, mixing well after each addition. Don’t rush this step, as it ensures even flavor distribution.
Gradually add the dry ingredients to the wet mixture, scraping down the sides as needed, until the dough comes together. You want a soft, slightly sticky dough.
Roll the dough into 1-inch balls and place them on the lined baking sheet. Refrigerate for 1 hour. This step is crucial for keeping the cookies from spreading too much while baking.
Preheat the oven to 350 degrees F and line two baking sheets with parchment paper. Let’s fill the air with that delicious aroma!
Place the chilled dough balls on the baking sheets, leaving space between each. They will expand!
Bake for 8-10 minutes until the edges are lightly golden. Keep an eye on them—overbaking can lead to hard cookies.
Let them cool completely.
For the glaze, combine confectioners’ sugar, 2 tablespoons of milk, and almond extract in a small bowl until smooth. Adjust with more milk if necessary for a pourable consistency.
Dip the top of each cookie into the glaze and sprinkle with Christmas sprinkles.
Set aside to let the glaze set completely.
Chef’s Tips:
- Use a silicone spatula to handle sticky dough.
- If you prefer a thicker glaze, reduce the amount of milk.
- Always keep an eye on the cookies in the oven—the perfect texture is soft in the middle with slight crisp edges.
Expert Tips & Tricks
Storage Recommendations: These cookies will last in an airtight container at room temperature for up to a week, or in the fridge for up to two weeks.
Make-Ahead Instructions: You can prepare the dough ahead of time and freeze it. Just roll into balls, freeze them on a baking sheet, then transfer to a Ziplock bag. Bake directly from the freezer—just add a couple of minutes to the baking time.
Troubleshooting Common Problems: If your cookies spread too much, try chilling the dough longer and ensuring your butter isn’t too soft. On the flip side, if they don’t spread enough, consider adding a tiny splash more milk to the dough.
Serving Suggestions: Pair your cookies with a cup of hot cocoa or espresso for the ultimate cozy experience!
Flavor Variations: Feeling adventurous? Substitute the almond extract with hazelnut for a rich twist, or add lemon zest for a refreshing zing!
Variations & Substitutions
- Flavor Combinations: Try using pistachios for nutty bites or sub in vanilla extract for a slightly different but delicious take!
- Dietary Restrictions: For gluten-free options, swap in a 1:1 gluten-free flour blend. You can also use dairy-free butter for a lactose-free alternative.
- Seasonal Variations: Change up the sprinkles for different holidays—baby shower colors, Valentine’s hearts, or even Halloween-themed!
Nutrition & Storage Info
- Prep Time: 15 minutes
- Cook Time: 10 minutes
- Total Time: 1 hour + chilling time
- Yield: Approximately 24 cookies
- Estimated Calories per Serving: About 100 calories per cookie.
Storage Instructions: Keep cookies in an airtight container at room temperature for up to 1 week. They can also be frozen for up to 3 months—perfect for preparing ahead!
FAQ Section
Can I use margarine instead of butter?
- While it’s technically possible, butter truly elevates the flavor and texture. I wouldn’t recommend margarine for the best results!
What if I don’t have almond extract?
- No worries! You can substitute with vanilla extract or even hazelnut extract for a delightful twist.
Can I add nuts to the cookie dough?
- Absolutely! Chopped almonds or pistachios would make a great addition.
What if I don’t have a stand mixer?
- A hand mixer works just as well, or you can mix by hand with a sturdy spatula—though it will take a bit more effort!
Can I decorate with chocolate?
- Yes! Melt some dark or white chocolate and drizzle it over the cookies for a delightful finish.
How do I keep cookies from spreading too much?
- Ensure your dough is well-chilled before baking and be cautious not to over-softening the butter.
What do I do if my glaze hardens too quickly?
- Simply add a bit more milk to loosen it up again; it should stay pourable for dipping.
Can I double the recipe?
- Definitely! Just make sure you have enough space on your baking sheets.
Is there a gluten-free option?
- Yes! Use a gluten-free all-purpose flour blend for perfect results.
Can I leave out the sprinkles?
- Of course—while they add a festive touch, the cookies are delicious on their own as well.

Conclusion
These Italian Christmas cookies aren’t just a dessert; they bring the warmth of family traditions and the joy of baking back into your kitchen. I hope you embrace the magic of this recipe and make it your own. After trying my recipe, please let me know how yours turned out in the comments! Don’t forget to check out my other holiday recipes on the blog, where I share more sweet ideas for your festive gatherings.
Best Strawberry Shortcake Ice Cream Bars
Happy baking!
Italian Christmas Cookies
Ingredients
Method
- Line a baking sheet with parchment paper.
- In a medium bowl, whisk together the flour, baking powder, and salt. Set aside.
- In the bowl of a stand mixer, cream together the butter and sugar until light and fluffy (about 3-5 minutes).
- Add the almond extract and eggs, one at a time, mixing well after each addition.
- Gradually add the dry ingredients to the wet mixture until the dough comes together.
- Roll the dough into 1-inch balls and place them on the lined baking sheet. Refrigerate for 1 hour.
- Preheat the oven to 350 degrees F and line two baking sheets with parchment paper.
- Place the chilled dough balls on the baking sheets, leaving space between each.
- Bake for 8-10 minutes until the edges are lightly golden.
- Let them cool completely.
- In a small bowl, combine confectioners’ sugar, 2 tablespoons of milk, and almond extract until smooth.
- Dip the top of each cookie into the glaze and sprinkle with Christmas sprinkles.
- Set aside to let the glaze set completely.