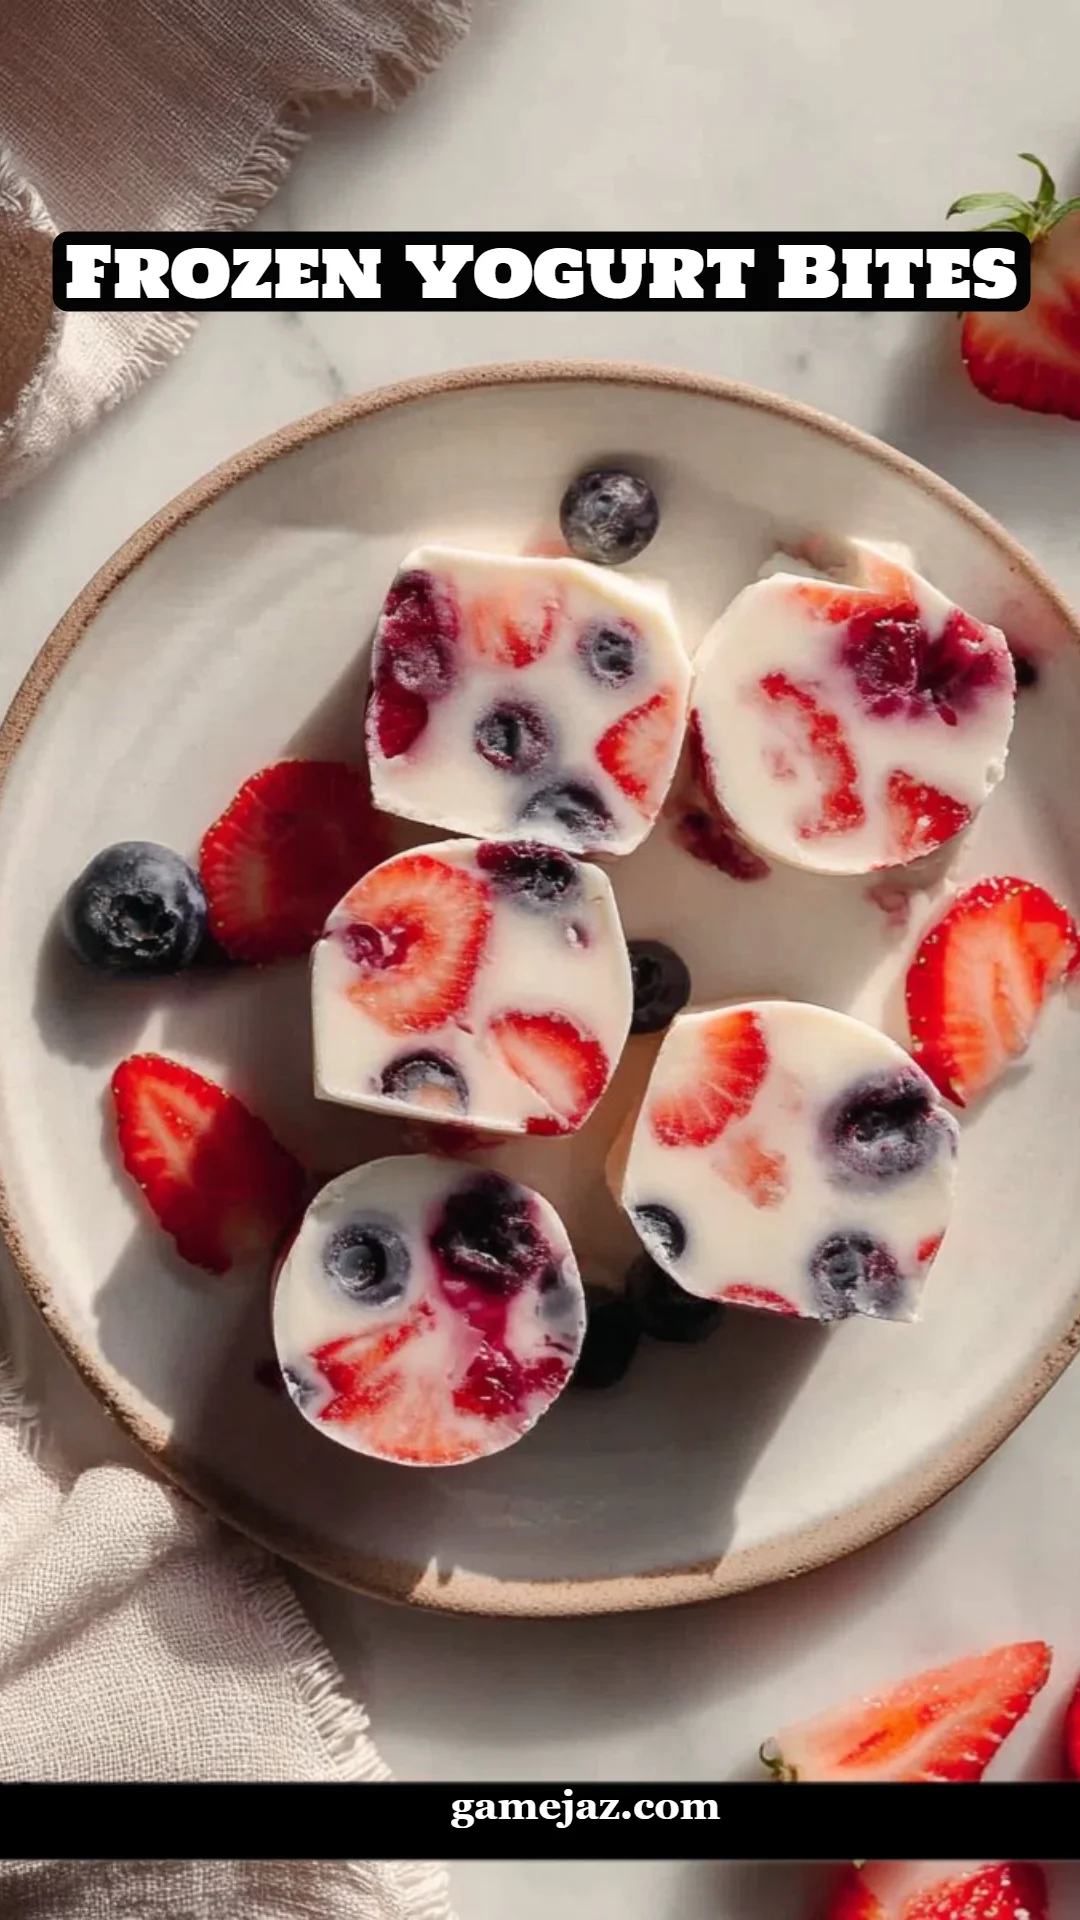
Ah, summer! The season of sunshine, laughter, and, of course, delightful frozen treats! I still remember those long, lazy afternoons as a child, sitting in the backyard with my family, savoring every spoonful of creamy frozen yogurt. One thing I always adored was snacking on those delightful frozen yogurt bites that felt like little bites of happiness on a hot day. With each bite, I’d relive the sweet joy of those precious moments spent with loved ones, creating memories that would stick around long after the sun went down.
Today, I want to share a recipe for Frozen Yogurt Bites that I believe is a special twist on those nostalgic treats! Unlike the store-bought versions that often come loaded with fillers and preservatives, these bites are fresh, wholesome, and incredibly customizable. With just a handful of ingredients and a little love, you can craft a perfect blend of creamy goodness and fruity delight.
So, grab your favorite fruits, and let’s dive into crafting these irresistible bites together! By the end of this post, you’ll not only learn how to make them but also how to play around with flavors and make each batch special.
What Are Frozen Yogurt Bites?
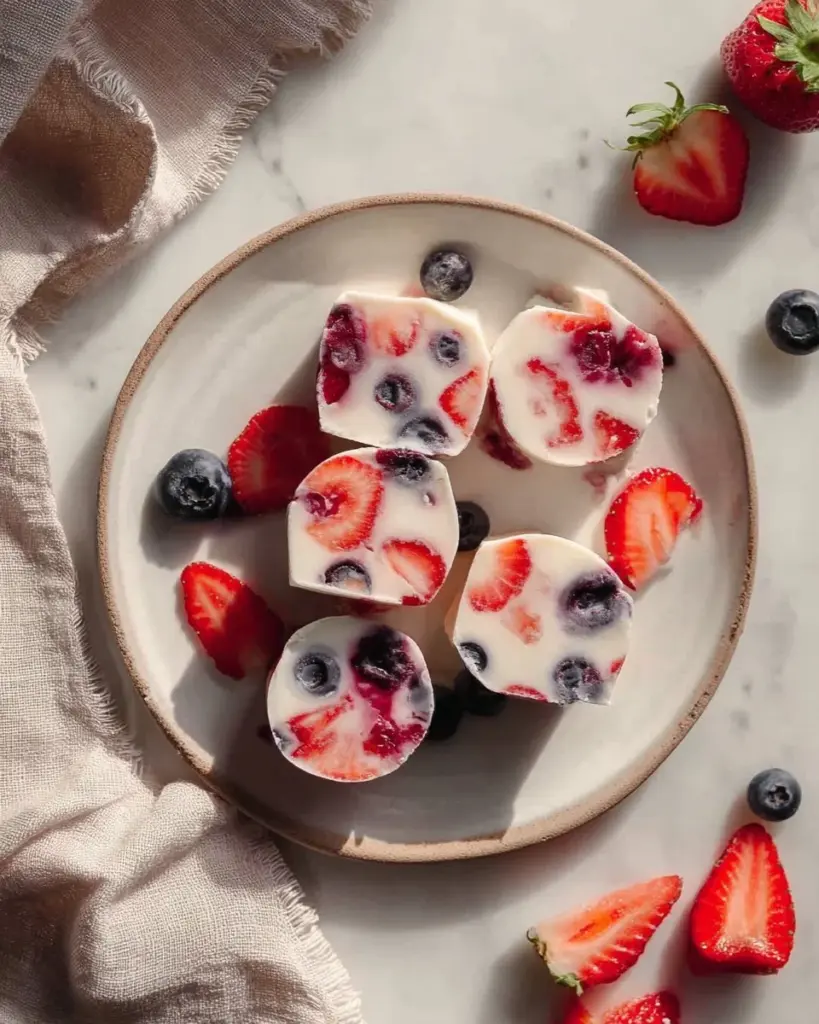
Frozen Yogurt Bites have become a delightful trend in the world of snacks, but their origins can be traced back to the simple joy of frozen treats. Essentially, these little gems combine the creamy texture of yogurt with the freshness of fruit, delivering a pleasant burst of flavor that tantalizes your taste buds. Think of them as a guilt-free dessert that’s perfect for the sweltering summer heat or for indulging your sweet tooth without the guilt.
Each bite is rich, creamy, and features elements of tangy yogurt together with sweet, juicy fruit, creating a satisfying texture that’s both smooth and slightly chewy. They are unique because they’re incredibly versatile—perfect for breakfast, a midday snack, or even dessert, making them an ultimate go-to for anyone seeking a healthy treat that doesn’t compromise on taste.
Whether it’s a hot day by the pool or a cozy evening at home with friends, Frozen Yogurt Bites are a fail-safe way to elevate your snack time.
Why You’ll Love This Recipe
Healthier Alternative: Unlike the supermarket versions brimming with added sugars, these homemade Frozen Yogurt Bites allow you to control every ingredient. You can use plain yogurt, fresh fruits, and natural sweeteners where needed, creating a treat that’s nutritious yet satisfying.
Customizable Fun: The beauty of this recipe lies in its versatility! Feel free to swap out fruits based on what’s in season or what you have on hand—think bananas, peaches, or even nuts for added texture!
Cost-Effective: Making your frozen treats at home significantly reduces costs compared to buying pre-packaged snacks. Plus, you get a larger yield with just a few affordable ingredients.
Family-Friendly: Kids love helping out in the kitchen! This simple recipe is a fun way to get them engaged and excited about healthy eating. I’ve made these with my children, and it transforms snack time into a cherished family bonding experience.
Quick and Easy: With minimal prep time and just a few steps, you can whip these up and have them chilling in your freezer in no time! Plus, an overnight freeze means they are ready when you need a snack urgently.
Ingredients
You’ll Need:
- 1 1/4 cups plain yogurt (Greek yogurt works great for creaminess)
- 8 strawberries, stems removed and finely diced (fresh is better, but frozen can work!)
- 15 blueberries (or any other berries you adore)
- 1 tablespoon unsalted, unsweetened peanut butter (for a lovely nutty flavor)
Notes on Ingredients:
- Yogurt: Use full-fat for a creamier texture, or any plant-based yogurt for dairy-free options.
- Fruits: Feel free to experiment with fruits like raspberries, mangoes, or even nuts for crunch.
- Nut Butter: You can substitute peanut butter with almond or sunflower seed butter for allergies.
Prep Notes:
- Let your butter sit at room temperature for a few minutes before mixing for easy blending.
- Rinse your fruits lightly and pat them dry for best results.
Step-by-Step Instructions
Mix the Ingredients: In a mixing bowl, combine the plain yogurt with the peanut butter. Use a whisk or a spatula to stir until it’s completely smooth and creamy, about 1-2 minutes. You want a luscious consistency that’s easy to pour!
Chef’s Tip: A hand mixer can help if you want to save on elbow grease!
Prepare the Fruits: Remove the stems from the strawberries and finely dice them. Lay the berries on a paper towel to dry them off slightly. This will prevent excess moisture from interfering with the freezing process.
Timing Note: This should take about 5 minutes.
Assemble the Bites: Distribute the diced strawberries and blueberries evenly into an ice cube tray or silicone molds. Make sure to fill each compartment, but don’t pack them too tight.
Pour the Mixture: Gently pour the yogurt mixture over the fruit, filling each compartment of the tray to the top. Use a spoon to tap down and release any air bubbles—this step helps ensure a solid bite!
Visual Cue: You’ll want to see the fruit peeking through the yogurt mixture.
Freeze: Place the tray in the freezer and allow it to freeze for at least 5 hours or overnight until completely solid. Patience is key—these bites are worth the wait!
Serve: To pop out the bites, run warm water over the bottom of the tray for 10-15 seconds, then gently push from the bottom. They should slide out beautifully! Store leftovers in an airtight container in the freezer for up to 3 months.
Common Mistakes: Avoid overfilling the molds or leaving out the warming water before trying to pop the bites out.

Expert Tips & Tricks
Storage: Store your Frozen Yogurt Bites in an airtight container to prevent freezer burn. If you make big batches, label your containers with the date!
Make Ahead: These bites can be made weeks in advance, making them perfect for meal prep! Just freeze, store, and they’ll be ready when you are.
Flavor Experiments: Add a splash of vanilla extract, or even a drizzle of honey, to the yogurt mix to elevate the flavors!
Troubleshooting: If your bites don’t pop out easily, you may not have frozen them long enough or you may just need a little warmth; also ensure your fruit is dry to avoid icy crystals!
Presentation: When serving, consider arranging them on a platter with fresh mint leaves and a drizzle of honey for a delightful touch!
Serving Suggestions
Pair your Frozen Yogurt Bites with a refreshing glass of iced tea or a smoothie for a complete snack experience! If entertaining, serve them on a beautiful platter with colorful fruit garnishes for a vibrant summertime treat. Perfect for casual get-togethers, children’s parties, or as a healthy option at family BBQs!
Variations & Substitutions
- Flavor Combinations: Get creative! Combine yogurt with mango and passionfruit for a tropical twist, or try almond yogurt with dark chocolate pieces for a decadent dessert.
- Dietary Adaptations: For a nut-free version, simply omit the peanut butter or substitute with sunflower seed butter. You can also use coconut or soy yogurt for dairy-free and vegan options!
- Seasonal Fruits: Experiment with seasonal fruits such as peaches in summer or even pumpkin puree in the fall!
Nutrition & Storage Info
- Prep Time: 10 minutes
- Freeze Time: 5 hours or overnight
- Total Time: 5 hours 10 minutes
- Yield: About 12-14 bites
- Estimated Calories: ~40 calories per bite
- Storage Instructions: Store in the freezer; can last for up to 3 months.
FAQ Section
1. Can I use other fruits?
Absolutely! Feel free to experiment with your favorite fruits. Just keep in mind the balance between sweetness and tanginess!
2. Are these suitable for kids?
Yes! These bites are a fun and healthy way for kids to enjoy a sweet treat.
3. How can I sweeten the yogurt?
You can add honey or maple syrup, or choose flavored yogurt instead of plain.
4. Can I use a different yogurt?
Sure! Greek, non-fat, or any dairy-free yogurts will work well.
5. How long do these last?
If stored properly, they can last up to 3 months in the freezer.
6. Can I add chocolate chips?
Yes! Mini chocolate chips can add a wonderful touch. Just mix them into the yogurt before pouring.
7. What if I don’t have an ice cube tray?
You can use silicone molds or even mini muffin tins as alternatives!
8. Can I make these without yogurt?
You could substitute with a smoothie blend, but they won’t have the same creamy texture.
9. How should I serve them?
These are best enjoyed right after removing from the freezer for that delightful, icy crunch!
10. What’s the best way to store leftovers?
Keep them in an airtight container in the freezer to prevent freezer burn!
Conclusion
These delightful Frozen Yogurt Bites are more than just a recipe; they’re a gateway to nostalgia and cherished summer moments. With their creamy texture, refreshing fruit, and endless customization options, you can make each batch to your family’s taste. I encourage you to give this fun and easy recipe a try, and watch as it brings smiles to the faces of your loved ones. Share your feedback in the comments, and if you’re looking for more yummy ideas, check out my other delightful recipes on the blog for more inspiration. Happy snacking!
Frozen Yogurt Bites
Ingredients
Method
- In a mixing bowl, combine the plain yogurt with the peanut butter. Use a whisk or a spatula to stir until it’s completely smooth and creamy, about 1-2 minutes.
- Remove the stems from the strawberries and finely dice them. Lay the berries on a paper towel to dry them off slightly.
- Distribute the diced strawberries and blueberries evenly into an ice cube tray or silicone molds.
- Gently pour the yogurt mixture over the fruit, filling each compartment of the tray to the top.
- Place the tray in the freezer and allow it to freeze for at least 5 hours or overnight until completely solid.
- To pop out the bites, run warm water over the bottom of the tray for 10-15 seconds, then gently push from the bottom.
- Store leftovers in an airtight container in the freezer for up to 3 months.