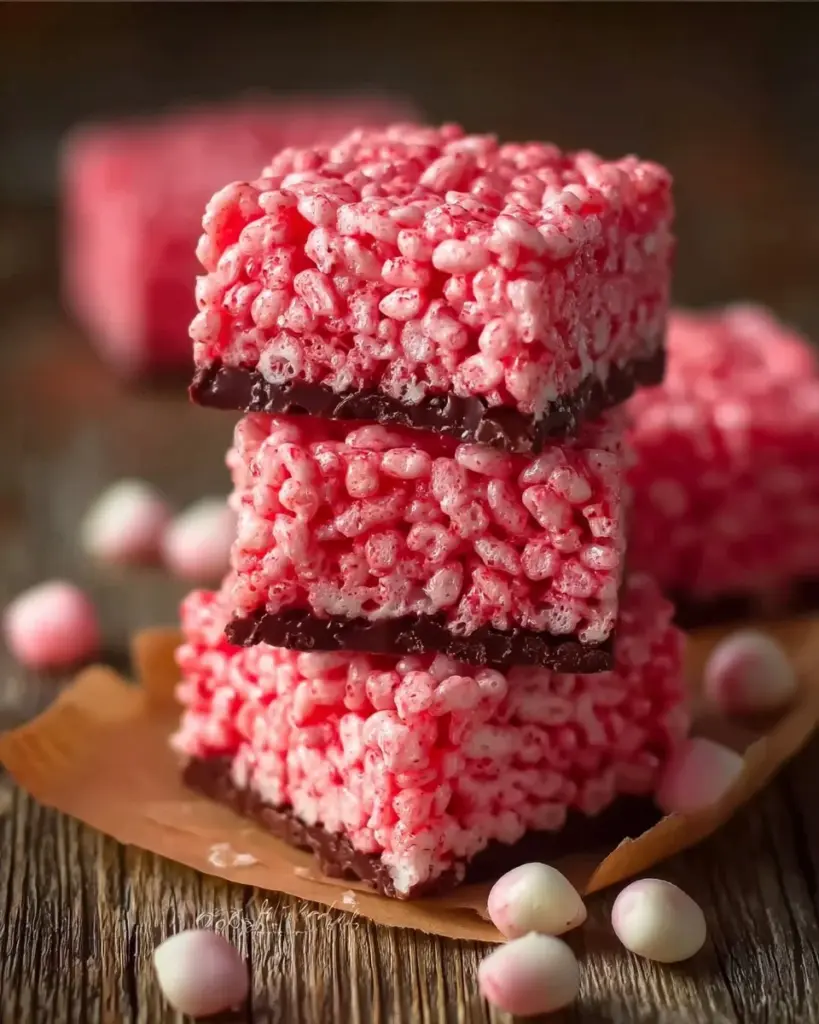
Cherry Rice Krispie Treats: A Sweet Twist on a Classic Favorite!
There’s something magical about Rice Krispie Treats, isn’t there? They take me back to my childhood when my mom would whip up a batch for after-school snacks or special occasions. And one snowy afternoon, spurred by the urge for a little nostalgia and comfort, I decided to elevate that classic recipe with a punch of cherry flavor. Let me tell you, these Cherry Rice Krispie Treats are not just a twist; they bring a delightful splash of color and flavor that makes every bite a joyous experience!
What makes this recipe so special is the creamy texture of melted marshmallows combined with the tart sweetness of cherry gelatin. It’s a nostalgic treat with an unexpected flavor that will leave your friends and family begging for more! Plus, I’ve kept the recipe simple and approachable, just like the original, but with my personal touches that make them truly memorable.
In this post, you’ll learn how to make these Cherry Rice Krispie Treats from scratch, the best way to achieve the perfect texture, and how to customize them to your liking. Trust me, once you try this recipe, you’ll wonder how you ever settled for anything less!
What Are Cherry Rice Krispie Treats?
The classic Rice Krispie Treat dates back to the 1930s, created by a couple of clever ladies at the Kellogg’s company. Combining crispy rice cereal, melted marshmallows, and butter, it became an instant hit as a no-bake treat. Cherry Rice Krispie Treats take this classic combo and infuse it with the delightful flavor of cherry gelatin, creating a unique twist.
These treats are delightfully chewy and slightly gooey with a satisfying crunch from the Rice Krispies. The addition of cherry gelatin not only boosts the flavor but also adds a lovely rosy hue that is sure to catch the eye. They are perfect for any occasion—be it a birthday party, holiday celebration, or even just a sweet treat for movie night!
When should you make them? Anytime you need a sweet pick-me-up or a fun project with the kids in the kitchen!
Why You’ll Love This Recipe
Irresistible Flavor: The tartness of the cherry adds an unexpected zing that takes your traditional Rice Krispie Treats to an entirely new level. They are sweet, tangy, and utterly delicious!
Quick and Easy: Like the classic version, these Cherry Rice Krispie Treats are incredibly straightforward to make. In under 30 minutes, you have a batch set, ready to slice into bars.
Cost-Effective: With basic pantry ingredients like marshmallows, butter, and Rice Krispies, this recipe is not only affordable but also offers a significant savings compared to store-bought versions!
Fully Customizable: Feel free to swap out cherry gelatin for your favorite flavor, or drench these beauties in white chocolate or peanut butter instead of dark chocolate—possibilities are endless!
Kid-Friendly Activity: This recipe is perfect for getting kids involved in the kitchen; they will love mixing the ingredients and pressing them into the pan.
So, kick that store-bought option to the curb! Gather your family in the kitchen and whip up a batch that’s so good, it might just become your new go-to treat.
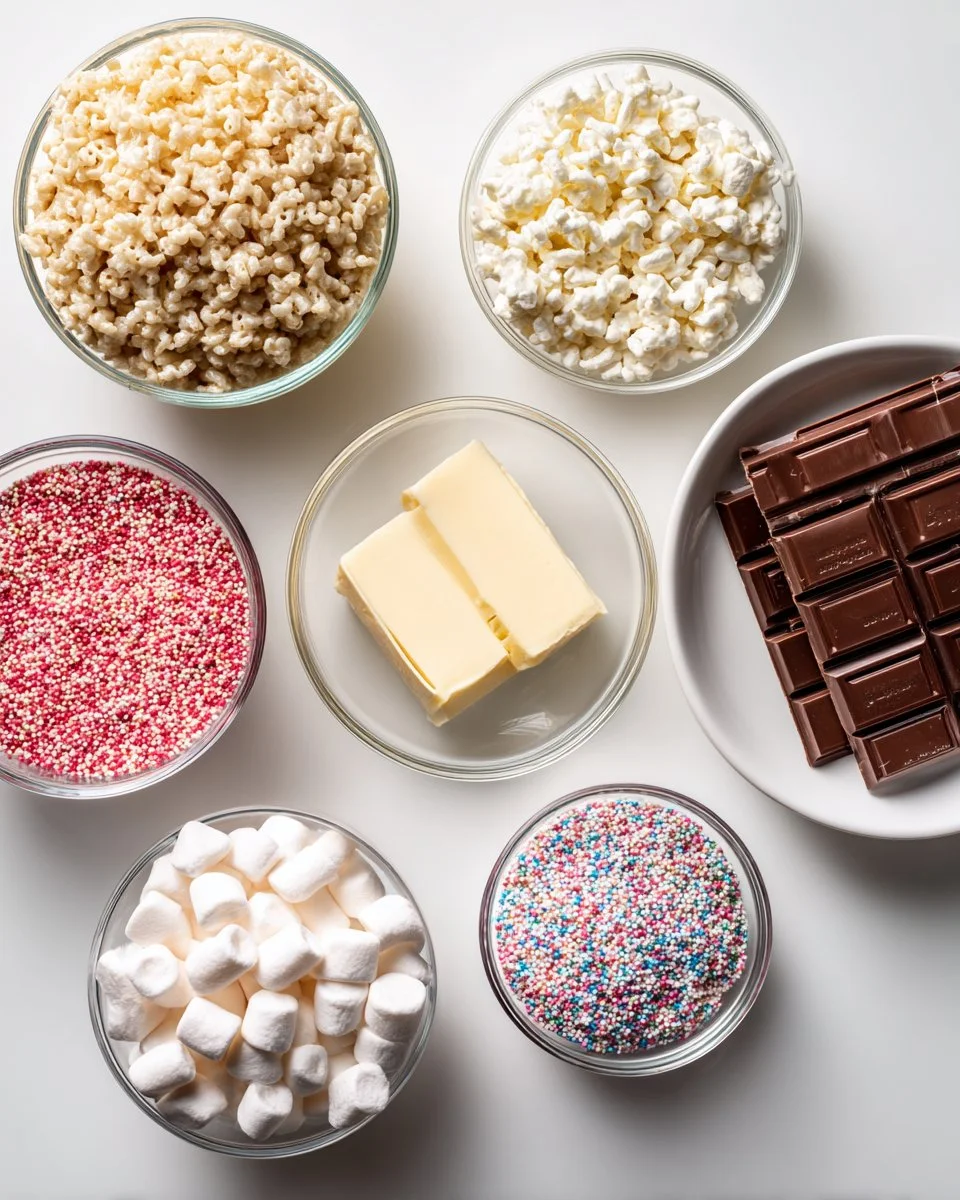
Ingredients
6 cups Rice Krispies cereal
The classic base! You can use the original or store brand; just ensure they’re fresh for the best crunch.10 ounces Ghirardelli dark chocolate melting wafers
These are my go-to for a rich, delicious finish! If you’re looking for an alternative, feel free to swap in white chocolate or milk chocolate melting wafers.6 tablespoons unsalted butter
Use room temperature butter for easy melting. I usually go for Kerrygold for its rich flavor!16 ounces mini marshmallows
You can’t skimp here—go for the regular mini marshmallows, as they melt to create that gooey texture we love!1½ tablespoons cherry gelatin powder (JELL-O, not sugar-free)
This is what sets these treats apart! The vibrant cherry flavor needs to be the real deal for the best results.Sprinkles (optional)
Add some fun and festivity with colorful sprinkles—perfect for celebrations!
Step-by-Step Instructions
Melt the Butter and Marshmallows:
In a large saucepan, melt 6 tablespoons of unsalted butter and 16 ounces of mini marshmallows over low heat. Stir continuously until the mixture is fully melted and smooth, about 5-7 minutes. Tip: Be patient and avoid high heat to prevent burning.Add Cherry Flavor:
Once melted, add 1½ tablespoons of cherry gelatin powder and mix until smooth. This step makes all the difference in flavor!Combine with Rice Krispies:
Gently fold in 6 cups of Rice Krispies cereal until everything is well combined—this should take about 1-2 minutes. You want to make sure every piece is coated in marshmallow goodness.Press into Pan:
Press the mixture into a buttered 13×9 baking dish (or for thicker treats, a 9-inch square pan). Use a greased piece of wax paper or spatula to help smooth the top.Add Chocolate Layer:
In a microwave-safe bowl, melt 10 ounces of dark chocolate melting wafers according to package instructions. Once melted, spread it evenly over the top of the Rice Krispie mixture. Tip: Let the chocolate cool slightly before pouring to avoid melting the marshmallow layer beneath!Set and Enjoy:
Let the treats set for about one hour at room temperature. Once set, cut into squares and enjoy!Storage Tip: Keep your treats in a covered container to keep them fresh; they’ll last about 3-5 days!

Expert Tips & Tricks
Quality Ingredients: Using fresh, high-quality marshmallows and butter will make a significant difference in flavor and texture.
Storage Recommendations: To preserve freshness, store your Cherry Rice Krispie Treats in an airtight container at room temperature.
Make-Ahead Instructions: You can prepare these up to a day in advance. In fact, letting them sit overnight allows the flavors to develop further!
Common Mistakes to Avoid: Don’t rush the melting process. Low heat ensures that your marshmallows melt evenly without burning. Cool chocolate before pouring over the treats for the best texture.
Troubleshooting: If your treats seem too sticky, they may need more Rice Krispies. Just add a little more, one cup at a time, until you reach your desired texture.
Serving Suggestions
These Cherry Rice Krispie Treats are fantastic on their own, but if you want to up your presentation game, consider these options:
- Serving with Milk: Pair with a glass of cold milk or a scoop of vanilla ice cream for a delightful dessert combo!
- Creative Presentation: Arrange them on a decorative plate with a sprinkle of extra cherry gelatin on top or drizzled with white chocolate for a luxurious touch.
- Occasions: Perfect for birthday parties, holiday gatherings, school events, or simply as a delightful after-dinner treat!
Variations & Substitutions
- Flavor Combinations: Try using strawberry or raspberry gelatin for a fruit twist! Or mix in chocolate chips for an added layer of yum.
- Dietary Restriction Adaptations: For a gluten-free option, ensure you’re using gluten-free Rice Krispies. You can also replace marshmallows with a plant-based alternative if dairy is a concern.
- Seasonal Variations: For fall, consider adding pumpkin spice to the melted marshmallows, or for a winter treat, add crushed peppermint candies on top!
Nutrition & Storage Info
- Prep Time: 10 minutes
- Cook Time: 15 minutes
- Total Time: 25 minutes
- Yield: Approximately 12-16 servings
- Estimated Calories: About 150 calories per serving
Dependent on portion size and chocolate choice.
Storage Instructions: Store in an airtight container at room temperature for up to 5 days. You can freeze for longer storage, but note that the texture may change slightly.
FAQ Section
Can I use different types of cereal?
Absolutely! Feel free to mix in other cereals like Cocoa Krispies or even Cheerio bits for a fun twist.What if I can’t find cherry gelatin?
You can substitute with any fruit-flavored gelatin you prefer—just ensure it’s not sugar-free for the best results.Can I make these treats vegan?
Yes! Use vegan marshmallows and plant-based butter for an easy adaptation, and check chocolate for dairy-free options.What is the best way to cut the treats?
Lightly butter your knife for a smooth cut through the marshmallow mixture without sticking.How can I make these treats more festive?
Consider adding red and green sprinkles for holidays or heart-shaped cuts for Valentine’s Day!What can I do with leftovers?
Re-melt and reshape leftover bits into fun shapes or a cookie bar!Do I have to refrigerate these?
No need to refrigerate! Keeping them in a cool, dry place works great.What’s the ideal way to store them?
An airtight container at room temperature works best. You can freeze them for up to a month.Can I use regular marshmallows instead of mini?
Yes! Just use the same total weight, but chop them into smaller pieces for even melting.How do I fix too sticky treats?
If the mixture feels too sticky, you can add a touch more Rice Krispies or chill the mixture briefly before trying to cut them into bars.
Conclusion
These Cherry Rice Krispie Treats are a unique, delightful way to bring some color and flavor to your classic favorite. With their chewy texture and sweet cherry goodness, they’re bound to impress friends and family alike!
I encourage you to try this recipe and experience the joy of creating something special in your kitchen. I’d love to hear your feedback or any twists you might add! Check out my blog for more tasty recipes, like my Chocolate Peanut Butter Rice Krispie Treats or S’mores Bars that are sure to keep your sweet tooth satisfied!
Cherry Rice Krispie Treats
Ingredients
Method
- In a large saucepan, melt 6 tablespoons of unsalted butter and 16 ounces of mini marshmallows over low heat, stirring continuously until melted and smooth, about 5-7 minutes.
- Once melted, add 1½ tablespoons of cherry gelatin powder and mix until smooth.
- Gently fold in 6 cups of Rice Krispies cereal until well combined.
- Press the mixture into a buttered 13x9 baking dish, using a greased piece of wax paper to smooth the top.
- Melt 10 ounces of dark chocolate wafers in a microwave-safe bowl according to package instructions and spread it evenly over the top of the Rice Krispie mixture.
- Let the treats set for about one hour at room temperature, then cut into squares and enjoy!