Cherry Juice Bliss: The Perfect Refreshing Drink You Didn’t Know You Needed
There’s something quite magical about cherry juice that brings back cherished memories of summer afternoons spent in my grandmother’s backyard. I still remember the vibrant, juicy cherries hanging from her trees, waiting to be plucked at the perfect moment. As we’d gather around the table, she’d whip up a batch of cherry juice that was not just a drink but an experience, bursting with flavor and goodness.
This cherry juice recipe is special because it embraces the natural sweetness of ripe cherries, complemented by a medley of fresh plums and apple, creating a symphony of flavors that will transport you straight to my grandmother’s cherished kitchen. Unlike store-bought versions, which often contain additives and preservatives, this homemade delight is a pure, wholesome refreshment. It’s comforting, reminiscent of family gatherings, and a little taste of summer throughout the year.
Get ready to dive into this delightful recipe, where I’ll share the secrets to capturing that homemade essence in every drop of cherry juice you make. You’ll learn not just how to do it, but also how to customize it to make it uniquely yours!
What is Cherry Juice?
Cherry juice originates from bold, luscious cherries that have been enjoyed for centuries. These fruits boast a rich history, from being used in ancient remedies to their modern status as a superfood packed with antioxidants. The taste of cherry juice is a delightful blend of sweet and tart, seamlessly mingling on your palate. The texture is smooth, often reminiscent of a velvety elixir that quench your thirst.
The beauty of making cherry juice lies in its versatility—whether you’re mixing it into cocktails for a summer soirée or sipping it solo to cool off on a hot day, it’s the perfect companion. You can whip it up for family gatherings or cozy weekends at home. With every sip, you’ll understand why this juice deserves a spot in your repertoire!
Why You’ll Love This Recipe
Pure, Natural Ingredients: This cherry juice recipe uses simple, fresh ingredients that you can feel good about. No preservatives, no artificial flavors—just nature in a bottle.
Cost-Effective: While the convenience of store-bought juice often comes at a premium, making your own cherry juice can be a far more economical choice, especially when cherries are in season.
Customization Galore: Want to jazz it up? Add a splash of lemon or a hint of ginger for an extra zing. You’re in complete control of the flavors!
Easier Than You Think: With just a few easy steps, you’ll have homemade cherry juice that can rival anything you’d find at a fancy juice bar. Plus, the process is therapeutic!
Memorable Moments: Making cherry juice isn’t just about the final product; it’s a journey filled with laughter and memories, particularly when shared with loved ones.
Ingredients
To make this cherry juice truly shine, you’ll need the following ingredients, each chosen for their quality and flavor:
- 3.5 litres filtered water: The foundation of your juice. Use good-quality water for the best results.
- 8 cups fresh cherries, pitted (optional): Fresh is always best! Look for plump, vibrant cherries. If you’re feeling adventurous, you can use frozen cherries, but fresh ones provide the most flavor.
- 6 red plums, pits removed: These add a beautiful sweetness and depth to your juice, making it an even more indulgent treat.
- 1 cup golden raisins: To enhance the sweetness without added sugars.
- 1 apple, cored and halved: A wonderfully tart addition that balances the sweetness of the cherries and plums.
Prep Notes: Ensure your water is at room temperature for better infusion of flavors. Always wash your fruits thoroughly before use.
Step-by-Step Instructions
Prep Your Pot: Start by adding 3.5 litres of filtered water to a large pot. Set it over medium heat and bring it to a gentle boil.
Add the Fruit: Once the water is boiling, gently add the fresh cherries, red plums, golden raisins, and halved apple. Semi-cover the pot with a lid to maintain heat but still allow some steam to escape. Reduce the heat to medium-low and let it simmer for 60 minutes. You’ll know it’s ready when your kitchen is filled with a heavenly aroma.
Remove the Fruit: After an hour, use a sieve or kitchen spider to remove the stewed fruit. Set the fruit aside; there are plenty of ways to use it later!
Make a Puree: If your cherries are pitted, you can blend them with a touch of sweetener to create a delicious fruit puree. Otherwise, compost it or use it as a topping for toast with mascarpone or cream cheese drizzled with honey.
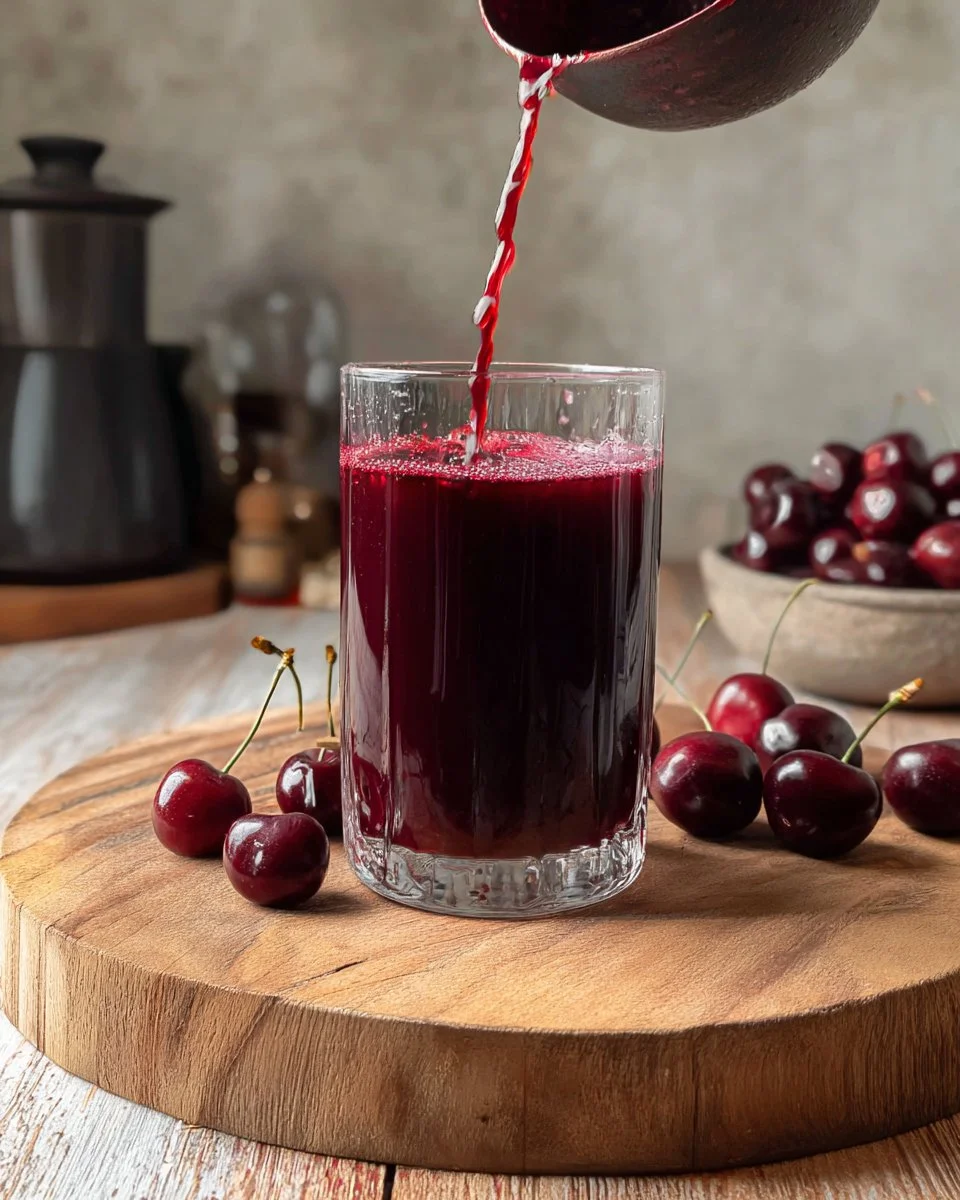
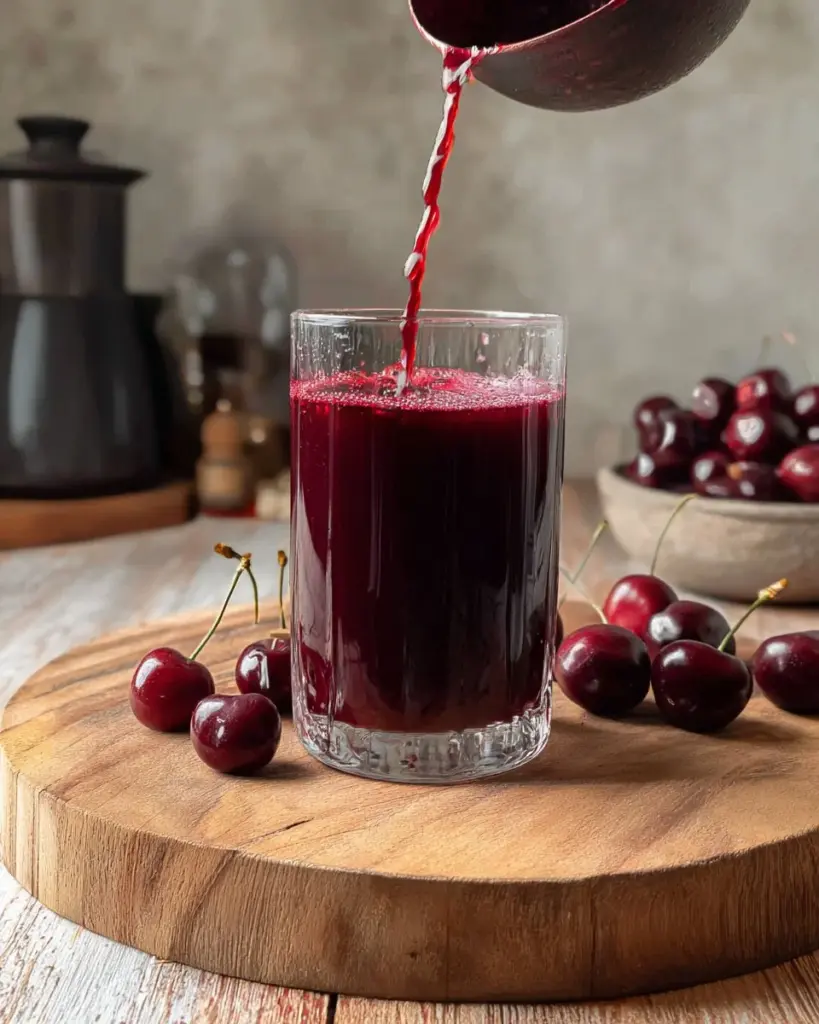
Strain the Juice: Let the liquid cool to room temperature. Strain it into a bowl or mason jars. This step is crucial for a smooth cherry juice experience!
Chill Out: Pop your strained juice into the fridge to chill. Serve over ice and prepare for those refreshing sips!
Chef’s Tips:
- For a sweeter or more tart juice, adjust the juice ingredients as needed.
- Always taste your juice before serving—feel free to add a little honey or brown sugar according to your preference.
Expert Tips & Tricks
Ingredient Quality: The better your ingredients, the better your juice. Organic cherries and plums make a big difference in flavor.
Storage Recommendations: Store your cherry juice in airtight bottles in the refrigerator. It lasts for about a week, or you can freeze it for up to three months.
Make Ahead Instructions: Prep your fruit and water the night before, then cook it when you’re ready. This allows flavors to mingle overnight!
Troubleshooting: If your juice turns out too strong, dilute it with a bit more water or add more sweet fruits.
Serving Icon: Serve your drink with fresh cherries or a sprig of mint for a visually appealing presentation.
Serving Suggestions
This cherry juice is phenomenal on its own, but it pairs beautifully with light snacks. Serve alongside a charcuterie board with cheeses, nuts, and cured meats for a delightful summer gathering. It’s especially great for picnics or birthday parties. Presentation can take a simple upgrade with some cute mason jars and decorative straws!
Variations & Substitutions
- Berry Bliss: Substitute cherries with equal parts mixed berries for a berry-flavored twist.
- Diet-Friendly: If you’re on a low-sugar diet, use stevia instead of raisins or add herbs like mint for sweetness without calories.
- Seasonal Flavors: Try adding seasonal fruits like peaches in the summer or apples in the fall for an autumnal take.
Nutrition & Storage Info
- Prep Time: 15 minutes
- Cook Time: 60 minutes
- Total Time: 1 hour 15 minutes
- Yield: Approximately 10 servings (1 cup each)
- Estimated Calories per Serving: ~80 calories
- Storage: Keep your juice in the fridge for 5-7 days, or freeze it for up to 3 months.
FAQ Section
Can I use frozen cherries?
Yes, while fresh is preferred, frozen cherries will work. You may need to adjust cooking times slightly.How can I sweeten my cherry juice?
You can add honey, sugar, or even pure maple syrup to taste while it cooks or after straining.Is this recipe safe for kids?
Absolutely! It’s a healthier alternative to store-bought juices and soft drinks.What can I do with the leftover fruit?
Use it in yogurt, smoothies, or as a topping for cakes and pies!Can I add alcohol to this recipe?
Yes! This cherry juice makes an excellent mixer for cocktails like cherry mojitos or as a base for sangrias.How long does cherry juice last?
Fresh cherry juice can last for about a week in the refrigerator.Can I use other fruits?
Absolutely! Experiment with peaches, nectarines, or even citrus to expand your flavor profile.What’s the best way to serve it?
Over ice with a slice of lemon or fresh mint leaves is always a hit!Can I carbonate my cherry juice?
Yes! Mix it with sparkling water for a delightful fizzy drink.What’s the best time to make cherry juice?
Summer is ideal when cherries are in season—you’ll get the freshest flavors!
Conclusion
This cherry juice recipe is not just about quenching your thirst; it’s about creating memories and sharing joy with loved ones. Each sip is packed with flavor and a story, and its beautiful, vibrant color brings life to any occasion. I invite you to try it and add your own personal twist. I’d love to hear your thoughts, experiences, and any tweaks you make to this fantastic drink. For more refreshing recipes, check out my other popular blog posts—let’s keep this culinary adventure going together!
Cherry Juice
Ingredients
Method
- Start by adding 3.5 litres of filtered water to a large pot. Set it over medium heat and bring it to a gentle boil.
- Once the water is boiling, gently add the fresh cherries, red plums, golden raisins, and halved apple. Semi-cover the pot with a lid to maintain heat while allowing some steam to escape. Reduce the heat to medium-low and let it simmer for 60 minutes.
- After an hour, use a sieve or kitchen spider to remove the stewed fruit. Set the fruit aside for later use.
- Let the liquid cool to room temperature. Strain it into a bowl or mason jars for a smooth cherry juice experience.
- Pop the strained juice into the fridge to chill. Serve over ice.