# Irresistibly Delicious Thumbprint Cookies With Icing: A Family Tradition Reimagined
Cookies have a way of bringing people together, don't they? I remember the cozy days in my grandmother's kitchen, where the air was thick with sweet scents and laughter. The highlight of our baking sessions was always her Thumbprint Cookies With Icing; those little morsels of delight were not just treats but memories in the making. With butter melting in your mouth, a sweet surprise at the center, and a glossy icing that sparkled under the kitchen light, these cookies were simply unforgettable. But why are my Thumbprint Cookies With Icing better than others? It’s all about the love that’s poured into the preparation and the use of quality ingredients that result in a texture that is crisp on the outside yet tender and chewy within.
What I want to share with you today is my family’s cherished recipe, infused with a little creativity and a touch of nostalgia. Whether it’s a special occasion or just a cozy evening at home, I promise you’ll not only learn how to make these phenomenal cookies, but you’ll also create moments that last a lifetime. So, grab your apron, and let’s get baking!
## What Are Thumbprint Cookies With Icing?
Thumbprint cookies have a delightful origin dating back to Poland, where they were initially known as "Kruche." These enchanting cookies are made from a simple but perfect dough that encompasses a rich, jam-filled center, often adorned with icing that adds a pop of sweetness. What makes my Thumbprint Cookies With Icing unique is the balance of buttery goodness with the charming tartness of the icing. The dough boasts a lovely crumbly texture, while the icing creates a delightful contrast that melts in your mouth with every bite.
Perfect for any occasion, these cookies are not just dessert; they are a celebration! Make them for birthdays, holidays, or simply to brighten up a Monday. Trust me, once you try my version, you'll see why they're bound to be a family favorite for years to come.
## Why You'll Love This Recipe
1. **Unmatched Flavor**: The blend of rich butter and a hint of sweetness elevates these cookies beyond your average treat. Unlike store-bought versions, my recipe ensures you know exactly what goes into them—no additives, just pure tastiness.
2. **Cost-Effective**: With just a few basic ingredients, this recipe is both economical and satisfying. You can create a batch of cookies for a fraction of the cost of bakery options, without sacrificing quality.
3. **Customize to Your Heart’s Desire**: Want to make them chocolate? Add cocoa powder to the dough! How about a lemony twist? A little lemon zest in the icing can make magic happen. These cookies are a canvas for your creativity!
4. **Easy to Make**: This is an approachable recipe even for novice bakers. With a prep time of fewer than 30 minutes and the whole process taking less than an hour, you’ll feel like a pro in no time.
5. **Make Ahead and Store**: These cookies stay fresh and delicious for days when stored properly, so you can whip up a batch and have treats ready for when the cravings hit or when unexpected guests pop by.
Before diving into the recipe, let’s go over the essential ingredients so you can get your kitchen prepped!

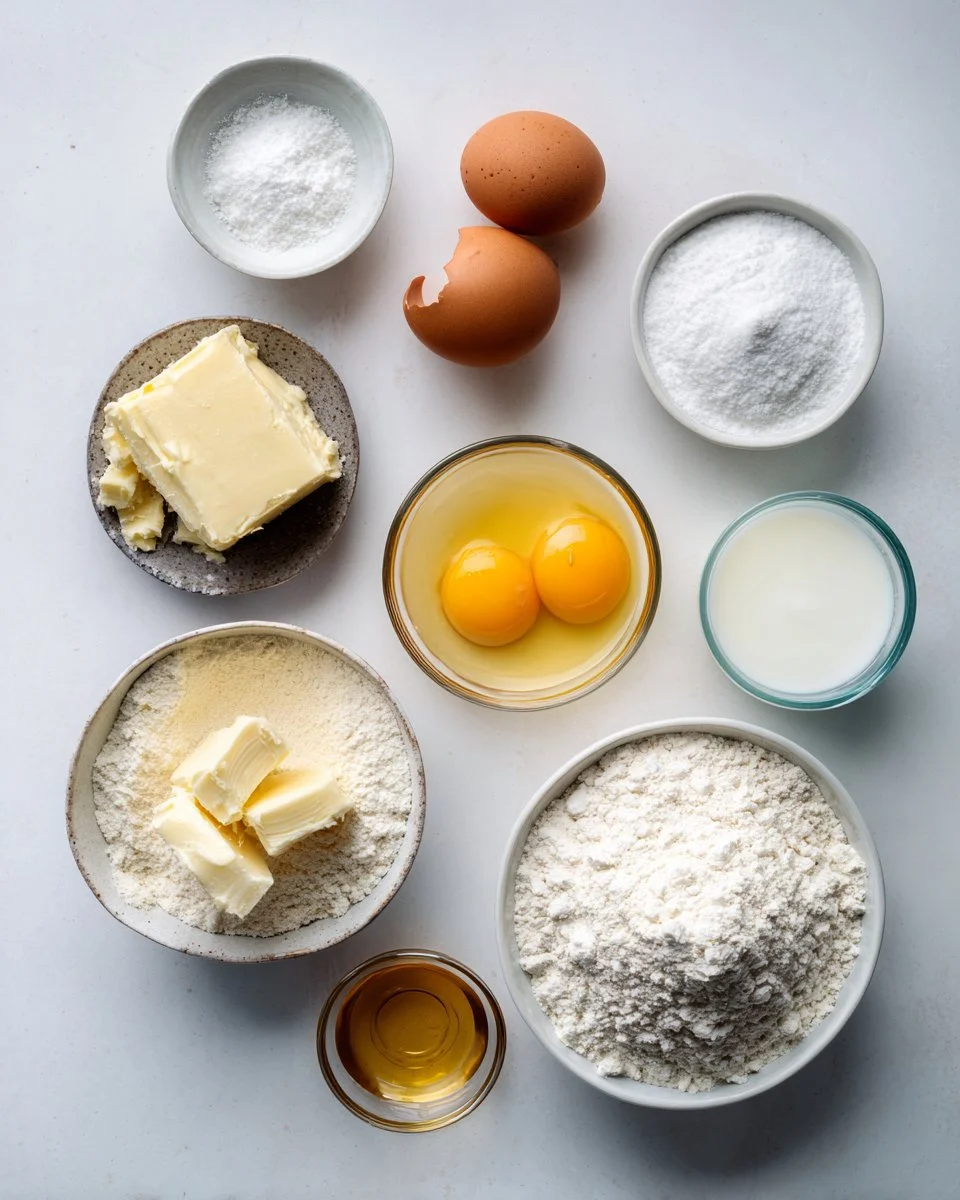
## Ingredients
- **1 cup unsalted butter, softened**: Use high-quality butter for the best flavor. Room temperature ensures it creams perfectly.
- **1 cup granulated sugar**: Regular white sugar works best, but feel free to experiment with coconut sugar for a more caramel-like flavor.
- **2 large egg yolks**: These add richness and moisture, crucial for that perfect texture.
- **2 teaspoons vanilla extract**: Always opt for pure vanilla for superior flavor.
- **2 cups all-purpose flour**: Make sure to measure correctly for the best results; spooning and leveling is key!
- **1/4 teaspoon salt**: Enhances the sweetness and balances flavors.
- **1 cup powdered sugar**: Essential for the icing, it creates that perfect sweet glaze.
- **2-3 tablespoons milk**: Adjust the quantity for your desired icing consistency.
- **Food coloring (optional)**: Perfect for adding a festive touch—think of holiday colors or pastels for spring!

## Step-by-Step Instructions
1. **Preheat the oven to 350°F (175°C)**: Preheating is crucial for even baking. Your oven should be hot enough before the cookies go in for the perfect rise and bake.
2. **In a large bowl, cream together the butter and sugar until smooth**: This step may take about 2-3 minutes with an electric mixer on medium speed. You're looking for a pale, fluffy mixture.
3. **Beat in the egg yolks and vanilla extract**: Mixing well ensures everything is combined—around 1-2 minutes should do.
4. **Gradually blend in the flour and salt until fully combined**: Start with a low speed to prevent a flour explosion! You want to form a soft dough.
5. **Roll the dough into small balls and place them on a baking sheet lined with parchment paper**: Aim for about a tablespoon of dough per cookie. Leave space in between to allow for spreading.
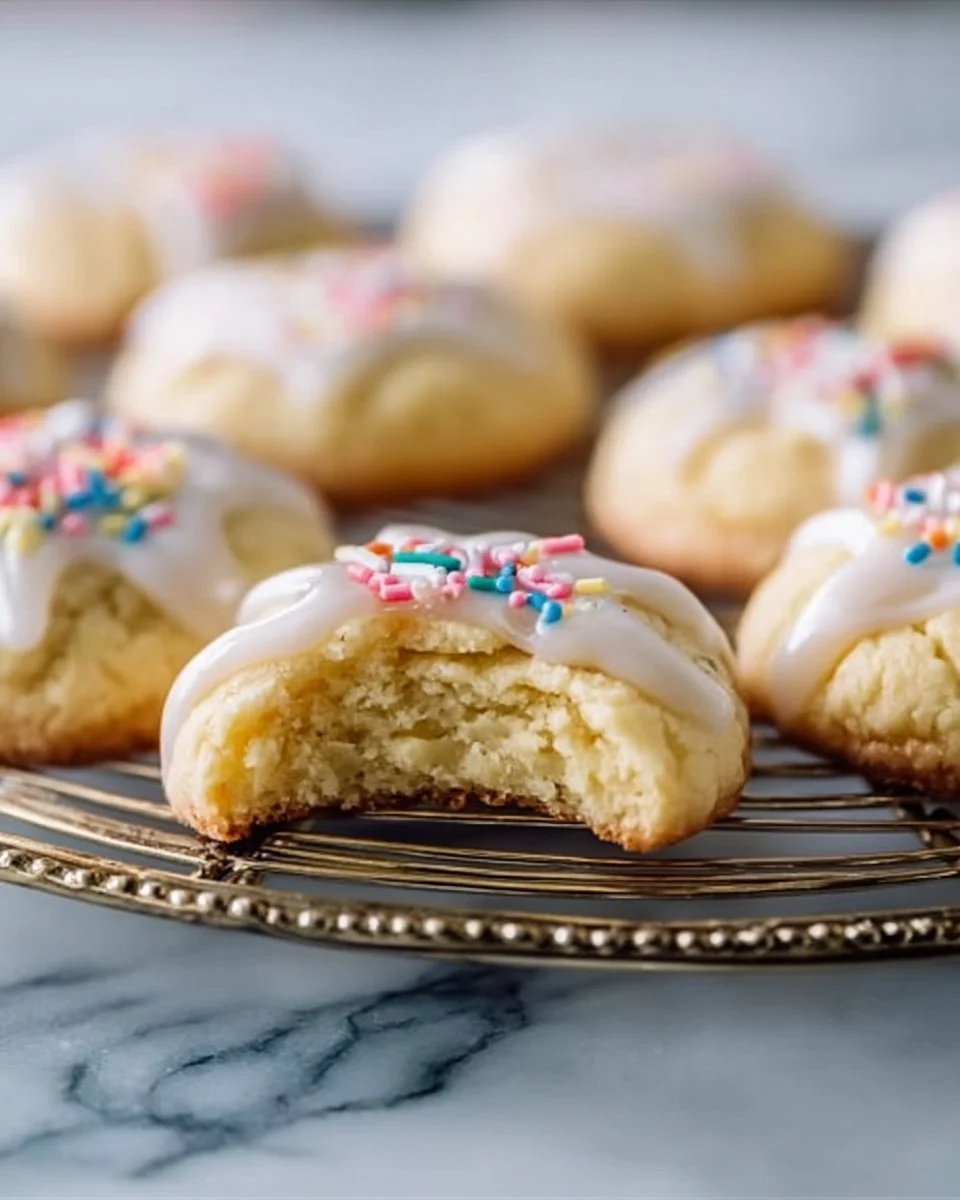
6. **Make an indentation in the center of each ball using your thumb or the back of a spoon**: This is where the magic of the icing happens! Ensure it’s deep enough to hold the icing.
7. **Bake for 10-12 minutes or until the edges are lightly golden**: Keep an eye on them around the 10-minute mark. They should look puffy and slightly firm to the touch.
8. **Let cookies cool completely**: This is crucial! If you ice them too soon, the icing will melt away into puddles.
9. **For icing, mix powdered sugar with milk until smooth; add food coloring if desired**: You want a drizzle-able consistency. Adjust with milk to reach your preferred thickness.
10. **Drizzle icing into the centers of cooled cookies**: You can use a piping bag or a fork for this; be as artistic as you want!
11. **Allow icing to set before serving**: Give them about 30 minutes on the rack—they’ll be divine!
**Chef’s Tip**: If icing isn’t setting, place the cookies in the fridge for quicker results.
12. **Enjoy your creation**: Bite into nostalgia and a delightful treat!
## Expert Tips & Tricks
1. **Invest in Quality Ingredients**: The better your ingredients, the better your cookies. Go for real butter and high-quality extracts for an unforgettable flavor.
2. **Avoid Overmixing**: When combining the flour, mix just until incorporated. Overmixing can result in tougher cookies.
3. **Chill Your Dough**: If the dough is too sticky, consider chilling it for 30 minutes. This can help with rolling and forming perfect balls.
4. **Experiment with Fillings**: Jam is traditional, but try chocolate chips, caramel, or even bright fruit preserves for a twist.
5. **Storage Recommendations**: Store in an airtight container for up to a week at room temperature or freeze for up to 3 months—just thaw at room temp before serving.
6. **Make-Ahead Instructions**: The dough can be made in advance and frozen. Just thaw in the fridge overnight before baking!
## Serving Suggestions
These Thumbprint Cookies With Icing are perfect alongside a steaming cup of tea or coffee. For a delightful presentation, serve them on a tiered cake stand for special occasions or simply arrange on a colorful platter to brighten up your table. They’re ideal for holiday gatherings, picnics, or a cozy night in with friends.
## Variations & Substitutions
- **Berry Bliss**: Switch up the flavors by using raspberry, blueberry, or apricot jam instead of the standard.
- **Chocolate Lovers**: Incorporate cocoa powder into the dough for a chocolate cookie or use chocolate ganache instead of icing.
- **Nutty Goodness**: Fold in chopped nuts like pecans or walnuts for a delightful crunch.
- **Gluten-Free Option**: Substitute all-purpose flour with a 1:1 gluten-free flour blend for a suitable adaptation.
## Nutrition & Storage Info
- **Prep Time**: 20 minutes
- **Cook Time**: 12 minutes
- **Total Time**: 32 minutes
- **Yield**: About 24 cookies
- **Estimated Calories**: 120 calories per cookie (varies with icing and filling)
- **Storage Instructions**: Store at room temperature for up to 1 week, in the fridge for up to 2 weeks, or freeze for up to 3 months.
## FAQ Section
1. **Can I use margarine instead of butter?**
Absolutely, but the flavor and texture may be slightly different.
2. **What can I use instead of egg yolks for a vegan version?**
Substitute with flax eggs (1 tablespoon ground flaxseed + 2.5 tablespoons water = 1 egg).
3. **Why are my cookies spreading too much?**
This could be due to the butter being too warm. Make sure to chill the dough before baking.
4. **Can I double the recipe?**
Yes! Just make sure you have enough baking sheets and space in your oven.
5. **What’s the best way to store leftovers?**
Place them in an airtight container at room temperature to keep them fresh longer.
6. **Can I add nuts to the dough?**
Definitely! Chopped pecans or walnuts make a delightful addition.
7. **How do I know when the cookies are done?**
They should be lightly golden on the edges and firm when touched.
8. **Is there a way to make the icing thicker?**
Add more powdered sugar a spoonful at a time until desired consistency is achieved.
9. **Can I make the dough in advance?**
Yes! You can refrigerate or freeze the dough for later baking.
10. **What’s a good filling for thumbprint cookies?**
Jam, chocolate, caramel, or fruity preserves all offer delicious variations.
## Conclusion
My Thumbprint Cookies With Icing are more than just a recipe; they’re a bridge to beautiful memories, perfect for every occasion. I encourage you to give them a try in your kitchen and witness the joy they bring. I can’t wait to hear your feedback! Have any special twists or stories of your own? Drop a comment and let me know, and be sure to check out my other cookie recipes on the blog for more sweet inspirations!


Similar Posts
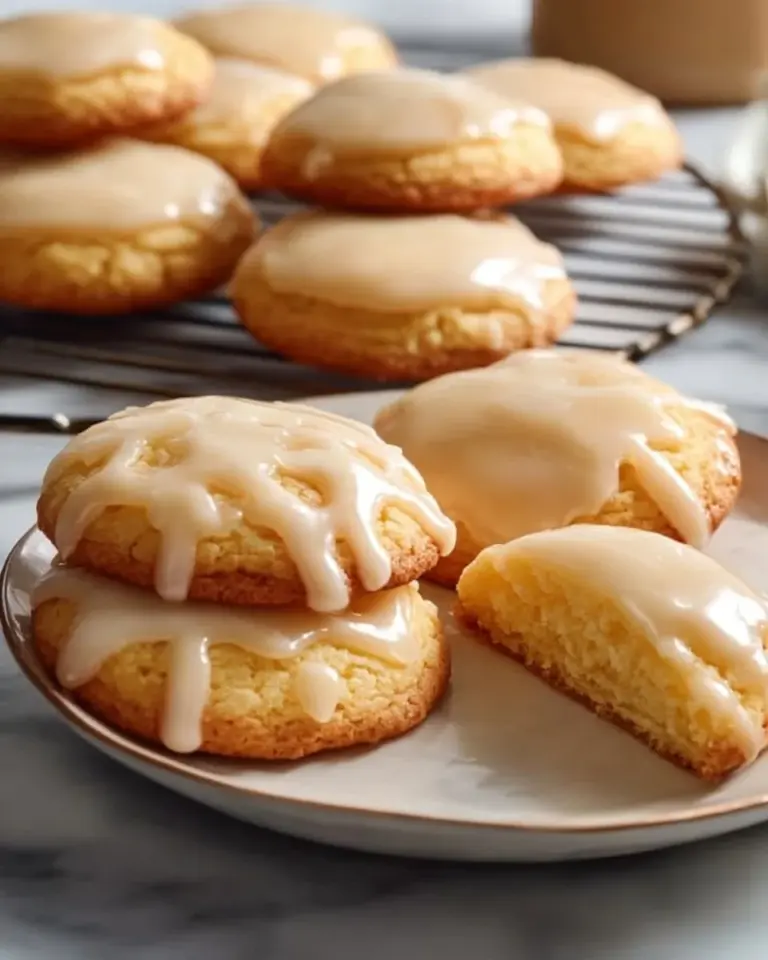
Kentucky Butter Cake Cookies
Irresistible Kentucky Butter Cake Cookies: A Sweet Taste of Southern Comfort Picture this: a sunny afternoon spent in my grandmother’s…
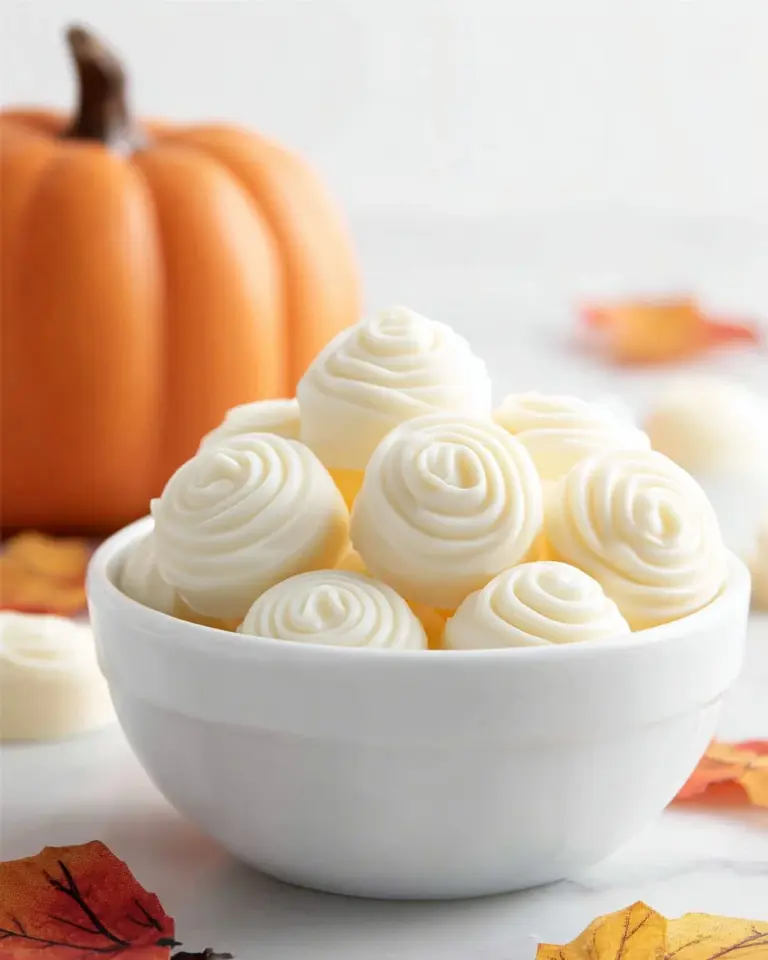
Pumpkin Truffles
As the leaves start to turn and a crispness creeps into the air, I can’t help but think of the…
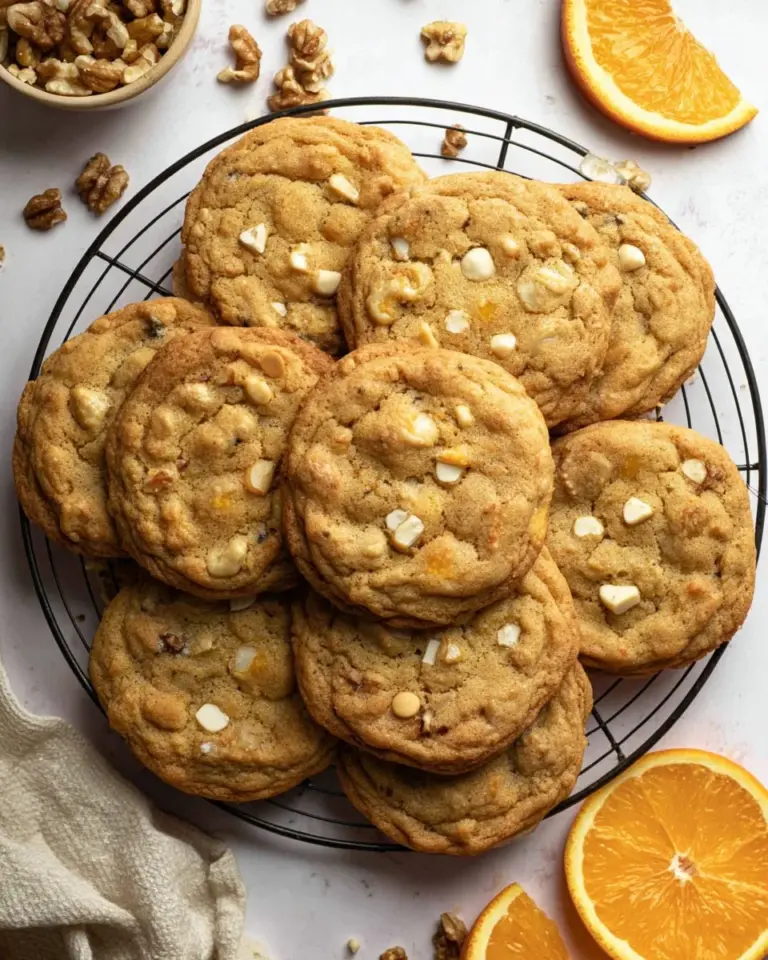
White Chocolate Orange Cookies
I still remember the first time I baked White Chocolate Orange Cookies. It was a chilly afternoon, and the sun…
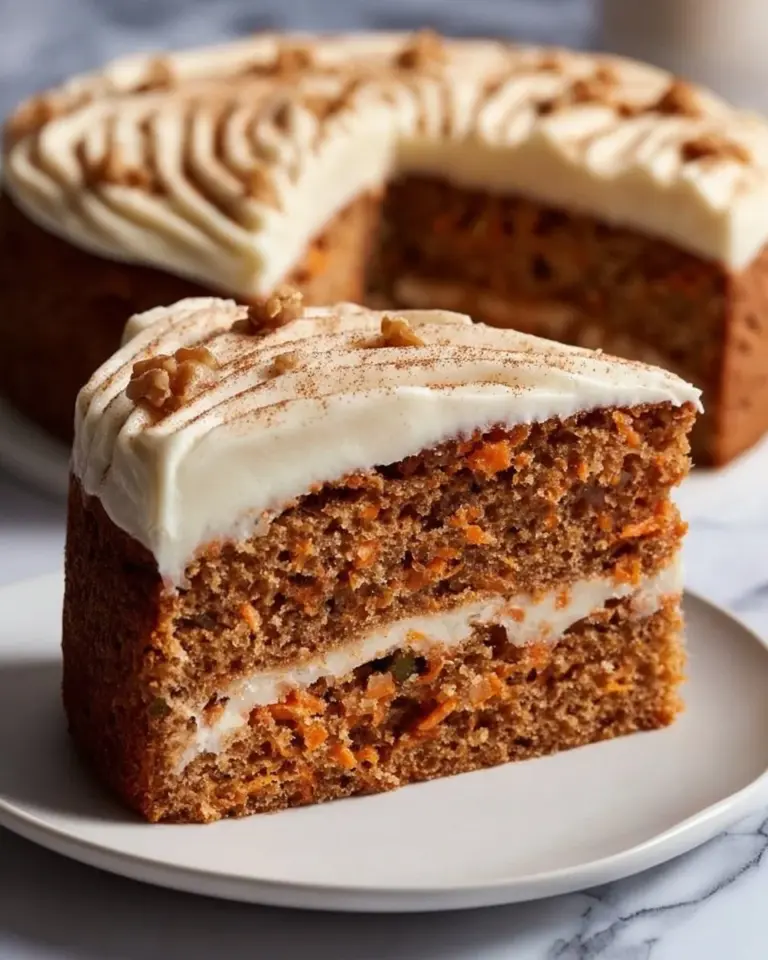
Spiced Carrot Cake
Irresistibly Delicious Spiced Carrot Cake: The Perfect Recipe for Any Occasion The first time I tasted a spiced carrot cake,…
Lemon Blueberry Cookies
I remember the first time my grandmother brought me into her warm, bustling kitchen to bake. The air was thick…