Delight Your Guests with This Irresistibly Cute Puff Pastry Christmas Tree!
There’s something magical about the holiday season that brings families together, and for me, that magic often unfolds in the kitchen. I still remember the first time I attempted a Puff Pastry Christmas Tree. My kitchen was a whirlwind of flour, festive music, and my little niece giggling as she sprinkled flour on her nose. It didn’t just become a recipe; it morphed into a treasured family tradition that we look forward to year after year.
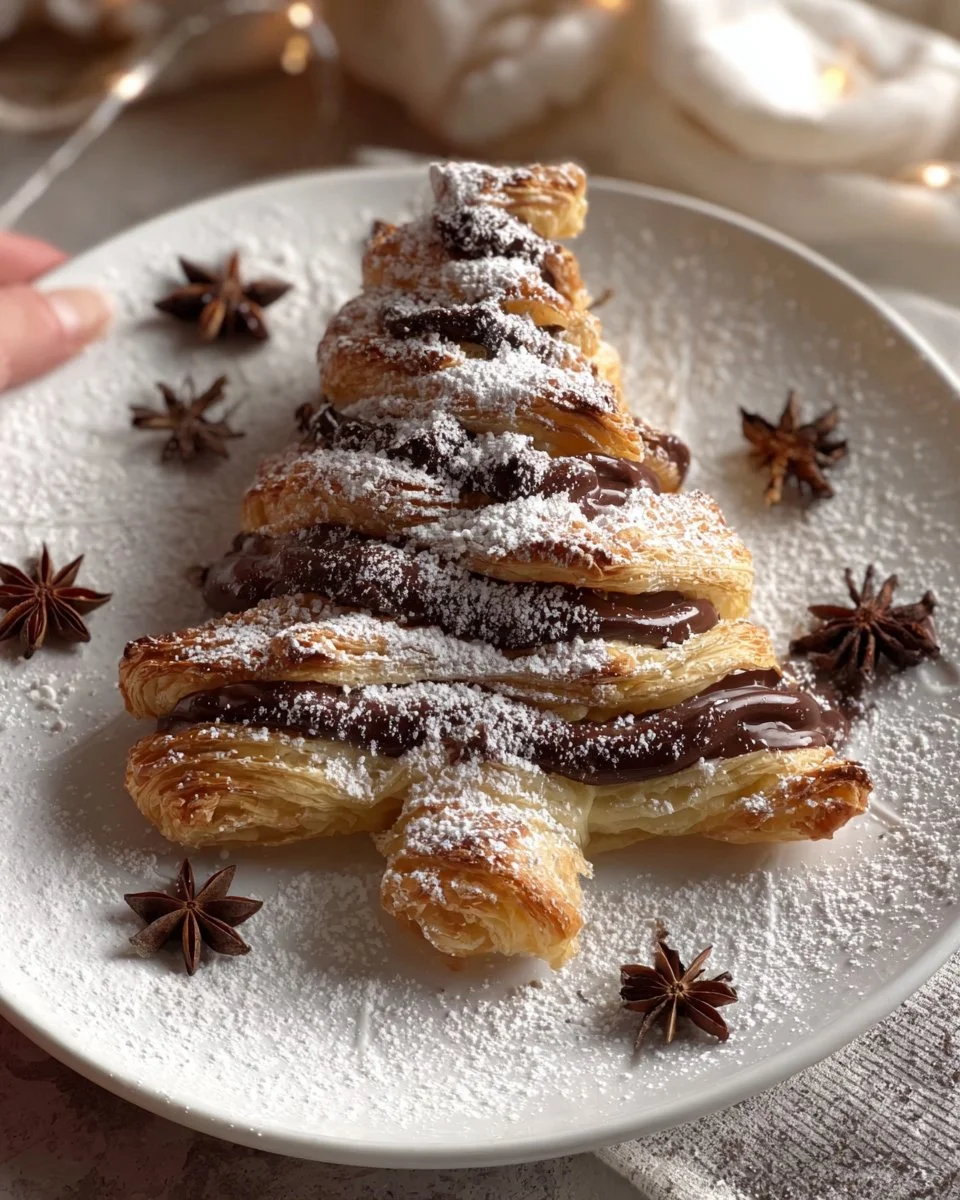
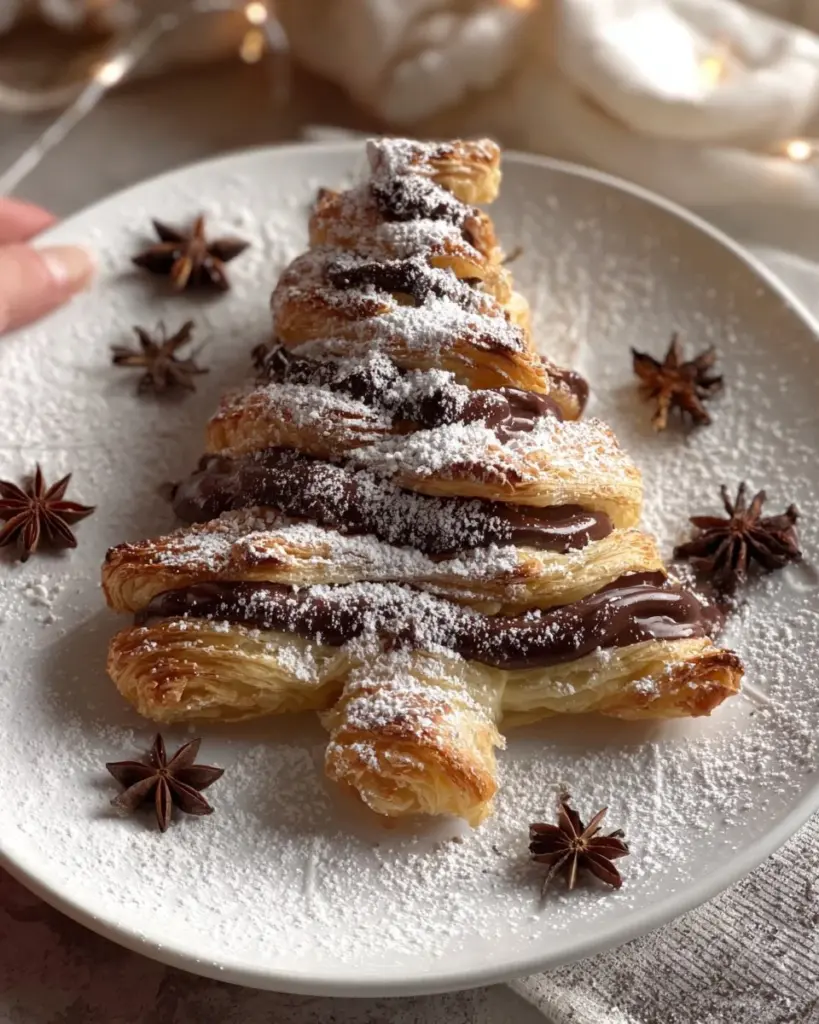
What makes these Puff Pastry Christmas Trees special isn’t just their whimsical shape, it’s the heavenly combination of buttery, flaky pastry and rich, velvety Nutella— a match made in holiday heaven! With a gorgeous golden finish and a dusting of icing sugar, these trees are as stunning to behold as they are delicious to eat.
This recipe stands out from the rest due to its simplicity and the sheer delight it brings to both the baker and the guests. You won’t just create a snack; you’ll craft memories that your loved ones will cherish. So, are you ready to create your own sugary masterpiece? In this post, I’ll guide you through step-by-step instructions and share all the tips and tricks to ensure your Puff Pastry Christmas Tree steals the show at your table.
What Are Puff Pastry Christmas Trees?
Puff Pastry Christmas Trees are festive confections crafted from layers of puff pastry, shaped into the silhouette of a Christmas tree. The history of puff pastry dates back to the 17th century in France, where it was named “pâte feuilletée.” This flaky treasure is made by layering dough with butter, creating countless delicate layers that puff up beautifully when baked.
Each bite offers a crunch followed by the soft, airy texture of the pastry. The addition of Nutella, a popular Italian hazelnut spread, brings a rich, chocolatey sweetness that complements the pastry perfectly. The trees can be customized for any occasion, and the presentation elevates even the simplest of gatherings into something truly festive.
Whether you’re hosting a holiday party or family celebration, these trees are sure to enchant your guests and add an extra sprinkle of joy to your celebrations.
Why You’ll Love This Recipe
Showstopper Presentation: There’s no denying that a Puff Pastry Christmas Tree is a visual delight. It’s a guaranteed showstopper that will leave your friends and family in awe. Forget the ordinary cheese platter—when they see this sweet tree, they’ll be talking about it for weeks!
Easy and Quick: Despite its impressive appearance, this recipe is surprisingly easy to whip up. With only a handful of ingredients and simple steps, you’ll be able to create a stunning centerpiece in under an hour. Plus, it’s perfect for novice bakers!
Cost-Effective: Creating these festive trees at home saves a fortune compared to overpriced bakery treats. All you need are two sheets of puff pastry and some Nutella, making it a budget-friendly choice that’s just as indulgent.
Customizable Creations: Not a fan of Nutella? No problem! You can swap it out for peanut butter, chocolate ganache, or even a fruity filling. The shape remains the same, allowing you to experiment with flavors that suit your taste or dietary restrictions.
Make Ahead Delight: You can prepare the Puff Pastry Christmas Tree ahead of time! Assemble it the day before and store it in the refrigerator until you’re ready to bake. This means less chaos in the kitchen when your guests arrive and more time for you to enjoy the festive season!
{image_template}
Ingredients Section
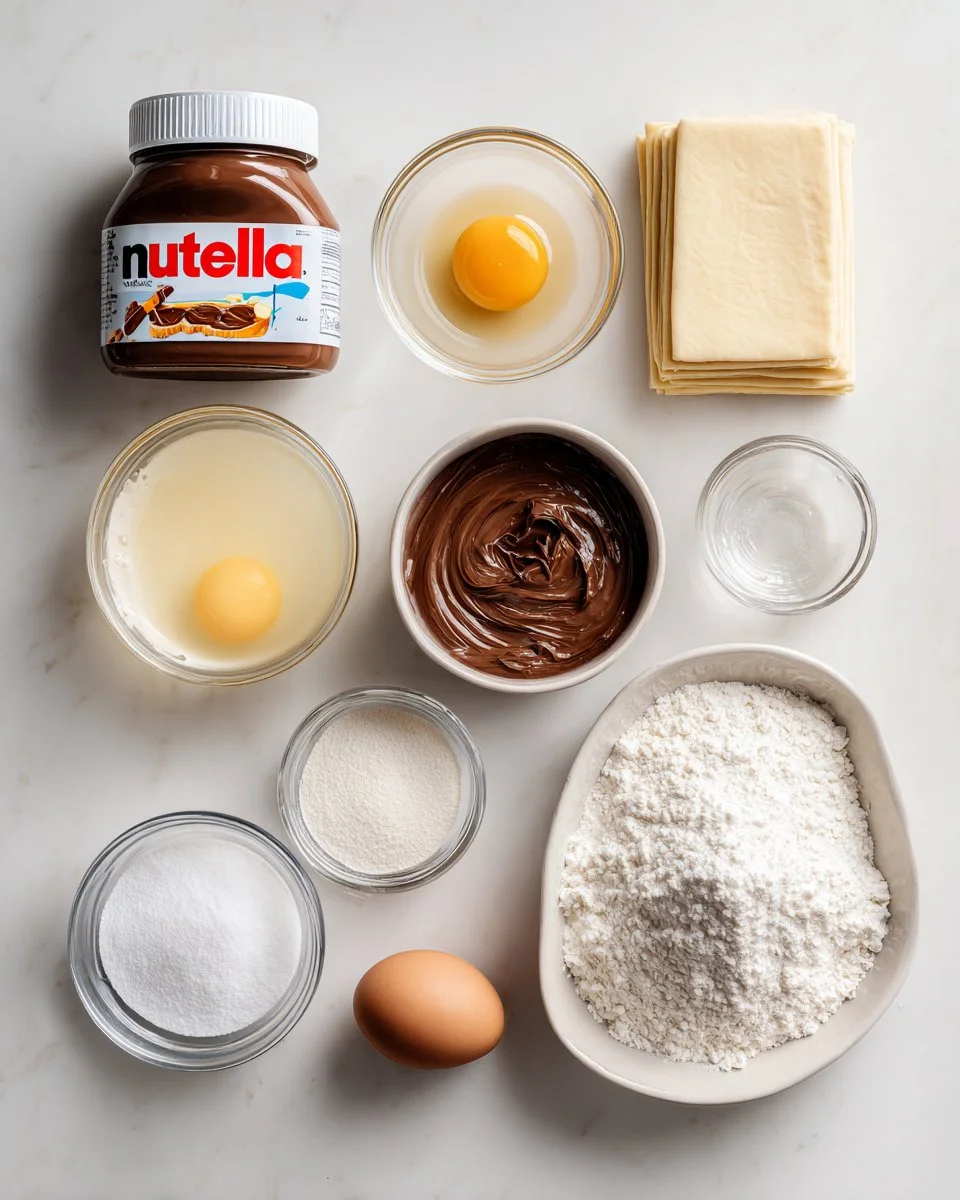
To create your delightful Puff Pastry Christmas Tree, you’ll need the following:
2 sheets of puff pastry (10” x 10”)
Tip: Make sure your pastry is properly thawed and at room temperature for optimal flakiness.1/2 cup Nutella
Feel free to use any chocolate hazelnut spread you love. Brands like Hershey’s or Justin’s are excellent alternatives!1 egg
This will be your egg wash for a golden finish; a farm-fresh egg works best.1 tablespoon water
To mix with the egg for the wash.Icing sugar (optional)
This is for that lovely snowy dusting at the end; powdered sugar will also work!
Prep Notes
- Ensure your puff pastry is thawed completely but chilled enough to work with easily.
- Let your egg sit out at room temperature if you can, as it blends better with the water.
Step-by-Step Instructions
Now let’s jump into the fun! Here’s how to create your delightful Puff Pastry Christmas Tree:
1. Preheat the Oven
Preheat your oven to 400°F (200°C). This is the optimal temperature for getting that magical golden crust.
2. Prepare the First Sheet
Defrost the puff pastry according to package instructions and place one sheet on a parchment-lined baking sheet. If it sticks, dust with a light sprinkle of flour.
3. Melt the Nutella
Gently melt the Nutella using a double boiler or microwave, ensuring it’s spreadable but not too hot. Use a spoon to evenly spread the luscious chocolate-hazelnut delight onto your first pastry sheet.
4. Layer and Cut
Place the second puff pastry sheet on top of the Nutella-covered sheet and dust again with flour to prevent sticking. Now comes the fun part—using a pizza cutter or sharp knife, cut the pastry from the top down towards each corner to form a large triangle.
5. Make Star Shapes
With the scraps of dough, use a cookie cutter to create star shapes. These will add a charming touch to your tree.
6. Assemble Your Tree
Carefully lift and flip the top left side of the dough to connect with the triangle shape, pinching the edges together. Make cuts along the tree’s sides, twisting each piece to create a visually appealing tree shape.
7. Brush and Bake
Prepare an egg wash by blending the egg and water in a bowl. Brush the entire tree, including the star shapes, to achieve that gorgeous golden color. Bake all the pieces at 400°F for about 20 minutes or until they turn golden brown. Keep an eye on it for that perfect crispy finish!
8. Dust and Serve
Once baked, dust your beautiful creation with icing sugar, giving it a snowy effect. Serve warm and enjoy the delightful reactions from your family and friends!
Expert Tips & Tricks
Use Quality Ingredients: The flavor of your tree comes from the quality of your ingredients. Opt for high-quality butter and a good Nutella for the best results.
Storage: Unfinished Puff Pastry Christmas Trees should be stored in an airtight container in the fridge and consumed within two days. Unfortunately, they can get soggy if left too long, as the pastry absorbs moisture.
Make Ahead Instructions: You can assemble and cut the tree and leave it in the fridge until you’re ready to bake. Just make sure to egg wash and bake straight from the fridge for best results—no thawing needed.
Troubleshooting Tips: If the pastry is too soft to cut, chill it in the freezer for about 10 minutes before cutting. This will help keep the shape.
Presentation: For a festive touch, serve your Puff Pastry Christmas Tree on a wooden board or cake stand, drizzled with chocolate sauce for extra indulgence!
Serving Suggestions
Your Puff Pastry Christmas Tree pairs beautifully with a side of hot chocolate or a warm spiced cider. For a savory balance, consider offering a cheese platter or a charcuterie board. Presentation is key, so elevate your tree on a beautiful serving dish, and scatter fresh rosemary around it to mimic pine branches. It’ll surely be the highlight of your holiday table!
Variations & Substitutions
Flavor Combinations: Get creative! Swap Nutella for a festive cranberry spread, or use almond paste for a nutty twist.
Dietary Adaptations: For vegan options, use plant-based puff pastry and substitutes like coconut cream instead of Nutella, ensuring you provide equal richness and flavor.
Seasonal Variations: In the summer, try making a fruit pastry tree filled with jam or fruit preserves, keeping the same iconic shape!
Nutrition & Storage Info
- Prep Time: 15 minutes
- Cook Time: 20 minutes
- Total Time: 35 minutes
- Yield: Serves 5-6 people
- Estimated Calories per Serving: Approximately 270 calories
- Storage Instructions: Best enjoyed fresh, but can be stored at room temperature for 1 day, in the fridge for 2 days, or freeze (wrapped) for up to 1 month.
FAQ Section
Can I use different fillings?
Absolutely! Use whichever spread you enjoy—peanut butter, fruit jam, or even cream cheese for a twist!Is puff pastry hard to work with?
It can be a bit finicky, but as long as it’s cold and you handle it gently, it should be a breeze!Can I prepare this in advance?
Yes! You can prepare the assembly ahead of time and bake right before serving.What if I don’t have a star cookie cutter?
You can use any shape you have on hand—just make sure it’s festive!How do I make it gluten-free?
Look for pre-made gluten-free puff pastry options available at many grocery stores.Can I freeze the cooked Puff Pastry Christmas Tree?
It’s best enjoyed fresh, but you can freeze it for later enjoyment—just reheat in the oven.What can I serve it with?
It pairs beautifully with hot beverages like coffee or hot chocolate.How do I get it golden brown?
An egg wash goes a long way! Use it generously before baking.Any tips to avoid uneven baking?
Ensuring your oven is at the correct temperature is key—and rotating the baking tray halfway through can help too!What’s the best way to reheat leftovers?
Reheat in the oven for the best crisp—microwaving can make it soggy.
Conclusion
Creating a Puff Pastry Christmas Tree is not just about baking; it’s about capturing the spirit of the season and sharing those precious moments with family and friends. This delightful recipe marries tradition with modern flair, making it a delightful backdrop for your holiday gatherings.
Give it a try and bring a sprinkle of joy to your table. I would love to hear how yours turns out, so feel free to share your experiences and any creative twists you added in the comments! And if you’re looking for more holiday recipe inspiration, check out my blog—there’s a treasure trove waiting for you! Happy baking!
Puff Pastry Christmas Tree
Ingredients
Method
- Preheat your oven to 400°F (200°C).
- Defrost the puff pastry according to package instructions and place one sheet on a parchment-lined baking sheet.
- Gently melt the Nutella using a double boiler or microwave and evenly spread it onto your first pastry sheet.
- Place the second puff pastry sheet on top of the Nutella-covered sheet and dust with flour to prevent sticking.
- Using a pizza cutter or sharp knife, cut the pastry from the top down towards each corner to form a large triangle.
- With the scraps of dough, use a cookie cutter to create star shapes.
- Carefully lift and flip the top left side of the dough to connect with the triangle shape, pinching the edges together.
- Make cuts along the tree's sides, twisting each piece to create a visually appealing tree shape.
- Prepare an egg wash by mixing the egg and water in a bowl. Brush the entire tree, including star shapes.
- Bake in the preheated oven for about 20 minutes or until golden brown.
- Dust with icing sugar before serving.