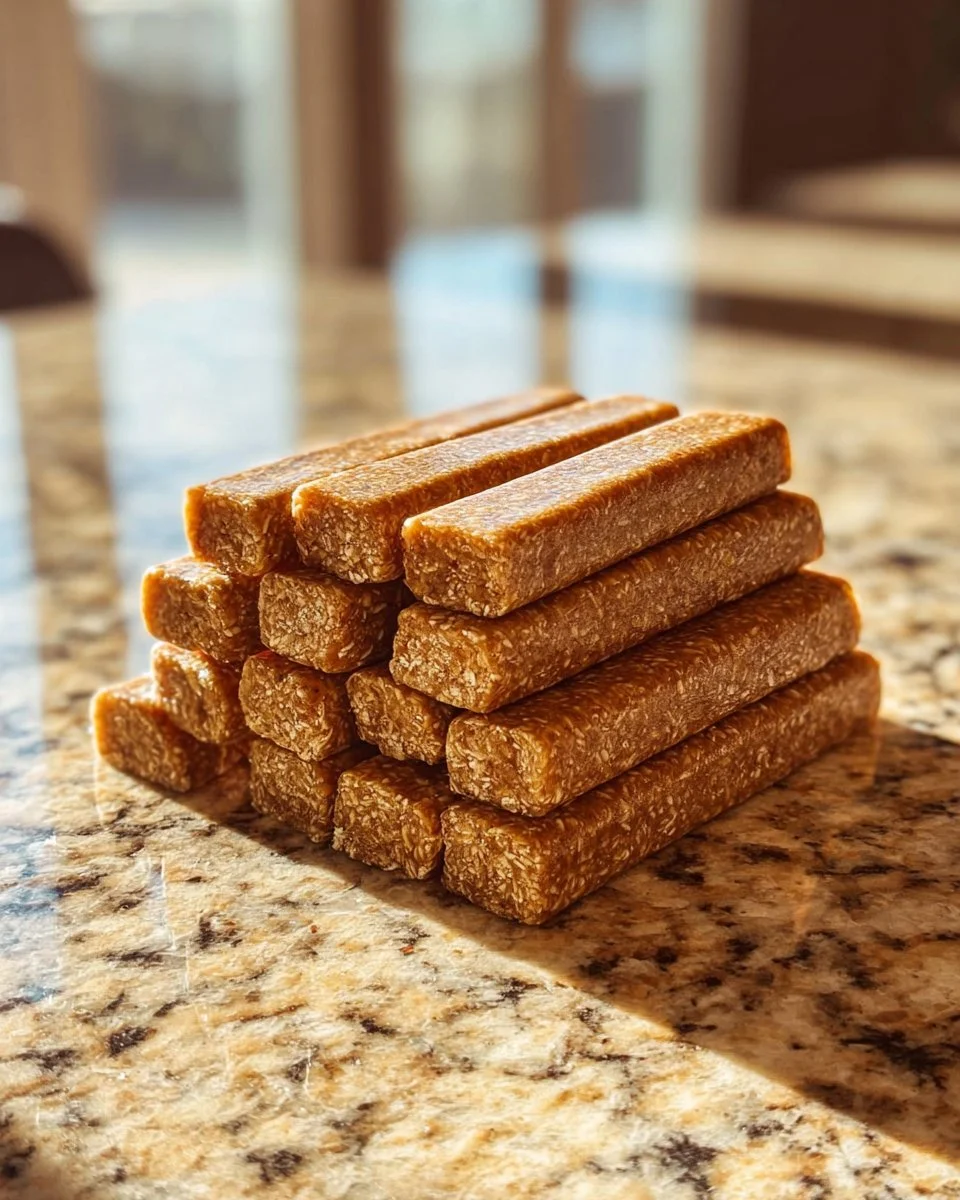
Irresistible Homemade Pumpkin and Oatmeal Dog Snack Sticks Your Pup Will Adore!
As a dog mom, the joy I experience when my furry friend bounces up to me, tail wagging, begging for a treat is priceless. There’s something so heartwarming about treating my pup with something I made, knowing it’s not just tasty but also healthy and wholesome. That’s why I absolutely adore these Homemade Pumpkin and Oatmeal Dog Snack Sticks. They’re chewy, full of flavor, and the perfect snack for your beloved canine companion.
You might wonder why I’m so passionate about these homemade delights. Unlike many store-bought treats that are jam-packed with artificial ingredients, preservatives, and who-knows-what-else, this recipe allows me to control every single ingredient. Every bite of these sticks is filled with pure pumpkin, wholesome oats, and the yummiest peanut butter. Trust me, once you whip up a batch, your kitchen will be filled with a heavenly aroma, and your pup will definitely be your biggest fan.
These snack sticks are not just about treats; they’re about making memories, too. The first time my dog tried them, he jumped around in excitement, and it reminded me of baking cookies with my family each holiday season. Comfort food isn’t only for us humans; it can nourish our four-legged family members too. In this post, I’ll guide you step-by-step to create these delightful Homemade Pumpkin and Oatmeal Dog Snack Sticks that will have your pup sitting up and begging for more!
What Are Homemade Pumpkin and Oatmeal Dog Snack Sticks?
Homemade Pumpkin and Oatmeal Dog Snack Sticks are a unique twist on traditional dog treats, combining the nutritional benefits of pumpkin with the heartiness of oats. Originating from the desire to create a healthier alternative to store-bought treats, these sticks are made using wholesome ingredients you can easily find in your pantry. The texture is slightly chewy yet crispy on the edges, perfectly satisfying for your pup’s palate.
The standout flavor of pure pumpkin gives the snacks a rich and natural sweetness, while the oats provide a delightful chewiness that dogs love. Plus, with a hint of natural peanut butter thrown in, it’s no wonder these sticks are a hit! You should think about making these as a special treat for your pup’s birthday, holiday celebrations, or even just to show your love and appreciation for their unconditional loyalty and companionship.
Why You’ll Love This Recipe
- Wholesome Ingredients: Packed with nourishing ingredients like pumpkin and oat flour, these snack sticks are free from any harmful additives. It’s a great way to ensure your dog is munching on something healthy.
- Cost-Effective: A batch of these sticks costs significantly less than buying high-quality dog treats from the store. Plus, you can make a large quantity at once!
- Customization Galore: Want to add a different flavor? Feel free to customize these snacks with shredded carrots, blueberries, or even sweet potato. The options are endless!
- Easy to Make: If you’ve never baked before, this recipe is perfect for beginners. It requires minimal ingredients and simple steps—everyone can whip these up in no time!
- Baking Bonding Time: What’s better than baking together with your kids? Allowing them to help measure, mix, and shape the treats can be a fun cooking adventure, and it’s a fantastic way to teach them about pet care.
Now that you know why this recipe will be a game-changer for you and your pup, let’s gather those ingredients and get started!
{image_template}
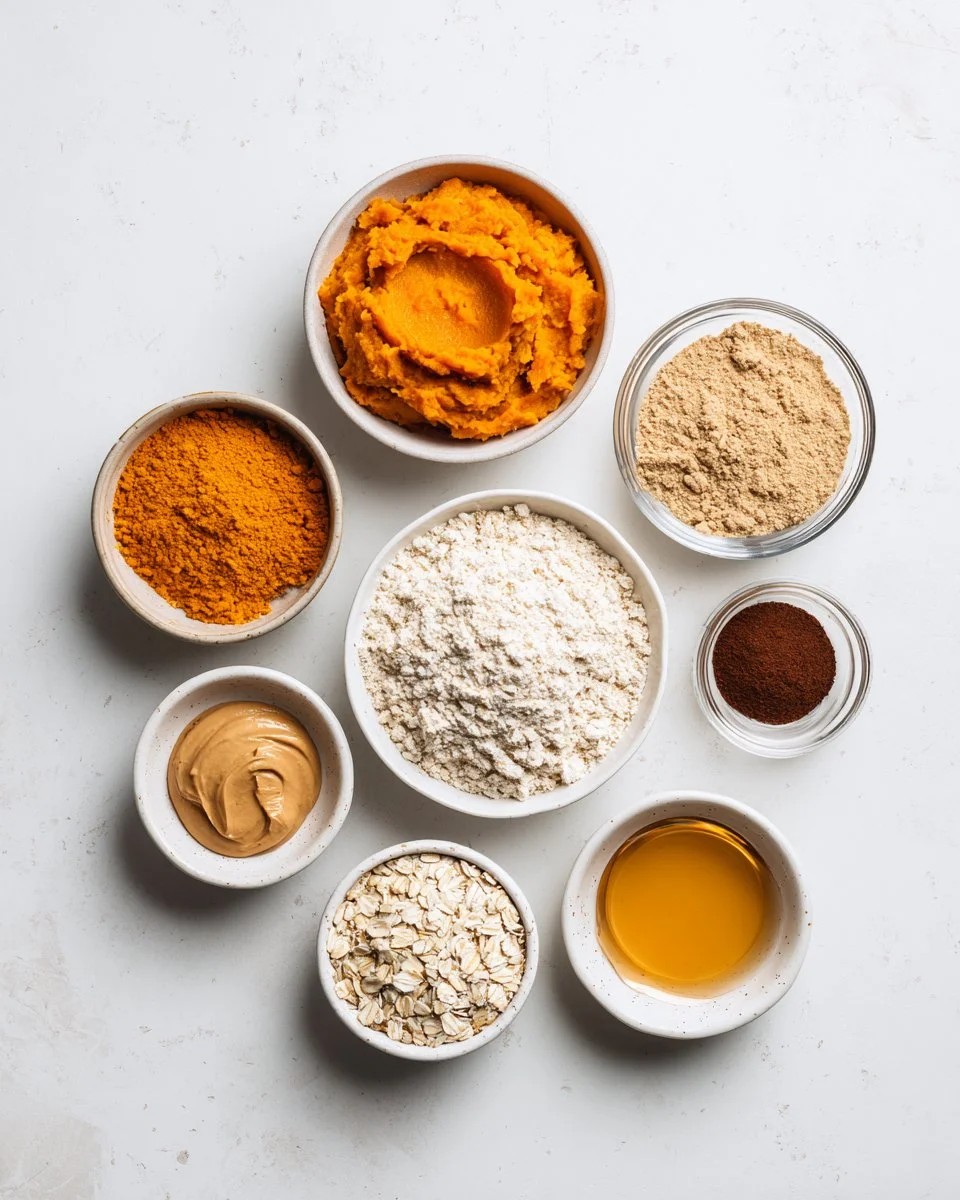
Ingredients
For these delightful Homemade Pumpkin and Oatmeal Dog Snack Sticks, you’ll need the following quality ingredients:
- 1 cup pure pumpkin puree (unsweetened, no spices; I highly recommend Libby’s)
- 2 cups oat flour (or finely blended oats; Bob’s Red Mill has great options)
- 1/2 cup unsweetened applesauce (I like Mott’s)
- 1 tablespoon natural peanut butter (xylitol-free; look for brands like Justin’s)
- 1/2 teaspoon ground cinnamon (optional, but it adds a lovely warmth)
Prep Notes:
- Ensure your peanut butter has no xylitol, as it’s toxic to dogs.
- If you don’t have oat flour, you can quickly blend rolled oats in a food processor to make your own!
- Let your peanut butter come to room temperature for easier mixing.
Step-by-Step Instructions
1. Preheat and Prepare
Preheat your oven to 350 degrees F (175 degrees C) and line a baking sheet with parchment paper or a silicone baking mat. This step is crucial; you want those sticks to bake evenly!
2. Mix the Wet Ingredients
In a medium bowl, combine the pumpkin puree, applesauce, and peanut butter. Mix until smooth—this should take about 1-2 minutes. (A little elbow grease goes a long way with this step!)
3. Incorporate the Dry Ingredients
Gradually stir in the oat flour and cinnamon (if using). The dough should turn thick but still slightly sticky. If you find it too wet, don’t hesitate to add a little more oat flour, a tablespoon at a time.
4. Shape the Snack Sticks
Take small portions of dough and roll them into sticks approximately 4 to 5 inches long and 1/2 inch thick. It’s like crafting little potato logs! Lay the sticks on the prepared baking sheet, ensuring there’s enough space between each one for even baking.
5. Bake!
Bake for 20 to 25 minutes or until the edges are golden brown and the sticks feel firm to the touch. Keep an eye on them; ovens vary!
6. Cooling Time
Remove from the oven and let them cool completely on a wire rack before serving to your pup. This step is essential; after all, you don’t want to serve them hot!
7. Storage
Store the snack sticks in an airtight container at room temperature for up to one week. For longer storage, refrigerate for up to two weeks or freeze for up to three months.
Chef’s Tips:
- If the dough seems too dry, add a teaspoon of water or more applesauce to help soften it.
- Remove them from the oven as soon as they’re golden brown—overbaking can dry them out!
- Be patient while cooling them down; your pup might be eagerly eyeing them!
Expert Tips & Tricks
- Use Fresh Ingredients: Always opt for the freshest pumpkin puree and oats. This ensures maximum flavor and health benefits for your furry friend.
- Store Smart: To keep the snack sticks fresher longer, store them in the fridge. The cool will help seal in the moisture and flavor.
- Make Ahead: These sticks make a fantastic treat for events like dog birthday parties or playdates. Make a batch ahead of time and watch your pup enjoy the love!
- Troubleshooting: If the dough is too crumbly, add more wet ingredients. If it’s too sticky, add a bit more oat flour. It’s all about achieving the right texture.
- Experiment: Don’t be afraid to get creative! Adding pureed baby food or mashed bananas can create different flavors your pup will love.
Serving Suggestions
Serve these delectable Homemade Pumpkin and Oatmeal Dog Snack Sticks alongside your pup’s regular meals or as a special treat during training. You could even set up a cute presentation at a doggy birthday party or playdate! Arrange them in a festive bowl and watch tails wag with delight as your furry guests dig in.
Variations & Substitutions
- Flavor Combinations: Mix in a couple of tablespoons of shredded carrots, blueberries, or even sweet potato for variety. You might consider adding a splash of low-sodium chicken broth for an extra flavor kick!
- Dietary Adjustments: If your dog has allergies or sensitivities, swap traditional peanut butter for sunbutter or omit it altogether.
- Seasonal Favorites: Try adding a pinch of nutmeg or ginger around the holidays to give these sticks a festive twist!
Nutrition & Storage Info
- Prep Time: 10 minutes
- Cook Time: 25 minutes
- Total Time: 35 minutes
- Yield: Approximately 24 sticks
- Estimated Calories per Serving: About 50 calories
- Storage: Room temperature for up to 1 week, refrigerate for up to 2 weeks, or freeze for up to 3 months.
FAQ Section
- Are these safe for all dogs? Yes! All the ingredients are dog-friendly, but always consult your vet if your dog has specific dietary needs.
- Can I freeze these dog snacks? Absolutely! They freeze very well. Just make sure you use an airtight container.
- How long will these last? The treats can last up to a week at room temperature and two weeks in the fridge. If frozen, they can last for three months.
- Can I change the flavors? Of course! Get creative! Swap the pumpkin out for sweet potato or experiment with different fruit purees.
- What if my dog is allergic to oats? If your pup has an allergy to oats, you could try substituting it with quinoa flour or rice flour, depending on their dietary needs.
- Why is xylitol-free peanut butter important? Xylitol is extremely toxic to dogs and can cause serious health issues, so it’s crucial to ensure your peanut butter doesn’t contain it.
- How can I tell if they’re done baking? You want the edges to be golden brown and firm to the touch. If they feel soft, they may need a few more minutes.
- Are these sticks good for training? Yes! Their chewy texture makes them great for rewarding your pup during training sessions.
- Can I make a smaller batch? Definitely! Just divide the ingredient amounts by half or even quarter them if you want to make fewer treats.
- What if my dough is too sticky? You can simply mix in a bit more oat flour until you achieve the desired consistency.

Conclusion
These Homemade Pumpkin and Oatmeal Dog Snack Sticks are not just treats—they’re a wholesome way to express your love for your furry friend. The thrill of seeing your pup happily munch on something you baked will warm your heart in ways you can’t imagine. I encourage you to give this recipe a try—your dog will be howling for more, and you’ll be filled with pride knowing exactly what’s in their snack!
I would love to hear how these turn out for you and your pup! Drop a comment below and feel free to check out other fabulous dog-friendly recipes on the blog. Happy baking, and let’s keep those tails wagging!

Homemade Pumpkin and Oatmeal Dog Snack Sticks
Ingredients
Method
- Preheat your oven to 350 degrees F (175 degrees C) and line a baking sheet with parchment paper or a silicone baking mat.
- In a medium bowl, combine the pumpkin puree, applesauce, and peanut butter. Mix until smooth, about 1-2 minutes.
- Gradually stir in the oat flour and cinnamon (if using), until the dough is thick but slightly sticky.
- Take small portions of dough and roll into sticks approximately 4 to 5 inches long and 1/2 inch thick. Lay them on the prepared baking sheet with space between each for even baking.
- Bake for 20 to 25 minutes until the edges are golden brown and the sticks feel firm.
- Remove from the oven and let cool completely on a wire rack before serving.
- Store the snack sticks in an airtight container at room temperature for up to one week, refrigerate for up to two weeks, or freeze for up to three months.