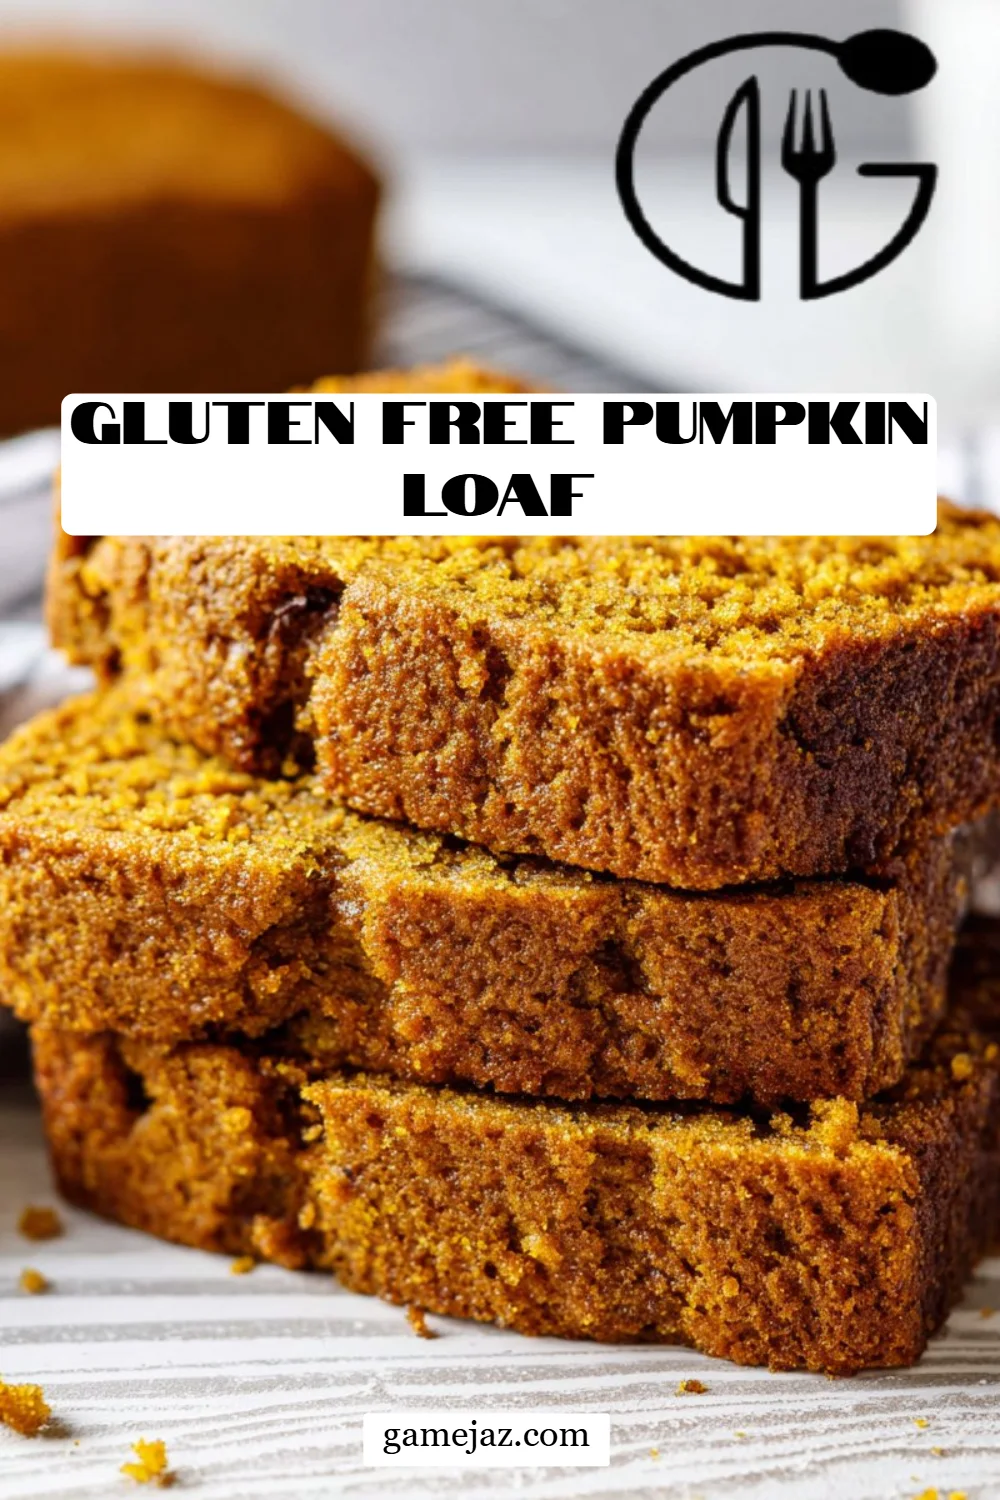
As the crisp air of autumn settles in and the leaves begin to dance to the ground, there’s one comfort food that always finds its way into my kitchen—Gluten Free Pumpkin Loaf. I remember sitting in my grandmother’s warm kitchen, surrounded by the aroma of spices and baked goods, as she taught me how to create this delightful treat. It wasn’t just a loaf; it was memories wrapped in golden-brown perfection.
This gluten-free version holds a special place in my heart because it captures that nostalgic flavor while being accommodating for those with dietary restrictions. Unlike many recipes that can turn out dense or dry, this moist pumpkin loaf combines the rich taste of pumpkin puree with just the right blend of spices, resulting in a slice that feels like a warm hug!
What makes this recipe stand out? It’s simple yet incredibly versatile. Whether you want to make it for a cozy family gathering or enjoy a sweet treat with your morning coffee, this loaf is sure to please everyone — gluten-free or not!
In this post, you’ll learn not just how to make this scrumptious loaf, but also some tips and tricks that will guarantee it becomes a cherished staple in your home, just as it is in mine.
What Are Gluten-Free Pumpkin Loaves?
The origins of pumpkin loaf are nestled deep in fall traditions, particularly in the United States and various parts of Europe, where they often celebrate the seasonal harvest of pumpkins. This delightful treat captures the essence of autumn with its warm, spice-filled flavor profile and moist, tender crumb, making it perfect for any gathering.
Gluten-Free Pumpkin Loaves stand out with their rich, aromatic taste, enhanced by warm spices like cinnamon and nutmeg. The texture remains soft and fluffy, thanks to the unique blend of gluten-free flours, which supports a tender crumb without the typical stickiness associated with gluten-free baking.
You might find yourself baking this incredible loaf when you’re in need of a cozy snack on a chilly day, or perhaps when you want to impress guests at Thanksgiving dinner. Whatever the occasion, this gluten-free treat is sure to elevate any moment!
Why You’ll Love This Recipe
Effortlessly Delicious: Unlike many store-bought options, this Gluten-Free Pumpkin Loaf is bursting with homemade flavor. The smell wafting from your oven alone will attract everyone to your kitchen!
Cost-Effective: Don’t let gluten-free labeling scare you. Making this loaf at home is easier on the wallet than buying pricey gluten-free baked goods from the store, plus it tastes fresher!
Customization Galore: You can easily swap in different spices or add-ins like chocolate chips or nuts. Go wild with your creativity—the possibilities are endless!
Time-Friendly: This recipe takes only about 10 minutes of active prep time, making it a perfect candidate for a quick afternoon baking session.
Family-Friendly: The whole family will love it, and it’s the perfect way to introduce gluten-free options without losing the comforting flavors of autumn.
Ready to get started? You might just find yourself making this loaf a bi-weekly ritual!
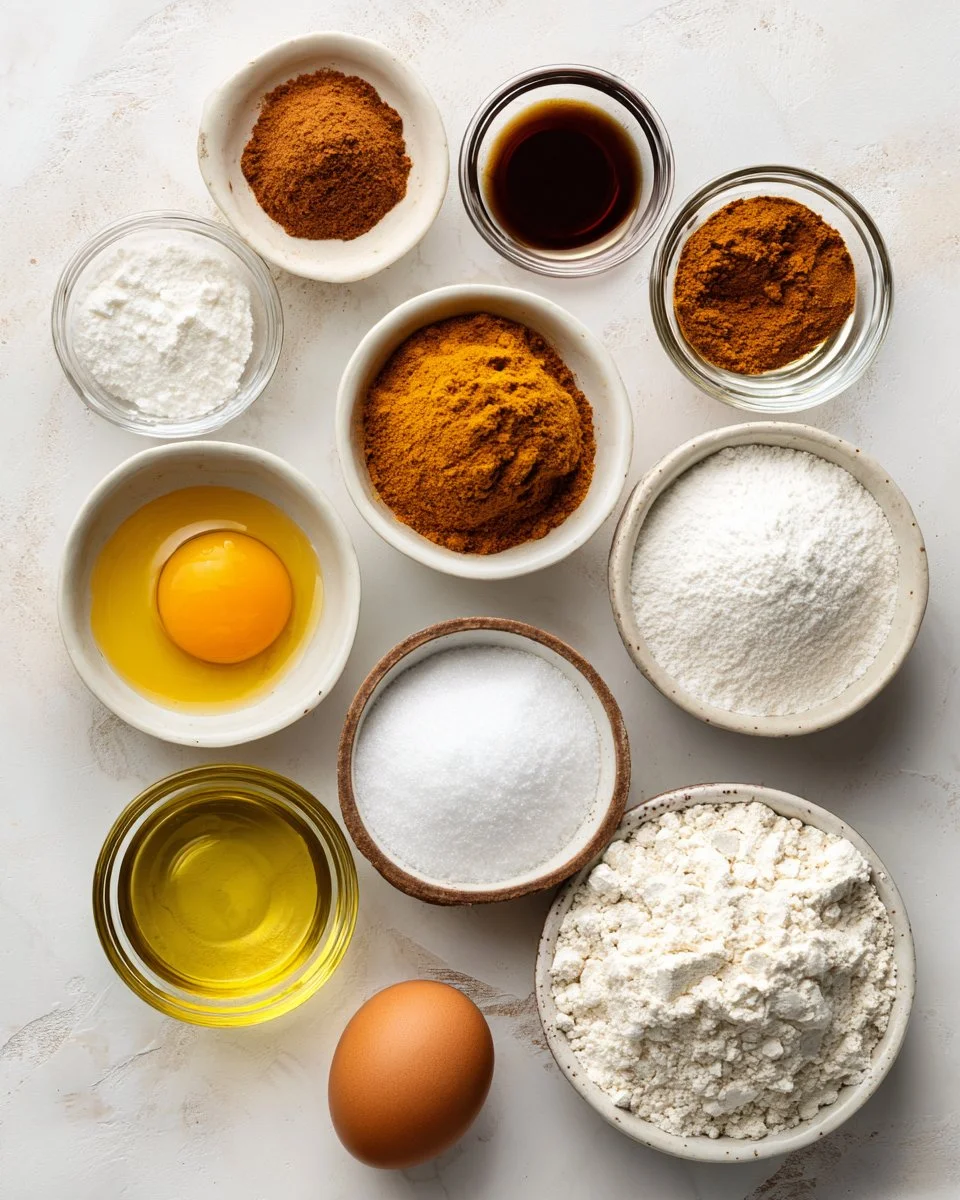
Ingredients
- 1 ½ cups gluten-free all-purpose flour with xanthan gum: Look for brands like Bob’s Red Mill or King Arthur Flour for a reliable mixture.
- 1 tbsp pumpkin pie spice: You can use store-bought or mix your own with cinnamon, nutmeg, and ginger (see notes).
- 1 tsp baking powder
- 1/2 tsp baking soda
- 1/2 tsp salt
- 1 cup pumpkin puree: Canned works just fine, but if you’re feeling adventurous, you can roast and puree your own pumpkin!
- 1 cup sugar: For a healthier option, you can substitute half with coconut sugar or another alternative.
- ½ cup oil (olive, vegetable, or canola): Use light olive oil for a subtle flavor; it balances well with the pumpkin.
- 1 egg (large): Make sure it’s room temperature for better incorporation.
- 1 tsp vanilla extract: Always choose pure vanilla for deeper flavor.
Prep Notes: Make sure your eggs, oil, and other wet ingredients are at room temperature for the best results.
Step-by-Step Instructions
Preheat Your Oven: Start by heating your oven to 350°F (175°C). The key to a successful loaf is a well-preheated oven.
Prep the Loaf Pan: Coat a 9 x 5 loaf pan lightly with cooking spray or line it with parchment paper for easy removal later.
Whisk the Dry Ingredients: In a large mixing bowl, whisk together the gluten-free flour, baking powder, baking soda, pumpkin pie spice, and salt. Make sure there are no lumps; this will create a smooth batter.
Combine the Wet Ingredients: In another bowl, mix together the pumpkin puree, sugar, egg, oil, and vanilla extract until smooth. This is where the magic begins!
Combine Wet and Dry Ingredients: Gradually add the dry mixture to the wet ingredients. Mix until just combined; be careful not to over-mix, as this can make the loaf tough.
Spread the Batter: Pour the batter into your prepared loaf pan, smoothing the top evenly.
Bake: Place the pan in the preheated oven and bake for about 1 hour or until a toothpick inserted into the center comes out clean. Check it at the 55-minute mark just in case your oven runs a bit hot.
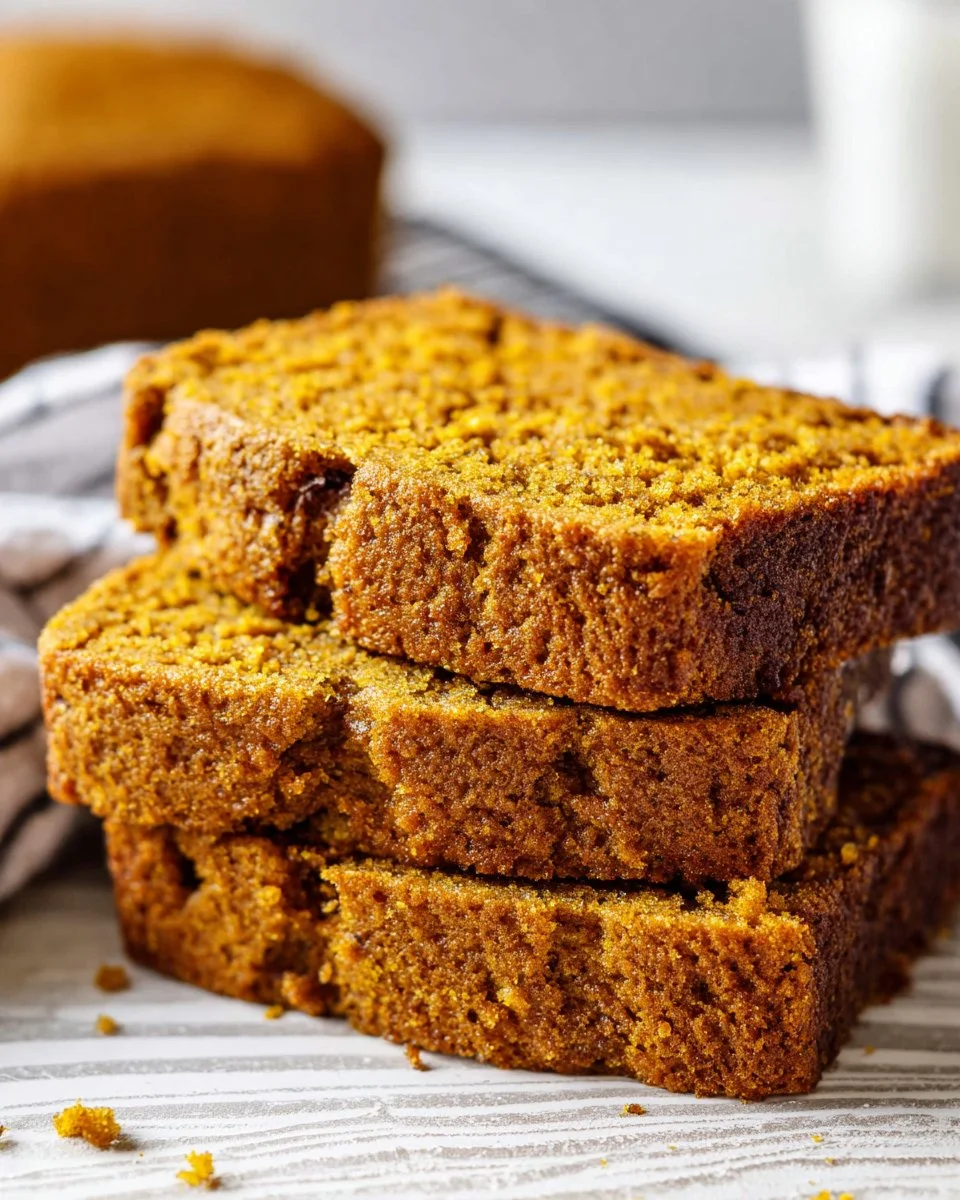
Cool Down: Once baked, remove the loaf from the oven and let it cool in the pan for 15 minutes. Use a knife to loosen the edges before carefully removing it and cooling it completely on a wire rack.
Slice and Serve: Once cooled completely, slice the loaf to your desired thickness. Enjoy the deliciousness alone or pair it with butter, cream cheese, or your favorite spreads!
Chef’s Tips:
- If the loaf is browning too quickly, tent it with aluminum foil halfway through baking.
- Allow the loaf to cool completely before slicing to achieve cleaner cuts.
Expert Tips & Tricks
- For Best Flavor: Use fresh spices and quality pumpkin puree. The flavor difference is truly remarkable!
- Storage: Keep your gluten-free pumpkin loaf in an airtight container at room temperature for two days. If it lasts longer, pop it in the fridge, where it will stay fresh for about five days.
- Make-Ahead: You can prepare the dry ingredients in advance, storing them in a sealed container until you’re ready to bake.
- Freezing: This loaf freezes beautifully! Wrap it tightly in plastic wrap and aluminum foil, and it will last up to three months. Thaw overnight in the fridge before serving.
- Common Issues: If your loaf comes out gummy, it may be due to improper measuring of flour. Use the spoon-and-level method rather than scooping directly from the bag.
- Custom Flavor Boosts: Consider adding chocolate chips, chopped nuts, or dried fruits for fun variations!
Serving Suggestions
This irresistibly moist gluten-free pumpkin loaf is perfect for enjoying solo or sharing with loved ones. Pair it with a steaming cup of your favorite coffee or hot tea for a cozy afternoon treat. For a festive presentation, dust the sliced loaf with powdered sugar and serve on a rustic wooden board. It’s a lovely addition to any holiday brunch or fall gathering, making it a crowd-pleaser everyone will remember!
Variations & Substitutions
- Flavor Combos: Experiment with different spices! Consider adding cardamom or swapping in chai spice for an extra kick.
- Dietary Adjustments: This loaf can easily be made vegan by substituting the egg with a flax egg (1 tablespoon ground flaxseed + 2.5 tablespoons water) and using a plant-based oil.
- Seasonal Changes: Try adding cranberries for a tartness that balances beautifully with the sweetness, or even incorporate apples for a delightful apple-pumpkin fusion.
Nutrition & Storage Info
- Prep Time: 10 minutes
- Cook Time: 1 hour
- Total Time: 1 hour 10 minutes
- Yield: 1 loaf (about 10 slices)
- Estimated Calories per Serving: 200-250 calories, depending on specific ingredient brands and portion sizes.
- Storage Instructions: Room temperature for 2 days; refrigerator for up to 5 days; freezer for up to 3 months.
FAQ Section
Can I substitute the flour?
Yes! For a different flavor, you can try almond flour or oat flour, but it may alter the texture.Can I make this loaf without sugar?
Absolutely! You can use substitutes like stevia or monk fruit sweetener, though it may change the texture.How do I know when it’s done baking?
A toothpick inserted into the center should come out clean or with a few moist crumbs. If it’s still wet, bake for a few more minutes.What’s the best way to store leftovers?
Keep them in an airtight container at room temperature, or in the fridge if you expect to keep it longer than two days.Can I add chocolate chips?
Definitely! Fold in about ½ cup of chocolate chips into the batter for an additional treat.Is this suitable for kids?
Yes! It’s a delightful treat that kids love, and it can also be a sneaky way to get some veggies into their diet!Can I make mini loaves?
Sure! Just adjust the baking time to about 30-40 minutes, checking for doneness with a toothpick.Can I use fresh pumpkin?
Yes! Simply roast and puree fresh pumpkin for a richer flavor.Is this recipe nut-free?
Yes, as long as you choose a gluten-free flour blend that doesn’t contain nuts.What should I serve it with?
It pairs wonderfully with cream cheese, flavored butter, or even a scoop of vanilla ice cream for dessert!
Conclusion
This Gluten-Free Pumpkin Loaf isn’t just a recipe; it’s an invitation to create fond autumn memories in your kitchen. With every slice, you bring warmth and comfort into your home, making it the perfect addition to your fall baking repertoire. I encourage you to try baking it yourself and let me know how it turns out! I’d love to hear your thoughts or any creative twists you come up with. Be sure to check out some of my other fall-inspired recipes on the blog for even more delicious options.
Slow Cooker Meatballs in Gravy
Happy baking!

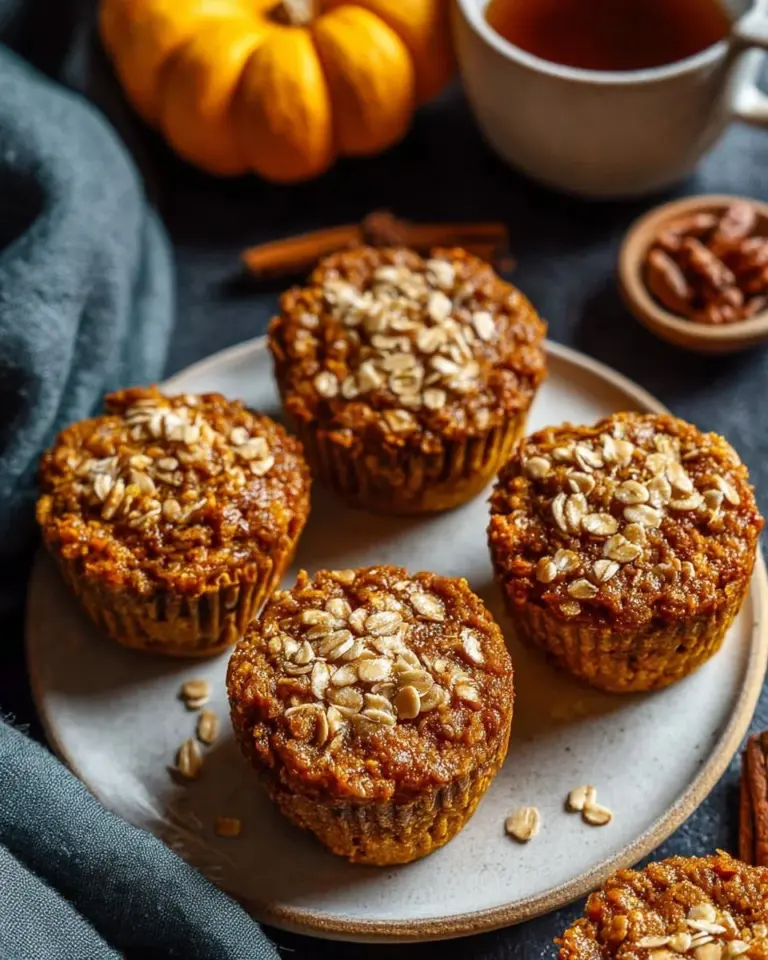
Gluten-Free Pumpkin Loaf
Ingredients
Method
- Preheat your oven to 350°F (175°C).
- Lightly coat a 9 x 5 loaf pan with cooking spray or line with parchment paper.
- In a large bowl, whisk together gluten-free flour, baking powder, baking soda, pumpkin pie spice, and salt until smooth.
- In another bowl, mix together pumpkin puree, sugar, egg, oil, and vanilla extract until smooth.
- Gradually add the dry mixture to the wet ingredients and mix until just combined.
- Pour the batter into the prepared loaf pan and smooth the top.
- Bake in the oven for about 1 hour, checking at the 55-minute mark for doneness.
- Once baked, remove from the oven and let cool in the pan for 15 minutes.
- Loosen the edges with a knife and transfer to a wire rack to cool completely.
- Once cooled, slice the loaf and enjoy it alone or with butter, cream cheese, or favorite spreads.