Delectably Moist Gluten Free Coffee Cake: The Ultimate Indulgence
There’s something about the smell of freshly baked coffee cake wafting through the kitchen that brings back warm memories from my childhood. Imagine cozy mornings spent sipping rich coffee alongside a slice of soft, cinnamon-infused cake, all while basking in the laughter of family. I cherish those moments, and as someone who recently delved into the world of gluten-free baking, I was determined to recreate that nostalgic delight. That journey led to the discovery of an incredible Gluten Free Coffee Cake recipe, which not only ignited my love for baking but also became a beloved staple at family gatherings.
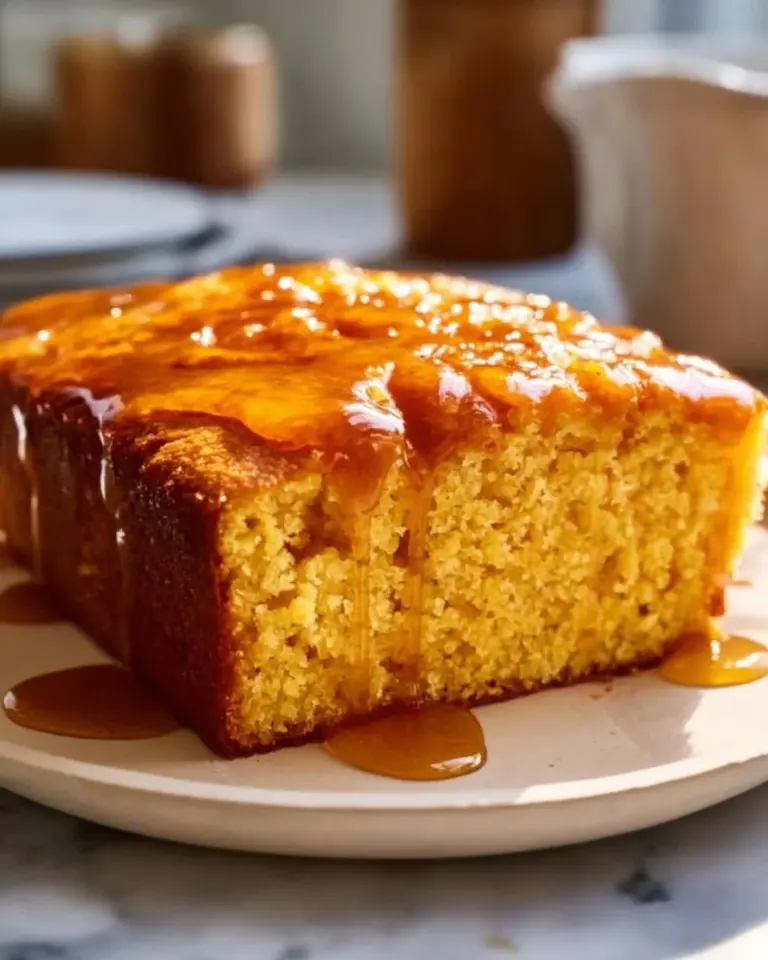
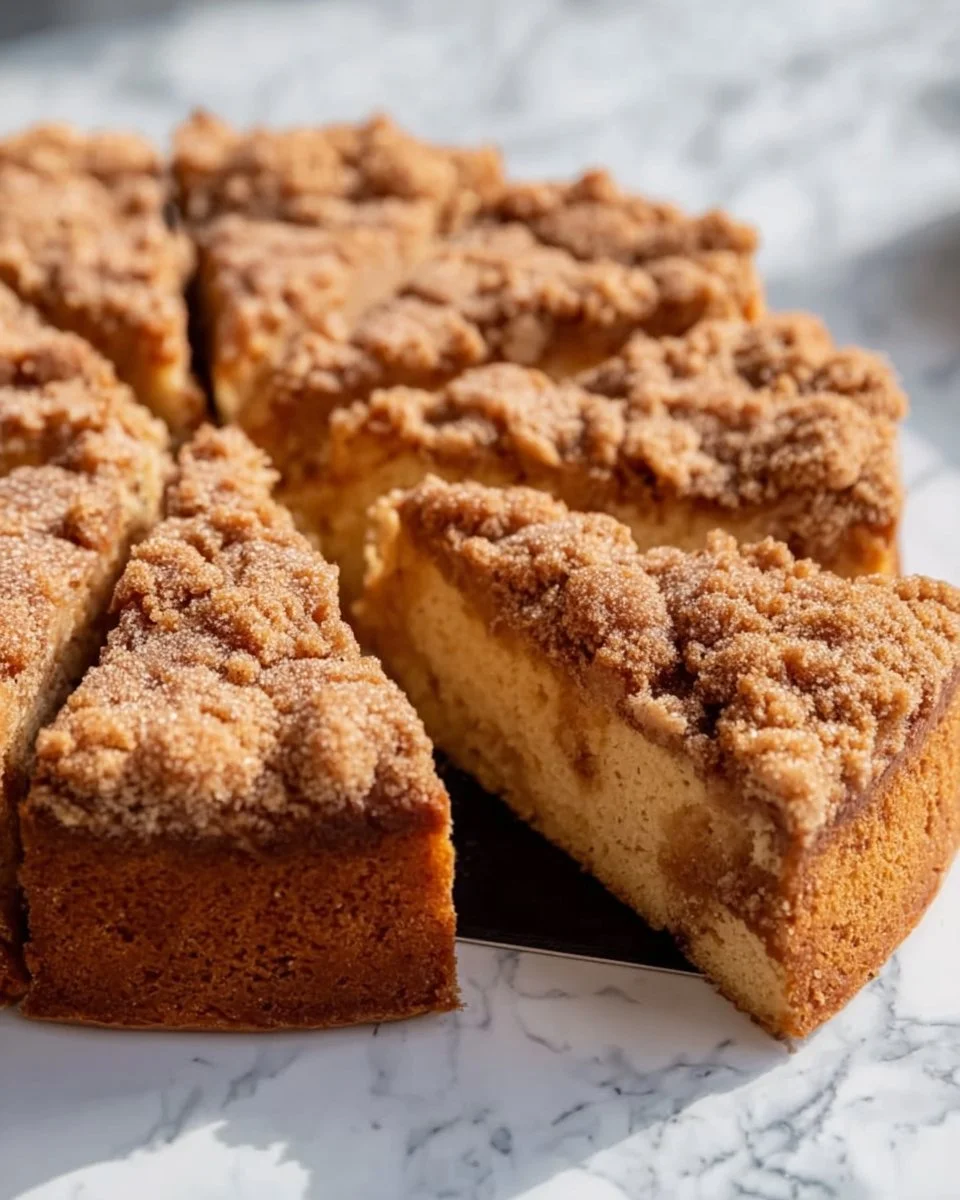
What makes this gluten-free version stand out? It’s all about the texture—a crumb so tender and moist, paired with a perfectly sweet, crumbly topping that elevates ordinary coffee time to extraordinary! Unlike many other recipes that demand complicated ingredients or tricky techniques, this one is straightforward and accessible, ensuring that anyone can whip it up with ease. Plus, it’s a beautiful indulgence anyone can enjoy, gluten-free or not! So grab your apron, and I promise you’ll learn how to create a heavenly coffee cake that could easily be mistaken for its gluten-laden counterpart, leaving your friends and family begging for seconds!
What Are Gluten Free Coffee Cakes?
Gluten Free Coffee Cakes have a rich history rooted in the traditions of morning gatherings and socializing. Originating in the 17th century, these cakes were designed to be enjoyed with coffee—hence the name. While they exist in various forms across cultures, there’s something uniquely comforting about this wholesome treat.
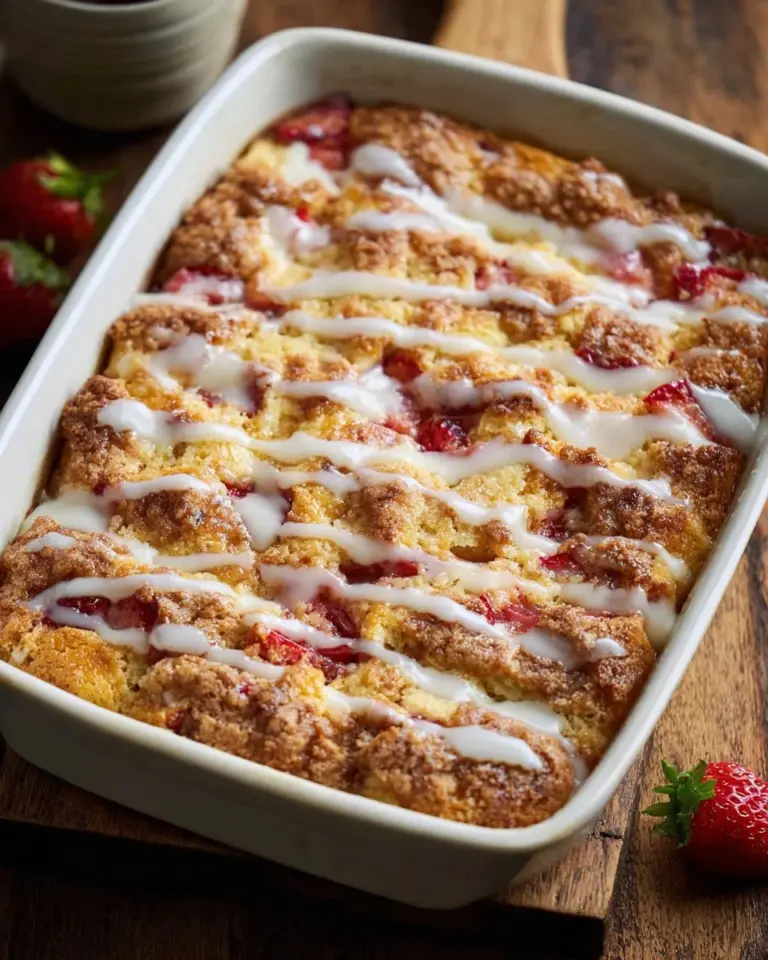
When you take a bite of a well-made gluten-free coffee cake, the taste and texture are reminiscent of its traditional sibling. Think soft, buttery layers interspersed with sweet cinnamon swirls and topped with a crisp, buttery crumble. The cake is light, moist, and full of flavors that dance on your palate, making it the perfect partner for your morning brew or a sweet afternoon pick-me-up.
Whether it’s a family brunch, a cozy coffee date, or just because you need a little self-care, this gluten-free delight is your ticket to indulgence. Mom always said that food tastes better when shared with loved ones, so seize the opportunity to bring a little joy to your next gathering!
Why You’ll Love This Recipe
Unmatched Flavor: This gluten-free coffee cake doesn’t compromise on taste. It’s rich, buttery, and has just the right amount of sweetness, making every bite feel like a warm hug on a plate.
Easy & Accessible: Unlike store-bought or restaurant versions that can be pricey and often lack the homemade touch, this recipe is simple enough for beginners. It requires minimal effort and basic ingredients that you likely already have in your pantry.
Customizable: This recipe invites creativity! Want to add chocolate chips, nuts, or even fresh fruits? Go for it! You can tailor it to your taste preferences or seasonal ingredients.
Cost-Effective: Making your own coffee cake is not just satisfying; it’s economical too! This gluten-free version is easy on the wallet compared to those fancy bakery treats, and you get to enjoy that personal touch.
Time-Friendly: With a prep time of around 20 minutes and bake time of 45-55 minutes, you’ll have a gorgeous cake ready to share without spending hours in the kitchen. Perfect for busy days or last-minute gatherings!

Ingredients
Here’s what you need to whip up this delightful Gluten Free Coffee Cake:
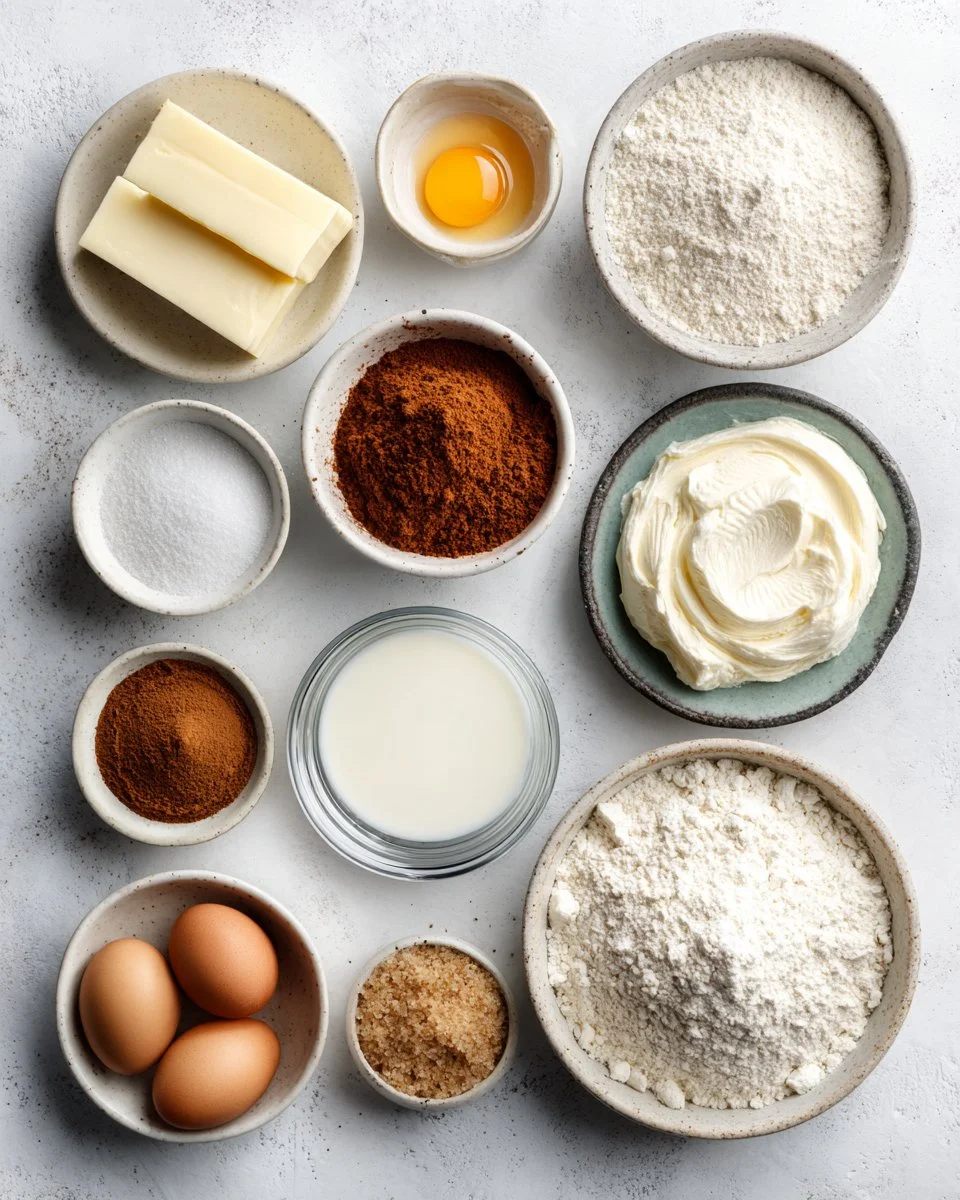
- 2 cups gluten-free all-purpose flour blend (with xanthan gum included) – Bob’s Red Mill or King Arthur are great options.
- 1 teaspoon baking powder
- 0.5 teaspoon baking soda
- 0.5 teaspoon salt
- 0.75 cup unsalted butter, softened (make sure it’s at room temperature for best results)
- 1 cup granulated sugar
- 2 large eggs, at room temperature
- 1 tablespoon vanilla extract
- 1 cup full-fat sour cream (greek yogurt can also work as a substitute)
- 0.75 cup brown sugar (for filling)
- 1 tablespoon ground cinnamon (for filling)
- 1 tablespoon gluten-free all-purpose flour (for filling)
- 0.5 cup gluten-free all-purpose flour (for crumb topping)
- 0.5 cup brown sugar (for crumb topping)
- 1 teaspoon ground cinnamon (for crumb topping)
- 0.25 teaspoon salt (for crumb topping)
- 0.25 cup unsalted butter, melted (for crumb topping)
Prep Notes:
- Make sure your butter is softened (not melted) for easy creaming.
- Use room temperature eggs and sour cream for a well-emulsified batter.
Step-by-Step Instructions
Preheat Your Oven: Preheat your oven to 350°F (175°C). Grease a 9-inch round springform pan and line the bottom with parchment paper for easy release later.
Mix Dry Ingredients: In a medium bowl, whisk together the gluten-free all-purpose flour, baking powder, baking soda, and salt. Set aside.
Cream the Butter and Sugar: In a large bowl, beat the softened butter and granulated sugar together for about 3 to 4 minutes. You want it light and fluffy—this is crucial for a tender cake!
Add Eggs and Vanilla: Mix in the eggs one at a time, allowing each egg to combine fully before adding the next. Then stir in the vanilla extract until even.
Combine Wet and Dry Ingredients: Add half of your dry mixture to the butter mixture and mix gently. Then, add the sour cream and blend until smooth. Fold in the remaining dry ingredients until just combined.
Prepare the Cinnamon Filling: In a small bowl, stir together the brown sugar, ground cinnamon, and gluten-free flour. This will be your filling, creating that flavorful swirl in the cake.
Layer the Batter: Spread half of the prepared batter in the bottom of the springform pan. Sprinkle the cinnamon filling over this layer, then gently spread the remaining batter on top.
Make the Crumb Topping: In a separate bowl, combine the gluten-free flour, brown sugar, ground cinnamon, salt, and melted butter until crumbly. Sprinkle this crumb topping over the batter.
Bake: Place the cake in the oven and bake for 45-55 minutes. A toothpick inserted into the center should come out clean—this is your cue to enjoy the delightful aroma filling your kitchen!
Cool and Serve: Allow the coffee cake to cool in the pan for at least 20 minutes before gently removing it. Slice generously, and watch it disappear!
Chef’s Tips:
- Keep an eye on the cake in the last few minutes of baking; every oven varies slightly.
- If the top is browning too quickly, cover it with aluminum foil halfway through baking.

Expert Tips & Tricks
Storage: Leftover cake? Great! It can be stored in an airtight container for up to 3 days at room temperature, or in the fridge for about a week. If you want it to last longer, freeze slices wrapped tightly for up to 3 months.
Make Ahead: You can prep the batter and store it in the refrigerator for up to a day before baking. Just allow it to come to room temperature before popping it in the oven.
Troubleshooting: If your cake turns out too dense, it may have been overmixed or overbaked. Aim for gentle mixing and a toothpick check for doneness!
Customization: Experiment with flavorings or add-ins like chopped nuts, chocolate chips, or seasonal fruits like blueberries or cranberries for a fresh twist.
Serving Suggestions
Your Gluten Free Coffee Cake is divine on its own, but pairing it with something special elevates it even further! Serve warm with a dollop of whipped cream or a scoop of yogurt.
For presentation, dust the top with powdered sugar for a finishing touch or add a sprinkle of crushed nuts for a bit of crunch.
This cake is perfect for brunch gatherings, casual coffee dates, or even for treating yourself after a long day.
Variations & Substitutions
Flavor Combinations:
- Try almond extract instead of vanilla for a nutty twist.
- Add in cranberries or blueberry swirls for a fruity hint.
Dietary Restrictions:
- Make it dairy-free by substituting the butter with coconut oil and using a dairy-free sour cream alternative.
Seasonal Variations:
- In the fall, introduce pumpkin spice to your filling for a cozy autumn vibe.
- In winter, add a hint of peppermint to the crumb topping to accompany your festive gatherings.
Nutrition & Storage Info
- Prep Time: 20 minutes
- Cook Time: 45-55 minutes
- Total Time: 1 hour & 15 minutes
- Yield: 10-12 servings
- Estimated Calories: Approximately 320 calories per serving (calories may vary depending on ingredient brands and measurements).
Storage:
- Room Temp: Enjoy within 3 days.
- Fridge: Up to 1 week.
- Freezer: Up to 3 months. Just thaw overnight in the fridge before serving.
FAQ Section
Can I use regular flour in this recipe?
- This recipe is specifically designed to be gluten-free. Regular flour will not yield the same results.
Can I make this recipe dairy-free?
- Yes! Substitute dairy ingredients with alternatives like coconut oil for butter and non-dairy yogurt or sour cream.
What can I substitute for eggs?
- You can use flaxseeds (1 tablespoon of ground flaxseed mixed with 2.5 tablespoons of water equals one egg) or applesauce.
How can I tell when my cake is done baking?
- A toothpick inserted in the center should come out clean or with a few moist crumbs but no wet batter.
Is this cake suitable for freezing?
- Absolutely! Just wrap slices tightly before freezing and thaw before serving.
How can I avoid a dense cake?
- Be careful not to overmix your batter and ensure your ingredients are at the right temperature; room temperature eggs and butter work best.
Can I add nuts or fruits to this recipe?
- Yes! Feel free to fold in nuts or fruits based on your preference before baking.
What should I do if my cake is too sweet?
- Balance it out with a side of Greek yogurt or whipped cream, or try reducing the sugar slightly next time.
How do I store leftover cake?
- Store in an airtight container at room temperature for a few days or in the fridge for up to a week.
Can I substitute the crumb topping ingredients?
- Feel free to get creative! You can use rolled oats or gluten-free muesli for a delicious twist.
Conclusion
Baking this gluten-free coffee cake is more than just making a dessert; it’s a way to create joyful connections and share memories. With its perfect blend of textures and flavors, it’s bound to become a family favorite, just like it did in mine. I encourage you to give this recipe a try and experience the magic for yourself!
Let me know how it goes in the comments and if it brings back those sweet memories! Don’t forget to check out some of my other favorite recipes on the blog for more ideas, like my Gluten-Free Cinnamon Rolls or my delightful Chocolate Chip Cookies!
Happy baking!

Gluten Free Coffee Cake
Ingredients
Method
- Preheat your oven to 350°F (175°C). Grease a 9-inch round springform pan and line the bottom with parchment paper.
- In a medium bowl, whisk together the gluten-free all-purpose flour, baking powder, baking soda, and salt. Set aside.
- In a large bowl, beat the softened butter and granulated sugar together for about 3 to 4 minutes until light and fluffy.
- Mix in the eggs one at a time, then stir in the vanilla extract.
- Add half of your dry mixture to the butter mixture and mix gently, then add the sour cream and blend until smooth. Fold in the remaining dry ingredients until just combined.
- In a small bowl, stir together the brown sugar, ground cinnamon, and gluten-free flour for the filling.
- Spread half of the prepared batter in the bottom of the springform pan, sprinkle the cinnamon filling over this layer, and gently spread the remaining batter on top.
- In a separate bowl, combine the crumb topping ingredients until crumbly and sprinkle over the batter.
- Place the cake in the oven and bake for 45-55 minutes until a toothpick inserted into the center comes out clean.
- Allow the coffee cake to cool in the pan for at least 20 minutes before removing and slicing.