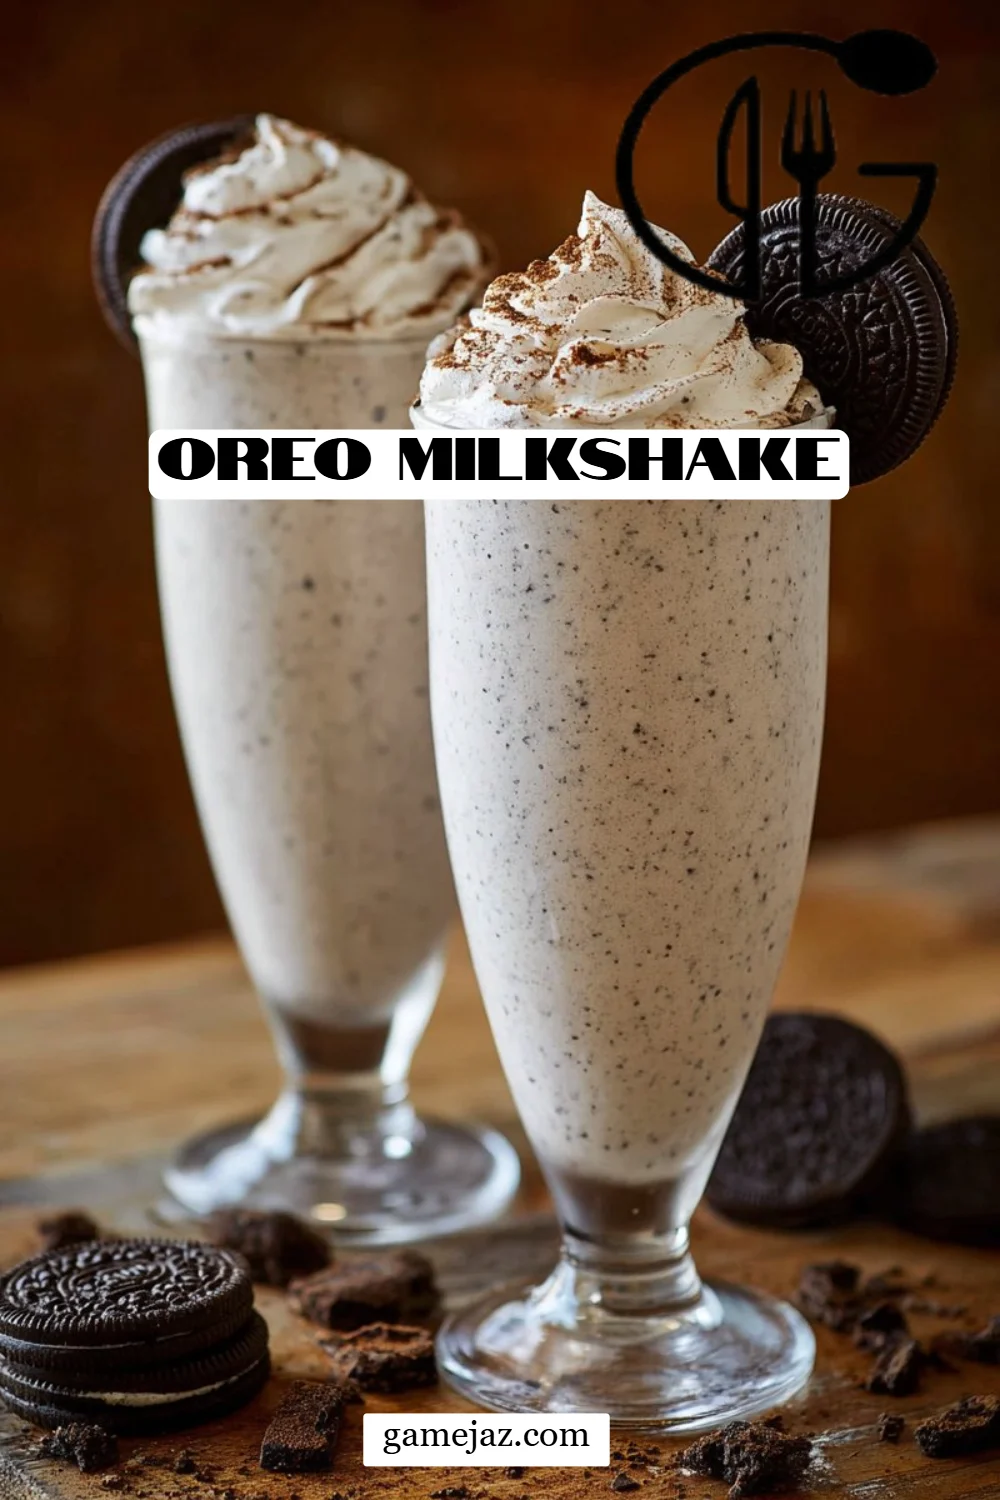
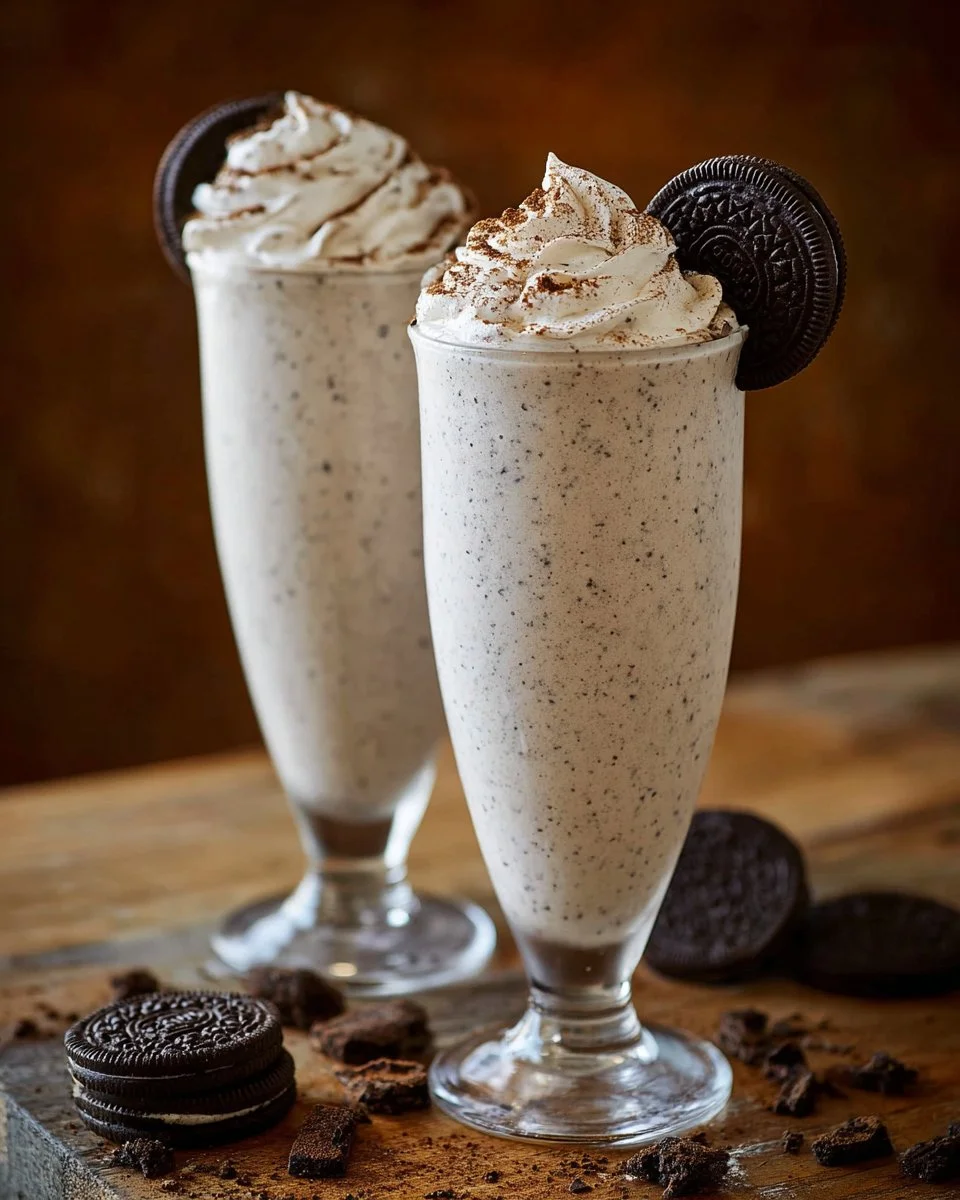
Do you remember those hot summer days where you’d rush into the kitchen, desperate for something to cool you down? One of my fondest memories is making Oreo Milkshakes with my siblings. The kitchen would be filled with laughter, the sound of the blender whirring, and the irresistible aroma of cookies wafting through the air. There’s something truly magical about swirling together vanilla ice cream, milk, and those classic Oreo cookies until you create a thick, velvety treat that evokes pure joy.
What makes my version of the Oreo Milkshake special? Well, not only is it an easy recipe to whip up in just a few minutes, but it also comes with a decadent twist that pays homage to our childhood memories. You won’t find this in a carton or fast-food cup! It’s loaded with rich, creamy texture, and the crunchy Oreo pieces add an unrivaled punch that takes every sip to nostalgia heaven.
In this recipe, I’ll share my easy step-by-step guide for crafting the ultimate Oreo Milkshake, alongside tips and tricks I’ve gathered through years of practice. Let’s dive in and create a milkshake that’s bound to awaken your taste buds and amp up the fun of your family gatherings!
What Are Oreo Milkshakes?
Oreo Milkshakes are a delightful blend of vanilla ice cream, milk, and crushed Oreo cookies turned into a luscious drink. The origins of this treat can be traced back to the classic American milkshake, but with a fun twist! The creamy, sweet base meets the rich, chocolaty crunch of Oreos, creating a harmonious balance that’s simply irresistible.
The taste and texture of an Oreo Milkshake are nothing short of heavenly. Picture this: you take your first sip, and it’s a delightful flavor crescendo – smooth, creamy, and just the right amount of sweetness, with tiny bits of Oreo dancing on your taste buds.
These milkshakes are perfect for any occasion! Whether it’s a family movie night, a birthday celebration, or just a hot day when you need something refreshing, Oreo Milkshakes are guaranteed to bring smiles all around.
Why You’ll Love This Recipe
Here are just a few reasons why I’m absolutely certain you will fall head over heels for my Oreo Milkshake recipe:
Customization Galore: The beauty of this recipe lies in its flexibility. Like mint? Toss in some mint chocolate cookies for an invigorating spin. Want it extra chocolatey? Drizzle chocolate syrup into the mix or top with chocolate sprinkles!
Cost-Effective Indulgence: Forget expensive milkshakes from cafes; making your own allows you to enjoy this decadent treat at a fraction of the cost. Plus, I’ve found that having the ingredients on hand means spontaneous milkshake moments can happen at any time.
Quick and Easy: In just about 10 minutes, you can blend up a crowd-pleaser. This is an ideal treat for busy families or anyone needing a quick pick-me-up.
Taste That Packs a Punch: My version is made with quality ingredients and techniques that elevate the experience, meaning every sip will remind you why homemade is always better than store-bought.
Satisfying and Fun: From the sound of the blender whirling to watching the ingredients come together, this process is an adventure all kids (and adults) will love. And let’s not forget about the joy of garnishing with whipped cream and lining that glass with chocolate syrup!
If that wasn’t enough to get your taste buds tingling, let’s check out the ingredients that will bring this milkshake to life!
Ingredients Section
Here’s what you’ll need to create the ultimate Oreo Milkshake:
- 2 cups vanilla ice cream, softened slightly (brands like Breyers or Häagen-Dazs work great for their creamy texture)
- 1/2 cup whole milk (for a richer flavor)
- 6-8 Oreo cookies, roughly chopped (go for the original variety for classic taste)
- 1/2 teaspoon vanilla extract (a splash of quality extract like Nielsen-Massey elevates the flavor)
- Whipped cream, optional, for topping (homemade or a can)
- Oreo cookies, optional, for topping (for decoration plus extra cookie goodness)
- Chocolate syrup, optional, for topping (a nice drizzle makes it feel even more indulgent)
Note: Always allow the ice cream to soften slightly before using. For best results, make sure your milk is also kept at room temperature to help with the blending process.
Step-by-Step Instructions
Blend the Base: Place the softened vanilla ice cream, milk, and vanilla extract into a blender. Blend on high speed for about 30-60 seconds until the mixture is smooth and creamy.
Chef’s Tip: If you want an extra thick milkshake, stick with the original proportions, but if you prefer a lighter drink, add a bit more milk gradually.
Add the Oreos: Next, toss in the roughly chopped Oreos. Pulse the blender a few times until they’re just combined into the mixture. You want some chunks to still remain for that delightful crunch!
Visual Cue: Look for small flecks of Oreo scattered throughout the milkshake.
Adjust Consistency: If the milkshake is too thick, add a tablespoon of milk at a time and blend again until you reach your desired consistency. Conversely, if it’s too thin, add more ice cream and continue to blend.
Serve It Up: Pour the milkshake into tall glasses.
Garnish Like a Pro: Top with whipped cream, a sprinkle of chopped Oreos, and a drizzle of chocolate syrup if you’re feeling fancy!
Indulge Immediately: Best served fresh for optimal flavor and texture.
Expert Tips & Tricks
Quality Ingredients Matter: Always use high-quality vanilla ice cream and fresh Oreos for a more robust flavor.
Keep Your Blender Dry: A damp blender may affect the consistency of your milkshake. Always ensure it is completely dry before adding ingredients.
Storage: Oreo Milkshakes can be kept in the freezer for up to 30 minutes if you have leftovers. Just give it a good stir before serving again.
Make-Ahead Instructions: You can prepare the base (ice cream, milk, and vanilla) a few hours ahead and keep it in the freezer. Just blend in the Oreos when you’re ready to serve!
Common Mistakes: Avoid over-blending. You want to keep some texture from the Oreos rather than turning them into a fine powder.
Troubleshooting: If your milkshake is too thick, resist the urge to add too much milk all at once. Remember to go slow!
Serving Suggestions
Pair your Oreo Milkshake with a slice of chocolate cake or brownies for a delightful dessert duo. Alternatively, a side of fresh fruit can balance the richness. For a fun presentation, consider using mason jars to serve, garnished with colorful straws and extra Oreos for flair. This treat works great for birthday parties, family movie nights, or even just a cozy evening at home with loved ones.
Variations & Substitutions
Flavor Combinations: Swap out vanilla for cookies and cream ice cream for that extra depth of flavor. Or try mint chocolate chip ice cream for a refreshing twist!
Dietary Adaptations: Dairy-free or vegan? Use coconut or almond milk along with dairy-free ice cream for a delicious alternative!
Seasonal Inspiration: For fall, add a pinch of pumpkin spice for a festive twist; for summer, blend in fresh strawberries for a creamy Strawberry Oreo combo!
Nutrition & Storage Info
- Prep Time: 10 minutes
- Total Time: 10 minutes
- Yield: Approximately 2 servings
- Estimated Calories per Serving: 410 calories
Storage Instructions
- Room temperature: Not applicable (best enjoyed fresh!)
- Fridge: Not recommended.
- Freezer: You can store any leftover milkshake for about 30 minutes before it becomes too hard.
FAQ Section
Can I make this milkshake without ice cream?
Yes! You can use frozen yogurt or even use only milk and Oreos for a lighter version.What can I use instead of Oreos?
Try subs like chocolate sandwich cookies or even gluten-free cookies for a different twist!How can I make it healthier?
Consider using reduced-fat ice cream and almond milk to cut calories.Is it possible to make this in advance?
While best fresh, the milkshake can be prepped ahead without the Oreos for blending right before serving.Can I use flavored Oreos?
Absolutely! Mint or even birthday cake Oreos would give an exciting flavor to your milkshake!How do I thicken my milkshake?
A bit more ice cream or frozen yogurt will help achieve the thickness you want.Is there a way to prepare this for a crowd?
You can double or triple the recipe as needed, mixing in batches to serve promptly.Can I add protein powder?
Yes! A scoop of vanilla protein powder can blend seamlessly into your milkshake.What’s the best way to clean my blender afterward?
Fill it halfway with warm water and a drop of soap, blend for a few seconds, then rinse thoroughly!Will adding chocolate syrup change the texture?
Only slightly! It gives a slightly richer taste without compromising the milkshake’s creaminess.
Conclusion
In summary, this Oreo Milkshake recipe is a delicious way to relive childhood memories while enjoying an easy and fun treat. Plus, it’s customizable, quick to make, and way more satisfying than any store-bought variety! I encourage you to try this recipe at home and share your experiences. Did you add a twist? Let me know in the comments! And if you’re craving more indulgent recipes, check out my other fabulous dessert ideas right here on the blog!

Oreo Milkshake
Ingredients
Method
- Place the softened vanilla ice cream, milk, and vanilla extract into a blender. Blend on high speed for about 30-60 seconds until the mixture is smooth and creamy.
- If you want an extra thick milkshake, stick with the original proportions, but if you prefer a lighter drink, add a bit more milk gradually.
- Toss in the roughly chopped Oreos. Pulse the blender a few times until they’re just combined into the mixture. You want some chunks to still remain for that delightful crunch!
- If the milkshake is too thick, add a tablespoon of milk at a time and blend again until you reach your desired consistency. Conversely, if it’s too thin, add more ice cream and continue to blend.
- Pour the milkshake into tall glasses.
- Top with whipped cream, a sprinkle of chopped Oreos, and a drizzle of chocolate syrup if you’re feeling fancy!
- Best served fresh for optimal flavor and texture.