Whip Up This Creamy Egg Free Mayo: A Guilt-Free Delight!
Let me take you back to those sunny, carefree summer days of my childhood. I remember my mom whipping up a batch of creamy mayonnaise in our small kitchen, the tangy scent wafting through the air as it clung to fresh garden tomatoes and my favorite sandwiches. Fast forward to today, and I still crave that delicious, velvety mayo. But here’s the twist—I now make an Egg Free Mayo that’s just as creamy and delightful without the eggs!
This homemade mayo isn’t just any mayo; it’s a vibrant and inclusive twist on a classic that everyone can enjoy, especially those with egg allergies or dietary restrictions. Unlike store-bought versions that often come laden with additives and preservatives, my Egg Free Mayo is fresh, simple, and oh-so-satisfying. You’ll find yourself reaching for it at every meal to add that perfect, creamy touch to everything from salads to snacks.
In this post, I’ll share not only the recipe but also my personal tips and tricks for creating a batch of this delectable spread. By the end, you’ll be ready to impress your family and friends with your newfound mayo-making skills, bringing back those lovely memories while savoring every bite. Let’s dive in!
What are Egg Free Mayo?
Egg Free Mayo has its roots in culinary creativity, born from the desire to make creamy condiments accessible to everyone. While traditional mayo relies on eggs for emulsification, my version harnesses the power of a light oil and milk to create that smooth and velvety texture you love, all without sacrificing flavor.
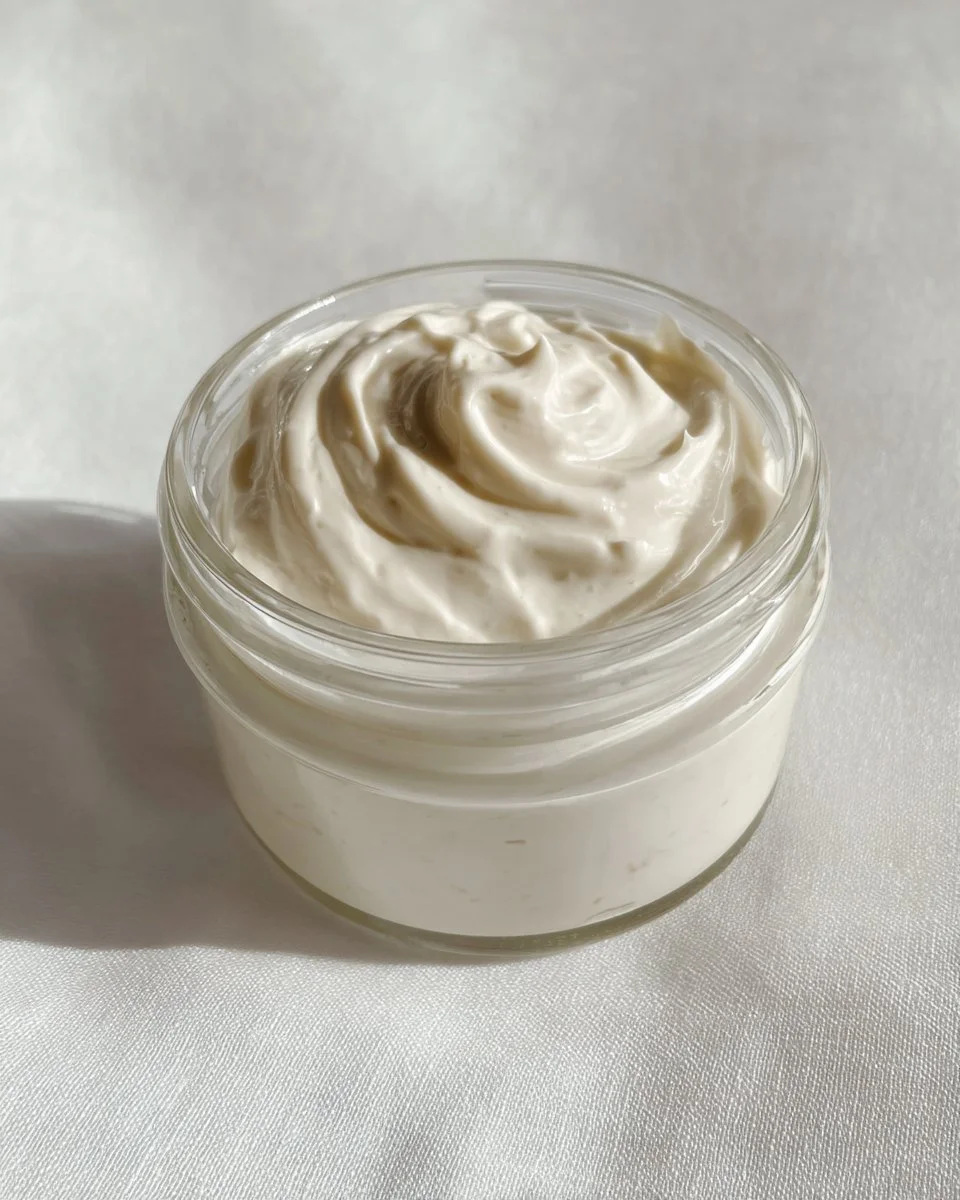
When you first taste it, you’ll be greeted by a rich creaminess that beautifully coats your taste buds. The accent of apple cider vinegar brings a delightful tang, while the dijon mustard adds a hint of sharpness that rounds out the flavor profile perfectly. The texture is thick yet spreadable, making it ideal for sandwiches, dips, and dressings.
Egg Free Mayo is perfect for when you want to whip something up quickly— a salad dressing in a pinch, a sandwich spread, or even a dip for crunchy veggies. It’s a versatile staple you can feel good about making, knowing that you’ll keep your loved ones safe and satisfied!
Why You’ll Love This Recipe
Healthier Choice: Store-bought mayo can be full of preservatives and unwanted additives. This Egg Free Mayo? It’s made from simple ingredients you can pronounce! By making it at home, you know exactly what’s going into your food.
Budget-Friendly: Buying high-quality mayonnaise can hit your wallet hard, but this recipe is cost-effective, using just a few pantry staples. You get all the flavor without draining your budget.
Customizable Flavors: This recipe is your canvas! The base is simple and adaptable—you can infuse it with garlic, herbs, or spices, tailoring it to suit your taste buds perfectly.
Quick and Easy: In about a minute, you can create a delicious mayo! There’s no cooking required, and it’s as easy as blending ingredients—making it a fantastic project even for kitchen novices.
Lasting Freshness: You can store your homemade mayo for up to 10 days in the refrigerator, ensuring you have a ready-to-use condiment whenever you need. No more worrying about lurking preservatives, either!
Ingredients Section
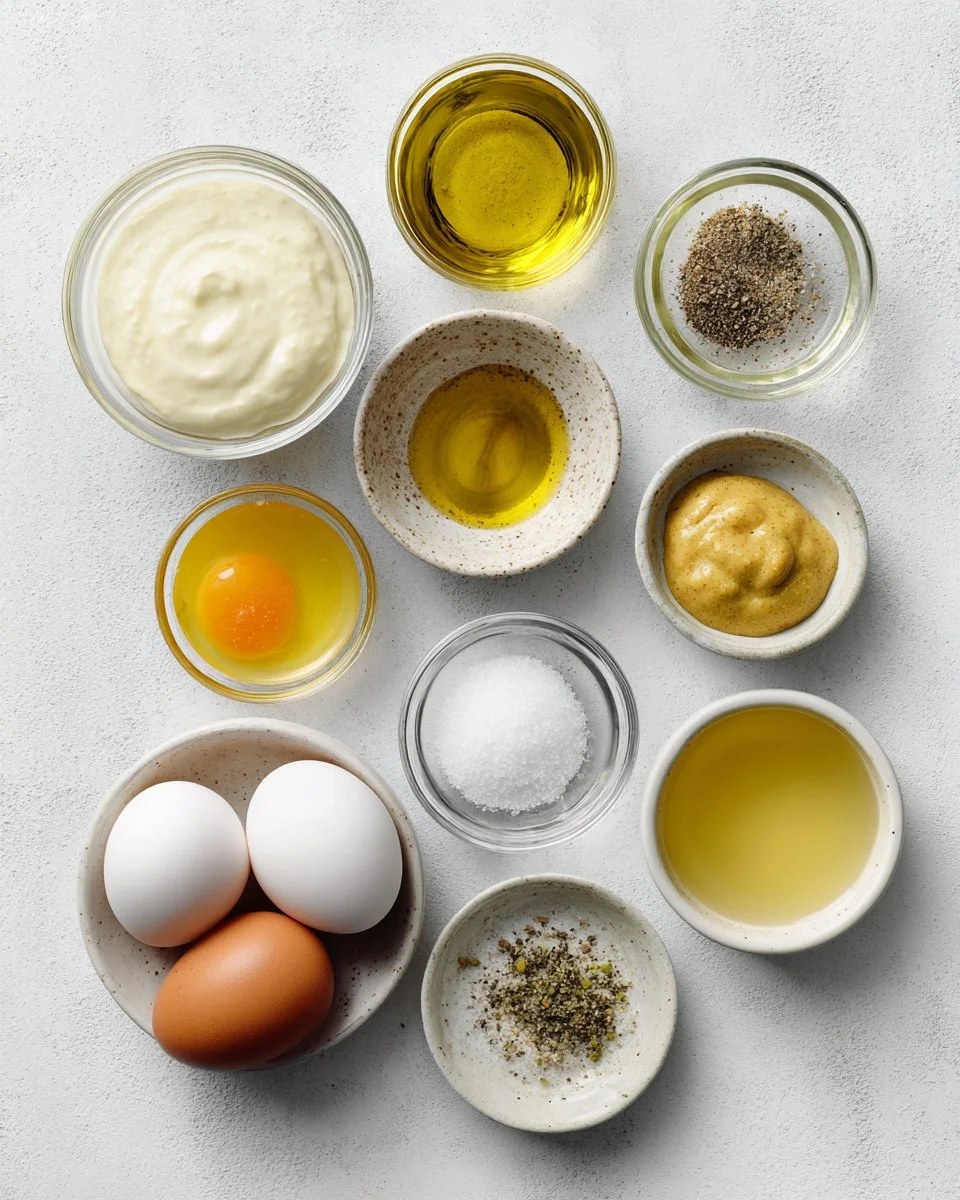
For this creamy Egg Free Mayo, you will need:
1/2 cup light, mild oil
I recommend using extra light olive oil or avocado oil for their neutral taste and great emulsification properties. If you want a hint of flavor, you could also try using sunflower oil!1/4 cup milk (2%)
Dairy or non-dairy milk works well—just make sure to use a good quality milk! If you need a non-dairy option, almond milk can be a great substitute.Pinch of salt
Kosher salt is my go-to here, as it dissolves well and distributes flavor evenly.Pinch of pepper
Feel free to use freshly cracked black pepper for an extra kick!1 teaspoon apple cider vinegar
This gives a beautiful tang to the mayo, enhancing the overall flavor. You can also use white wine vinegar for a different twist.1 teaspoon dijon mustard (or honey dijon mustard)
This is essential not just for flavor but for emulsification. I love using a whole grain or honey dijon for some added sweetness!
Prep Notes:
Make sure your oil and milk are at room temperature for the best emulsification.
Step-by-Step Instructions
Gather Your Ingredients: Begin by measuring out your oil, milk, salt, pepper, apple cider vinegar, and dijon mustard.
Add Ingredients: Pour the oil, milk, salt, pepper, apple cider vinegar, and dijon mustard into a wide jar or a tall bowl. A narrow vessel will help with effective blending.
Blend Together: With an immersion blender, start blending the mixture slowly, keeping the blender touching the bottom of the jar initially. Once you see it starting to emulsify (usually in about 30 seconds), swirl the blender around until the mayo thickens. The whole process takes about 1 minute.
Chef’s Tips:
- Make sure your immersion blender is fully submerged before starting to prevent splatters!
- If you see the mayo not emulsifying, you can add a little extra milk to help it blend better.
Store Your Mayo: Once blended to your desired consistency, transfer it to a clean jar and seal tightly. Homemade mayo can be stored in the refrigerator for up to 10 days.
Expert Tips & Tricks
Use Fresh Ingredients: Fresh oil and dairy will yield a more vibrant flavor, so be careful with storing your ingredients.
Emulsification Tip: If your mayo doesn’t thicken as expected, try adding a bit more mustard or vinegar to aid in emulsification.
Storage Recommendations: Always keep your homemade mayo refrigerated to maintain its freshness. Consider portioning out leftover mayo in small jars for convenience.
Make-Ahead Instructions: You can make this mayo ahead of time. Just store it in the fridge in an airtight container and give it a quick stir before using.
Troubleshooting: If your mayo separates, re-blend it with a splash of milk until it comes back together!
Serving Suggestions
This Egg Free Mayo is incredibly versatile! Use it as a spread on sandwiches or wraps, toss it in pasta salads, or serve it as a dip for veggies at your next gathering. To present it beautifully, transfer it into a small dish and drizzle with a bit of olive oil or sprinkle with fresh herbs. It’s lovely for picnics, barbecues, or just a cozy evening at home!
Variations & Substitutions
Herbed Mayo: Add fresh dill, chives, or basil for a refreshing herb-infused mayo that’s perfect for summer dishes!
Spicy Mayo: Stir in some sriracha or hot sauce for a spicy kick. It’s delightful on sandwiches or as a dipping sauce!
Garlic Aioli: Blend in roasted garlic for a creamy aioli that elevates any dish. Perfect for dipping fries or spreading on burgers.
Dairy-Free Option: Substitute milk with your favorite non-dairy milk and ensure the mustard is also egg-free.
Nutrition & Storage Info
- Prep Time: 5 minutes
- Cook Time: 0 minutes
- Total Time: 5 minutes
- Yield: About 1 cup
- Estimated Calories per Serving: 50 calories (assuming 1 tablespoon serving)
Storage Instructions:
Store your Egg Free Mayo in an airtight container in the fridge. It lasts for about 10 days – but I doubt it will last that long!
FAQ Section
Can I use different oils for this mayo?
Yes! While I recommend light oils like avocado or sunflower, you can experiment with others as long as they’re neutral-flavored.What should I do if the mayo is too thin?
Add more oil slowly while blending until the desired thickness is achieved.Can I make this mayo vegan?
Absolutely! Just use plant-based milk and ensure you’re using vegan-approved mustard.How do I add flavor to my mayo?
You can mix in ingredients like garlic, lemon juice, or herbs after the base mayo is made for added flavor.What if I don’t have an immersion blender?
You can use a standard blender or a food processor. Just ensure to scrape down the sides frequently.Can I freeze homemade mayo?
It’s not recommended to freeze mayo, as the texture may change upon thawing.Is there a low-fat version of this mayo?
You can substitute half the oil with yogurt for a lighter take.Why is my mayo grainy?
This could happen if the oil is added too quickly or the ingredients weren’t at room temperature.Can I spice it up?
Definitely! Toss in some cayenne or jalapeño for a kick, or experiment with spices based on your cuisine.What’s the easiest way to keep it fresh?
Use clean utensils each time and ensure it’s stored in an airtight container.
Conclusion
This Egg Free Mayo is a game-changer! Not only does it bring back those treasured memories of my childhood, but it also opens the door to new flavors and creations. I can’t wait for you to make your own and taste the difference. Share your thoughts in the comments below, and let me know how you enjoyed it! If you’re looking for more delicious recipes, be sure to explore my blog for creative twists on family favorites! Happy cooking!
Egg Free Mayo
Ingredients
Method
- Gather Your Ingredients: Measure out your oil, milk, salt, pepper, apple cider vinegar, and dijon mustard.
- Add Ingredients: Pour the oil, milk, salt, pepper, apple cider vinegar, and dijon mustard into a wide jar or a tall bowl.
- Blend Together: Start blending the mixture slowly with an immersion blender. Once it starts to emulsify, swirl the blender until the mayo thickens.
- Store Your Mayo: Transfer the mayo to a clean jar and seal tightly. Refrigerate for up to 10 days.