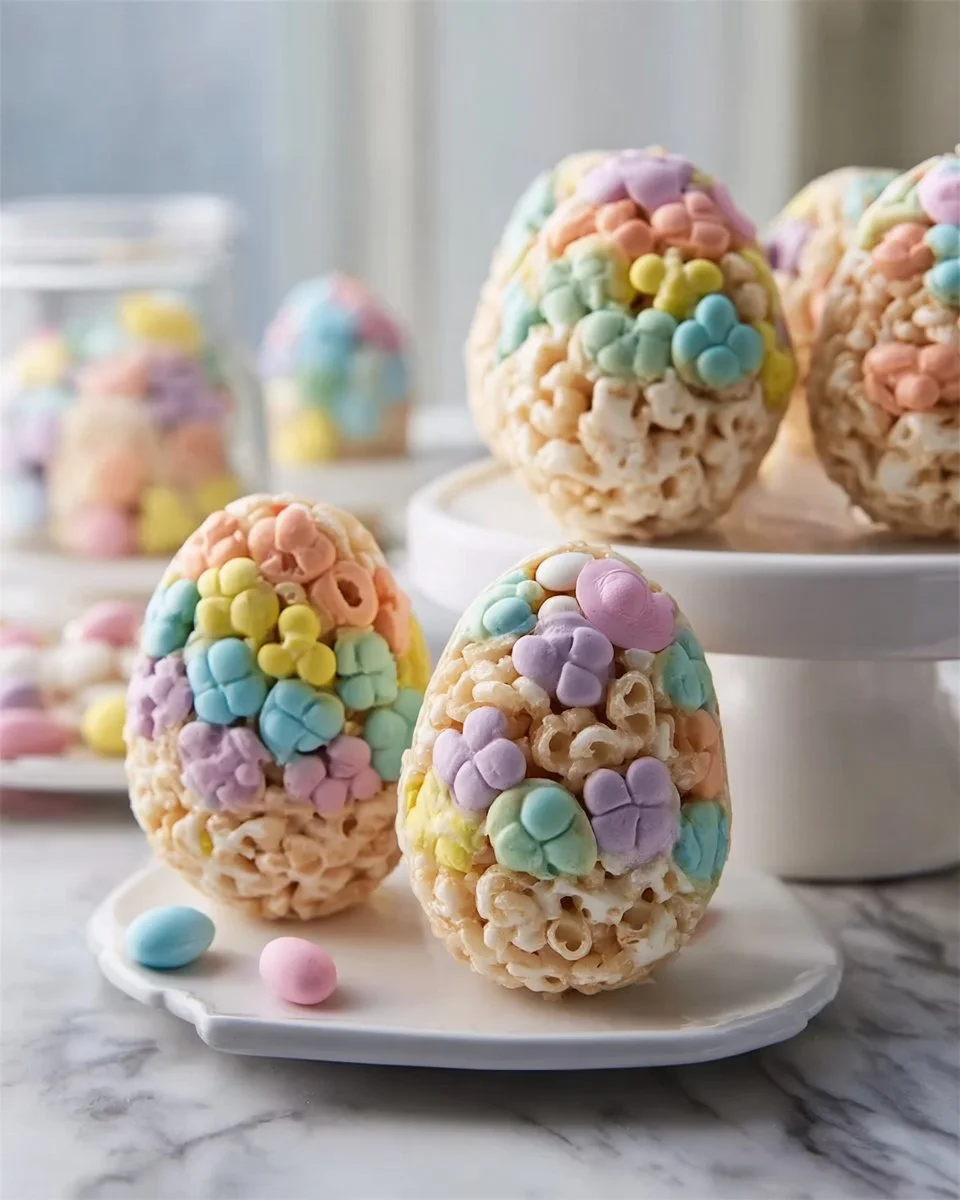
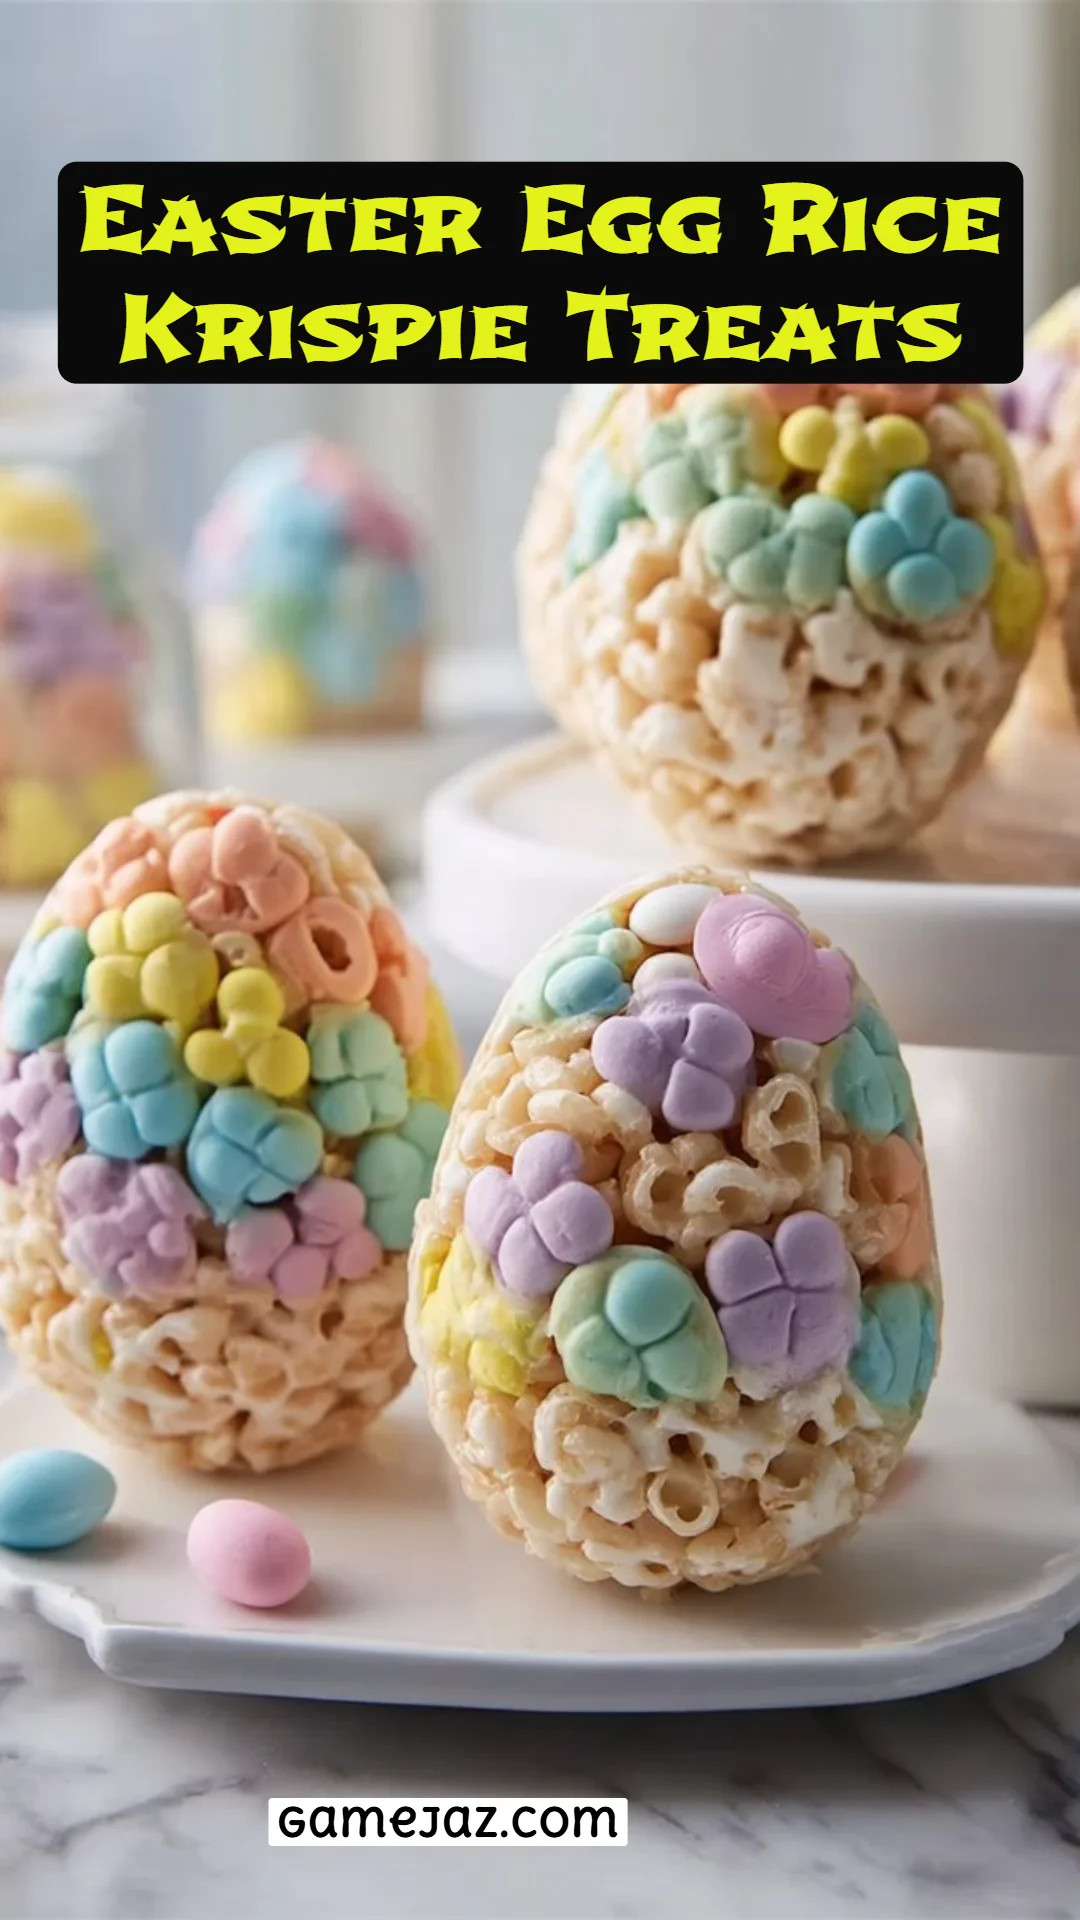
Delightfully Fun Easter Egg Rice Krispie Treats: A Sweet Spin on a Classic
Every Easter, our family has a tradition that brings out the inner child in all of us—hiding colorful egg-shaped treats around the backyard for the kids, and let me tell you, it’s as much fun for the adults! This year, I couldn’t resist putting a new spin on this classic Easter activity by whipping up a batch of Easter Egg Rice Krispie Treats. These little gems combine the nostalgia of my childhood with a touch of creativity that makes them both a whimsical treat and a delightful surprise.
What makes my Easter Egg Rice Krispie Treats extra special? Well, they’re not just the standard squares you’ve seen before. Shaped like Easter eggs and filled with pastel candy-coated chocolates, they encapsulate the joy and whimsy that Easter represents. Plus, this recipe is a breeze to make—far easier than those fancy versions you find at bakeries, and let’s face it, way more budget-friendly!
As I dove into the fun of making these treats, I reminisced about the countless family gatherings where sweet snacks united us—each bite transporting me back to sunny afternoons and laughter. By the end of this post, I promise you’ll learn how to craft your own playful Easter Egg Rice Krispie Treats that will become a heartwarming addition to your family tradition, just like mine.
What Are Easter Egg Rice Krispie Treats?
Originating in the mid-1930s, Rice Krispie Treats have become a staple in American homes, and their versatility is truly unmatched. These Easter Egg Rice Krispie Treats take that beloved recipe and transform it into something truly festive! Imagine the gooey texture of melted marshmallows combining with crispy cereal, all shaped into vibrant egg forms.
These treats feature a delightful balance of textures—the crunch of the Rice Krispies, the chewiness of marshmallows, and the satisfying pop of candy-coated chocolates. Each bite is a sugary surprise, making them perfect for both kids and adults alike. Ideal for Easter gatherings, birthday parties, or just a fun afternoon project, you’ll want to whip up a batch of these charming goodies whenever you need a festive touch!
Why You’ll Love This Recipe
Easy and Quick: This recipe takes just 30-45 minutes from start to finish! Say goodbye to complicated dessert recipes—this one is perfect for every skill level, even if you’re a beginner in the kitchen.
Customization Galore: If pastel candy-coated chocolates aren’t your thing, you can swap them out for any of your favorite treats—think sprinkles, gummy candies, or even mini chocolate chips. The possibilities are endless!
Cost-Effective: Why buy expensive specialty treats when you can make this fun and delicious option at home? With minimal ingredients that are easy to find, you’ll save money while showcasing your baking skills.
Perfect for Any Occasion: Whether it’s Easter, a birthday, or just a special day at home, these treats fit the bill. They can be bright, colorful, and whimsical, or sophisticated and elegant depending on how you decorate.
Nostalgia Wrapped in Fun: Making these treats is not just about the end product; it’s a bonding experience! Gather your kids or friends and enjoy some sweet quality time while making memories.
Ingredients
- 6 cups Rice Krispies cereal (or puffed rice cereal): Use fresh cereal for the best crunch!
- 1 bag (10 oz) mini marshmallows: Look for name-brand marshmallows for consistent meltability; it’s all about the quality here!
- 3 tablespoons unsalted butter: Room temperature butter works best. I always reach for European-style butter for a richer flavor.
- 1 teaspoon vanilla extract: A must for adding depth to the sweetness; don’t skimp on quality!
- Pinch of salt: Don’t underestimate this ingredient; it helps balance the sweetness.
- 2 to 2½ cups pastel candy-coated chocolates (such as Cadbury Mini Eggs or pastel M&M’s): For that vibrant burst of color and crunch.
Prep Notes: Make sure your butter is at room temperature for easier mixing. Set out your molds ahead of time so you’re ready to go.
Step-by-Step Instructions
Lightly grease the inside of plastic Easter egg molds with nonstick spray or a small amount of butter. If molds are not available, prepare a tray and grease your hands to manually shape the eggs.
In a large pot over low heat, melt the butter completely. Add the mini marshmallows and stir constantly until fully melted and smooth (about 5 minutes). Remove from heat and stir in the vanilla extract and pinch of salt.
Quickly add the Rice Krispies cereal to the marshmallow mixture and stir until evenly coated. Allow to cool for 2 minutes—this will make it easier to handle while warm.
Spoon a small amount of the mixture into one half of each mold, pressing down gently and leaving space at the top (about a half inch).
While warm, press pastel candy-coated chocolates into the Rice Krispie layer. Fill the other half with more mixture and press to close, sealing both halves.
Let them set at room temperature for 30 to 45 minutes. Once firm, carefully open the molds and remove the treats.
Serve on a platter or wrap individually for Easter baskets. Store in an airtight container for up to 3 days.
Chef’s Tips:
- Don’t be afraid to get your hands in there! Grease your hands with butter to make shaping easier.
- If your mixture gets difficult to work with, lightly reheat over low heat to soften.
Expert Tips & Tricks
Storage Recommendations: Store your treats in an airtight container at room temperature for up to 3 days. For longer-lasting treats, consider refrigerating them, but expect a bit of chewiness.
Make-ahead Instructions: You can prepare the mixtures a day in advance and shape them right before serving. Just remember to keep them covered!
Troubleshooting Common Problems: If your treats are too sticky, they may not have enough rice cereal. Adjust as you make your next batch. If they’re too hard, reduce the marshmallow or add a touch more butter next time.
Taste Testing: Sample your mixture before shaping! That way, you can adjust the sweetness or add extras as desired.
Fun Variations: Think about adding peanut butter or white chocolate for different flavors! Just fold them in after melting the marshmallows.
Serving Suggestions
Want to make your treats even more festive? Consider presenting your Easter Egg Rice Krispie Treats on a colorful platter alongside chocolate bunnies or springtime fruit like strawberries. They’re the perfect addition to any Easter brunch or dessert table!
Create a sweet little treat station for the kids to decorate their own egg-shaped goodies with edible glitter, more candy, or sprinkles. The fun of decorating the treats can create delightful chaos while keeping everyone entertained!
Variations & Substitutions
- Flavor Enhancements: Incorporate a teaspoon of almond extract for a nutty flavor while maintaining that classic Rice Krispie base.
- Dietary Adaptations: For a gluten-free version, ensure your Rice Krispies are labeled gluten-free. You can also opt for vegan marshmallows to make it dairy-free or vegan.
- Seasonal Variations: For birthdays, switch out the pastel chocolates for rainbow sprinkles, or for Halloween, use orange and black candies for spooky treats.
Nutrition & Storage Info
- Prep Time: 15 minutes
- Cook Time: 10 minutes
- Total Time: 25 minutes
- Yield: About 12-16 treats
- Estimated Calories: Approximately 150 calories per treat (varies based on specific ingredients).
- Storage Instructions: Airtight container at room temperature (may last up to 3 days) or refrigerated (can last up to a week).
FAQ Section
Can I use different cereals?
Absolutely! You can substitute with any puffed cereal, such as Cheerios or Special K for a unique twist.How do I know when the marshmallows are perfect?
They should be fully melted and smooth without any lumps. Stir continuously to prevent burning!What if I don’t have Easter egg molds?
No problem! You can shape them by hand or use a muffin tin lined with cupcake liners.Are these treats gluten-free?
Yes, if you use gluten-free Rice Krispies! Always check the packaging.How can I customize flavors?
Try mixing in peanut butter or Nutella before adding the Rice Krispies, or fold in crushed cookies or sprinkles!Can I freeze these treats?
Yes! Wrap them individually and store in an airtight container for up to a month.What if they come out too hard?
This can happen if you add too many Rice Krispies. Next time, reduce cereal amount slightly and test the texture.What are some extra toppings I can use?
Try crushed graham crackers for a s’mores twist or chocolate drizzle for added sweetness!What size should the egg mold be?
Aim for two halves that can fit in the palm of your hand; larger molds may require more mixture.Can I add food coloring?
Certainly! A few drops of food coloring can give your marshmallow mixture a fun pastel hue!

Conclusion
These Easter Egg Rice Krispie Treats are more than just a delicious dessert—they’re a celebration of family, nostalgia, and creativity! I can’t wait for you to give this recipe a try and watch the smiles it brings to your loved ones’ faces. Don’t forget to share your feedback in the comments section below, and be sure to check out other festive recipes on my blog, like my Chocolate Bunny Cupcakes and Spring Fruit Tart. Happy baking!