There’s something magical about doughnuts, isn’t there? Growing up, Saturday mornings were always about the sweet ritual of going to the local bakery with my family. The warm, sugary scent that wafted through the air was intoxicating, and I can still remember the joy of picking out my favorite chocolate-covered treat, the sprinkles dancing on top like confetti. These doughnuts aren’t just pastries; they’re memories sewn together by warmth, laughter, and delight.
What sets my doughnut recipe apart is the balance of flavors and the textures that come alive with each bite. Soft on the inside, golden and slightly crispy on the outside, these doughnuts have become my family’s go-to comfort food, perfect for anything from breakfast to an afternoon snack. While many recipes out there leave you with dense, dry doughnuts, mine creates airy, pillowy delights that will have your loved ones begging for seconds.
Get ready to roll up your sleeves and immerse yourself in dough creation because I’m here to share everything you need to know. From the perfect rise to the art of frying, I promise by the end of this post, you’ll have a batch of incredible doughnuts that can envelop you in nostalgia and warmth.
What Are Doughnuts?
Doughnuts, or “donuts” as some affectionately spell them, have a rich history that dates back to the 19th century. Originally crafted by Dutch settlers in America, who made “olykoeks” (meaning “oil cakes”), they have evolved into the fluffy treats we adore today. The traditional doughnut shape, with that iconic hole in the center, emerged to ensure even cooking (and let’s be honest, to make them easier to eat with one hand while we sip our coffee in the other).
The texture of a perfect doughnut is what truly makes it unique: a delicate crust that gives way to a tender, airy interior—addictive, really! Imagine biting into one, the slightly sweet fragrance enveloping you like a warm hug. Ideal for breakfast, brunch, or an indulgent snack, doughnuts are the ultimate way to satisfy your sweet tooth. Whether glazed, frosted, or filled with rich cream, they can be made any way your heart desires—making them the perfect canvas for creativity in the kitchen.
Why You’ll Love This Recipe
Fluffiness Guaranteed: Unlike store-bought versions that can often leave you feeling heavy, my recipe promises airy and delightful doughnuts that are a pleasure to bite into. The secret? A perfect balance of ingredients and the right rising time.
Cost-Effective Indulgence: Making your own doughnuts is not only fun but also much cheaper than hitting up your local café. For the cost of a few simple ingredients, you can whip up a whole batch of these scrumptious wonders at home.
Customization is Key: The joy of making doughnuts is the endless possibilities for customization! You can experiment with flavored glazes, fillings, or toppings – the world is your oyster! Think fruity jams, chocolate frosting, or even matcha powder for a unique twist.
Easy Step-by-Step Instructions: While some might see dough-making as intimidating, I promise you that this recipe is accessible. With clear instructions and personal tips sprinkled throughout, you’ll feel at ease tackling this culinary adventure.
Perfect for Any Occasion: Whether you’re hosting a brunch, throwing a birthday party, or simply need to bring a little joy to your week, these doughnuts are perfect for any occasion. Plus, they make excellent gifts or treats to share with friends!
Ingredients
Here’s what you’ll need to create these magical doughnuts:
- 3/4 cup lukewarm water: Not too hot, as you don’t want to kill the yeast—think around 110°F (just warm to the touch).
- 1/4 cup granulated sugar: This sweetener will help activate the yeast and add a touch of sweetness.
- 1 packet active dry yeast: Fresh yeast equals fluffy doughnuts! Make sure to check the expiration date.
- 1/2 cup whole milk (room temperature): Sets a creamy base for our dough.
- 1 large egg (room temperature): This will help enrich the dough and act as a binder.
- 3 1/2 cups all-purpose flour: Breaking out your trusty flour—this creates the structure of your doughnuts.
- 1/2 teaspoon kosher salt: Balances the sweetness and enhances flavor.
- 2 tablespoons unsalted butter (softened): Adds richness and tenderness to the dough.
- Vegetable oil (for frying): You want oil with a high smoke point; I recommend canola or peanut oil.
- Confectioners’ sugar (for dusting): The sweet finishing touch for your doughnuts!
Ingredient Quality & Substitutions:
- For a richer flavor profile, consider using a good quality organic sugar and milk.
- If you don’t have whole milk, you can use 2% or even almond milk for a different sweetness.
- You can also swap out all-purpose flour for bread flour for an even chewier bite.
Before starting, ensure all your ingredients are at room temperature—that’s key for a successful rise!
Step-by-Step Instructions
Start with the yeast: In a medium bowl, whisk together the lukewarm water, sugar, and yeast. Let it sit for about 5-10 minutes until it becomes foamy. This signals that your yeast is alive and ready to work its magic.
Combine with wet ingredients: Once foamy, add the milk and egg to the yeast mixture and whisk to combine.
Mix the dry ingredients: In a stand mixer fitted with a dough hook, combine the flour and salt. Pour in the yeast mixture and add the softened butter, mixing until just combined.
Kneading time: Knead the dough for 2-3 minutes on low speed until it becomes smooth and elastic. You may need to scrape down the sides occasionally.
First rise: Transfer your dough to a greased bowl, cover it with plastic wrap, and let it rise in a warm place until doubled in size—about 1-2 hours.
Shape the doughnuts: Roll out your risen dough onto a floured surface to about 1/2 inch thickness and cut into squares or round shapes with a doughnut cutter.
Heat the oil: In a large pot, heat vegetable oil to 360°F. You can check this with a kitchen thermometer or by dropping in a small piece of dough; it should sizzle and rise immediately.
Frying time: Carefully fry the dough in batches for about 30 seconds on each side until they’re golden brown. Be patient and don’t overcrowd the pan.
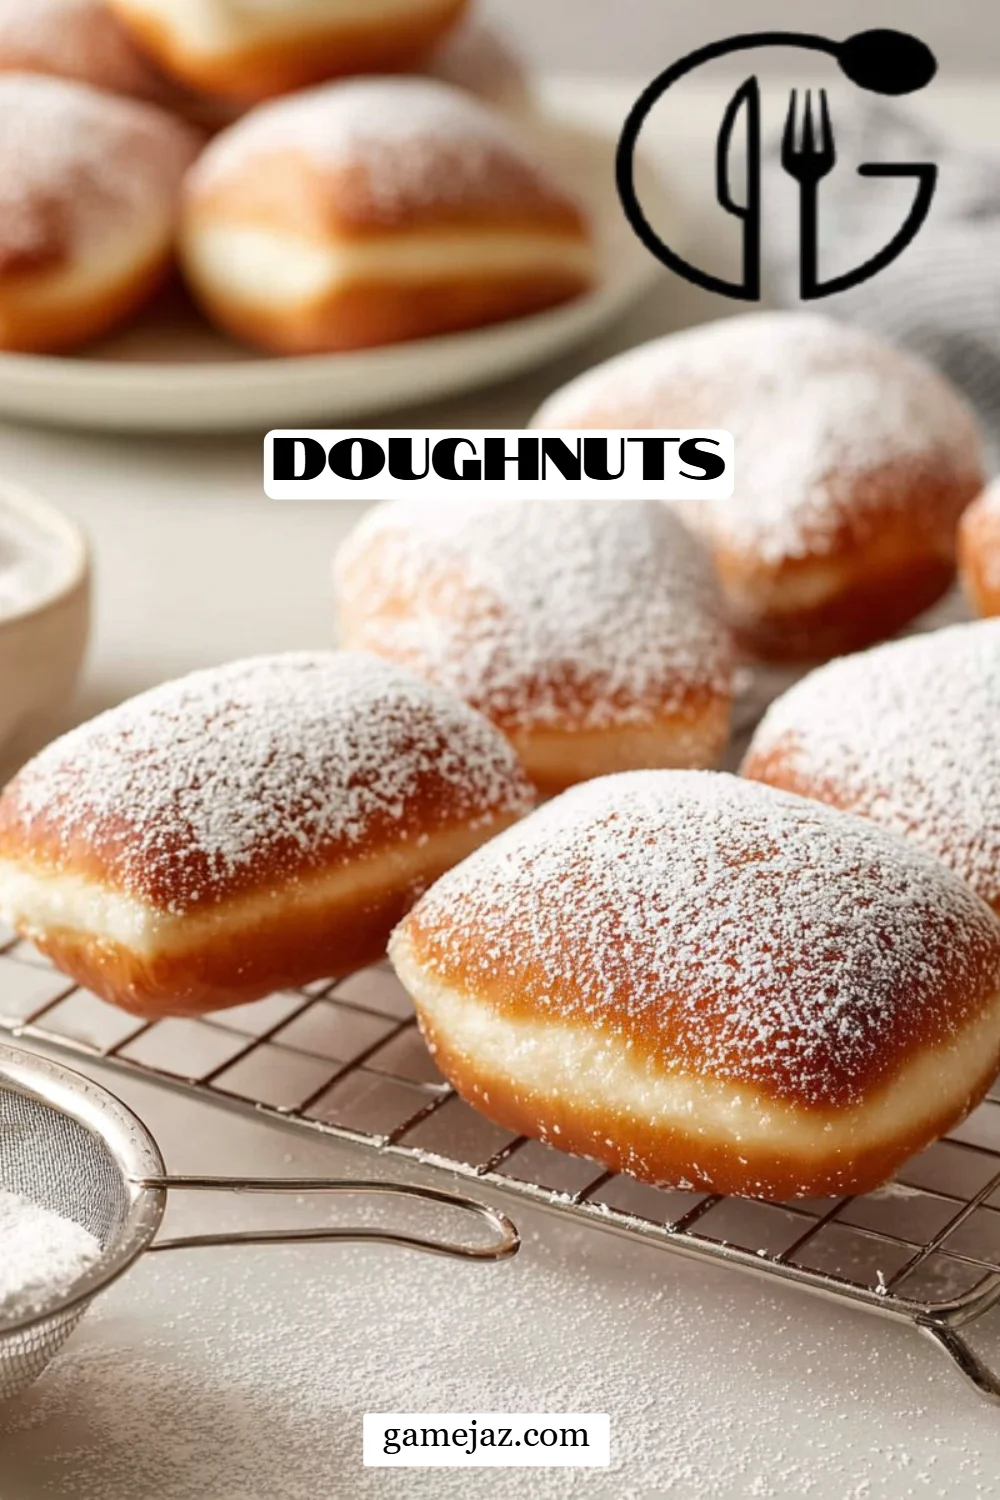
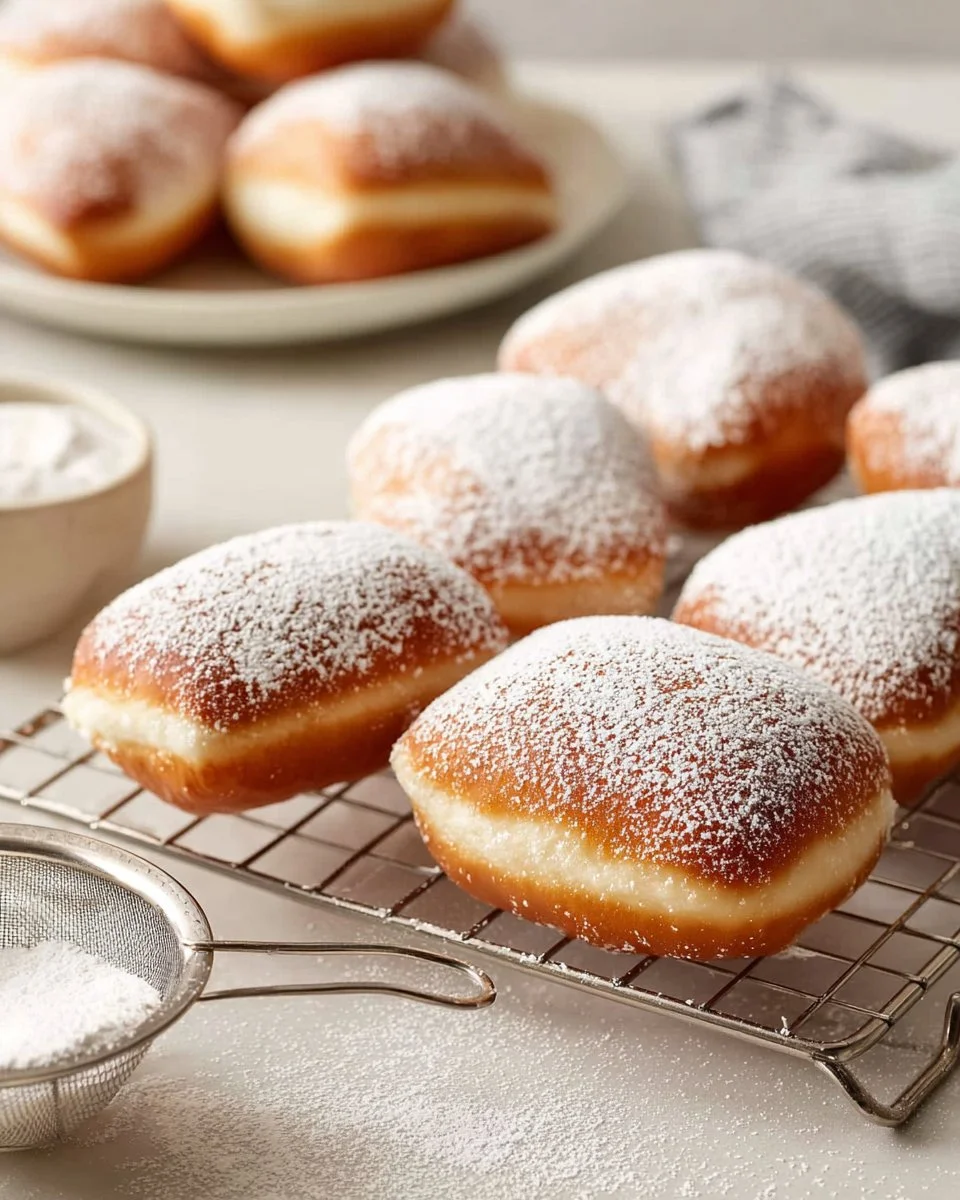
Dust with sugar: Place the cooked doughnuts on paper towels to absorb excess oil, then dust generously with confectioners’ sugar.
Alternative methods: For oven-baked doughnuts, allow shapes to rise again, preheat oven to 350°F, brush with milk, and bake for 12-15 minutes. Or for air fryer method, place doughnuts in a single layer, cooking at 350°F for 2-3 minutes before dusting with sugar.
Chef’s Tips:
- Watch your doughnuts closely while frying—they can go from golden to burnt in seconds.
- If they don’t rise properly, your yeast may be expired or the water too hot/cold.
Expert Tips & Tricks
Optimal Rising Location: For the best rise, turn your oven on, then switch it off and place your covered bowl inside. The residual heat provides a cozy environment for dough growth.
Flavorful Enhancement: Consider adding vanilla extract or a splash of almond extract to your wet ingredients for a flavor boost.
Storage Solutions: Store leftovers in an airtight container at room temperature for up to 2 days or in the fridge for up to a week. For longer storage, consider freezing them—just pop them in an airtight bag.
Make-Ahead Options: You can prepare the dough in advance and refrigerate it overnight. Just let it come to room temperature before shaping!
Troubleshooting tips: If your dough is too sticky, sprinkle in a bit more flour. If too dry, add a tablespoon of milk at a time until it comes together.
Personalization: Don’t hesitate to play with toppings—try melted chocolate, coconut flakes, or even a sprinkle of sea salt for savory-sweet glory!
Serving Suggestions
These fluffy doughnuts are perfect on their own, but they also lend themselves beautifully to be served alongside a steaming cup of coffee or a flavored latte. For special occasions, plate them up with fresh berries and whipped cream, or fill them with homemade jam for a delightful surprise.
They can elevate a simple gathering or a casual Sunday brunch and are even a fun option as a dessert at birthday parties—who doesn’t love doughnuts?
Variations & Substitutions
- Cinnamon Sugar Twist: Before dusting with confectioners’ sugar, roll your doughnuts in a mixture of cinnamon and granulated sugar. A classic favorite!
- Seasonal Treats: For fall, consider adding pumpkin puree to the dough for pumpkin-spiced doughnuts or peppermint flavoring around the holidays for festive flair.
- Gluten-Free Option: You can substitute all-purpose flour with a gluten-free flour blend, ensuring you’re also using gluten-free yeast.
Nutrition & Storage Info
- Prep time: 30 minutes
- Cook time: 15-20 minutes
- Total time: Approximately 3 hours (including rising time)
- Yield: About 12 doughnuts
- Estimated calories per serving: About 200 calories (varies based on toppings)
- Storage Instructions:
- Room temperature, in an airtight container for up to 2 days
- Refrigerate for up to 1 week
- Freeze for up to 2 months
FAQ Section
Can I use instant yeast instead of active dry yeast?
Yes! Just mix it directly into your dry ingredients without proofing.What if my dough isn’t rising?
Check if your yeast is fresh, ensure the water was the right temperature, and let the dough sit in a warm environment.Can I make these doughnuts without frying?
Absolutely! You can bake them in the oven or use an air fryer for a healthier option.What are some good toppings for doughnuts?
Some favorites include chocolate glaze, sprinkles, or even a simple vanilla icing. Get creative!How do I avoid greasy doughnuts?
Make sure the oil is heated properly before adding dough, and drain the doughnuts on paper towels after frying.Can I double the recipe?
Of course, just make sure you use a large enough bowl for the dough to rise!How do I fill doughnuts with jam or cream?
Use a piping bag to inject your filling into the doughnut after frying.What can I do with leftover dough?
You can re-ball and roll it out to make more doughnuts or bake them as mini muffins.How can I keep doughnuts crispy?
Store them in a single layer or line with parchment paper to avoid sogginess.Can I use non-dairy substitutes?
Sure! Use almond or oat milk and vegan butter for a dairy-free version of this recipe.
Conclusion
Making doughnuts from scratch is a rewarding experience, filled with the delight of rich flavors and cherished memories. Each bite is not just about satisfying a sweet craving; it’s about embracing the tradition of gathering around food and creating joy. I encourage you to try your hand at this easy-to-follow recipe—trust me, your taste buds will thank you!
Don’t forget to share your creations in the comments below; I’d love to hear how your doughnuts turned out and any unique twists you added. And for more scrumptious treats, check out my other related recipes on the blog.
Happy baking!

Fluffy Doughnuts
Ingredients
Method
- In a medium bowl, whisk together the lukewarm water, sugar, and yeast. Let it sit for about 5-10 minutes until it becomes foamy.
- Add the milk and egg to the yeast mixture and whisk to combine.
- In a stand mixer, combine flour and salt. Pour in the yeast mixture and add softened butter, mixing until just combined.
- Knead the dough for 2-3 minutes on low speed until smooth and elastic.
- Transfer the dough to a greased bowl, cover with plastic wrap, and let rise in a warm place until doubled (about 1-2 hours).
- Roll out risen dough to about 1/2 inch thickness and cut into shapes.
- Heat vegetable oil to 360°F in a large pot.
- Fry the dough in batches for about 30 seconds on each side until golden brown.
- Drain on paper towels and dust with confectioners’ sugar.
- For oven-baked doughnuts, allow shaped dough to rise again, preheat oven to 350°F, brush with milk, and bake for 12-15 minutes.
- For air fryer doughnuts, cook at 350°F for 2-3 minutes before dusting with sugar.