Delish and Easy Chia Seed Jam: Your New Favorite Spread!
It was one of those cozy Sunday mornings when the sun peeked through the kitchen window, illuminating my cluttered countertop filled with jars and fruits. I had a mountain of fresh seasonal berries sitting on my counter, leftover from the farmers’ market, and a craving for something both delicious and healthy was nipping at my heels. That’s when the idea hit me—why not whip up a batch of vibrant Chia Seed Jam?
This recipe has become a staple in my family’s kitchen not just for its mouthwatering taste but also for the memories it conjures. I remember making it with my grandmother; her secret was to let the jam sit and thicken, bringing out the best flavors. This isn’t just any jam; it’s versatile, nutrient-dense, and can easily replace sugary store-bought versions. With a handful of ingredients and a sprinkle of love, this Chia Seed Jam is a testament to the beauty of simple pleasures.
In this post, you’ll learn how to craft this delightful spread in minutes, tailor it to your taste, and savor the joy of healthier eating without sacrificing flavor. Trust me; once you try it, you’ll never look back!
What are Chia Seed Jams?
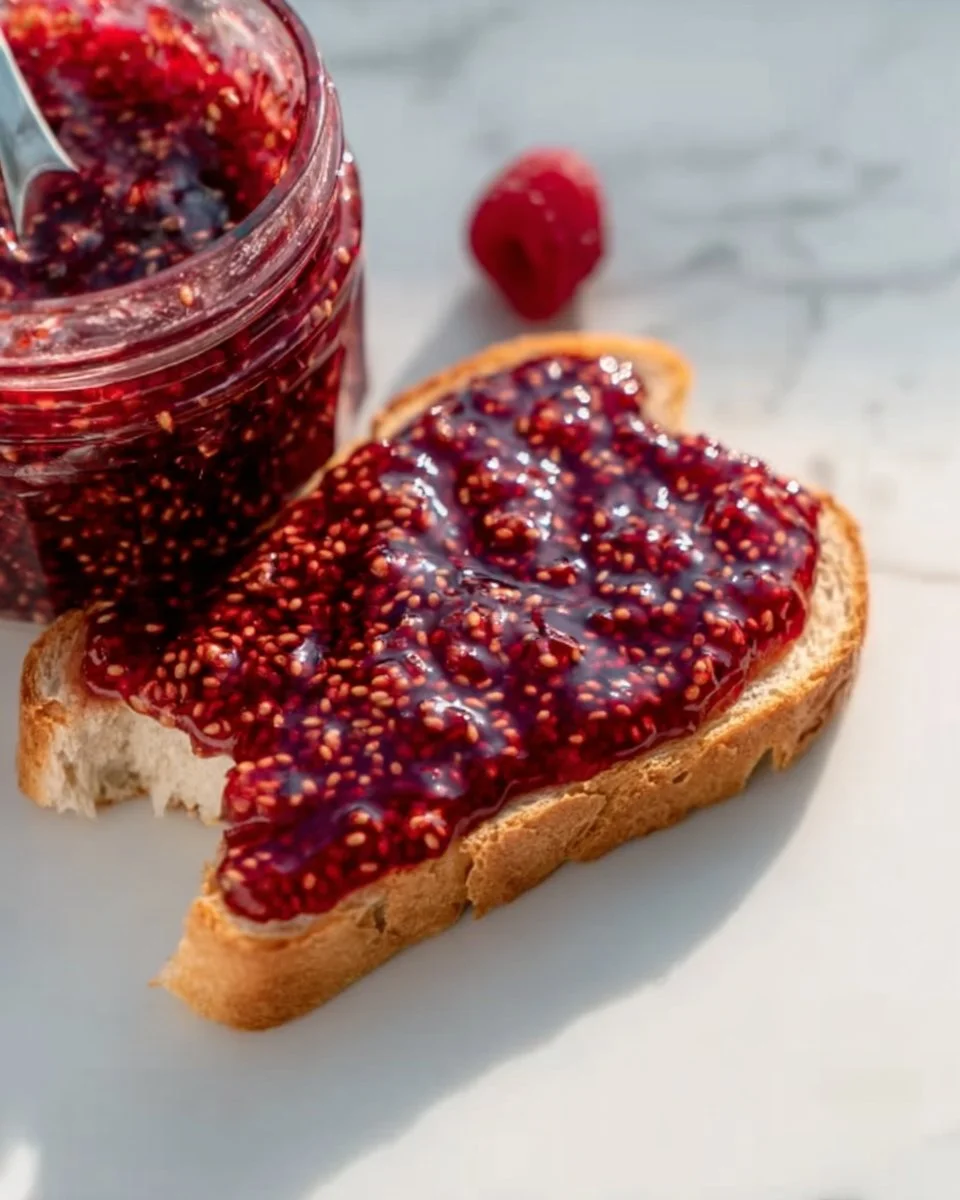
Originating from the nutritious seeds of the Salvia hispanica plant, Chia Seed Jam has taken the culinary world by storm. The seeds swell when mixed with liquid, creating a gel-like texture that mimics traditional jam but with a superfood twist! It combines the natural sweetness of your choice of berries with the slightly nutty flavor of chia seeds, resulting in an enjoyable treat that’s bursting with fresh flavor.
The texture is incredibly unique; it’s both gooey and thick, perfect for spreading on toast, dolloping atop yogurt, or adding to smoothies. It’s also incredibly versatile—you can tailor the sweetness to your liking, or mix in your favorite spices for a personalized flavor.
Whether it’s a lazy weekend brunch or a vibrant addition to your meal prep, making Chia Seed Jam is not just a good idea, it’s an adventure in taste and health that you won’t want to miss!
Why You’ll Love This Recipe
Healthier Lifesaver: Unlike store-bought jams loaded with refined sugars and preservatives, my Chia Seed Jam is packed with nutrients! Chia seeds are a rich source of omega-3 fatty acids, fiber, and protein, making this treat guilt-free.
Customize Your Creation: One of the best parts? You can switch up the berries based on what you have on hand or your mood! Strawberries, blueberries, raspberries, or a fun mix—each brings a unique flavor and sweetness!
Budget-Friendly: Making jam at home is significantly cheaper than buying organic varieties from the store. A pint of quality Chia Seed Jam will cost you a mere fraction of store prices.
Simple and Quick: This isn’t a complicated recipe that takes hours; it comes together in under 30 minutes. Perfect for beginners and seasoned cooks alike!
Perfect for Meal Prep: Once you get the hang of it, make batches ahead of time to enjoy throughout the week. It keeps well in the fridge and can even be frozen!
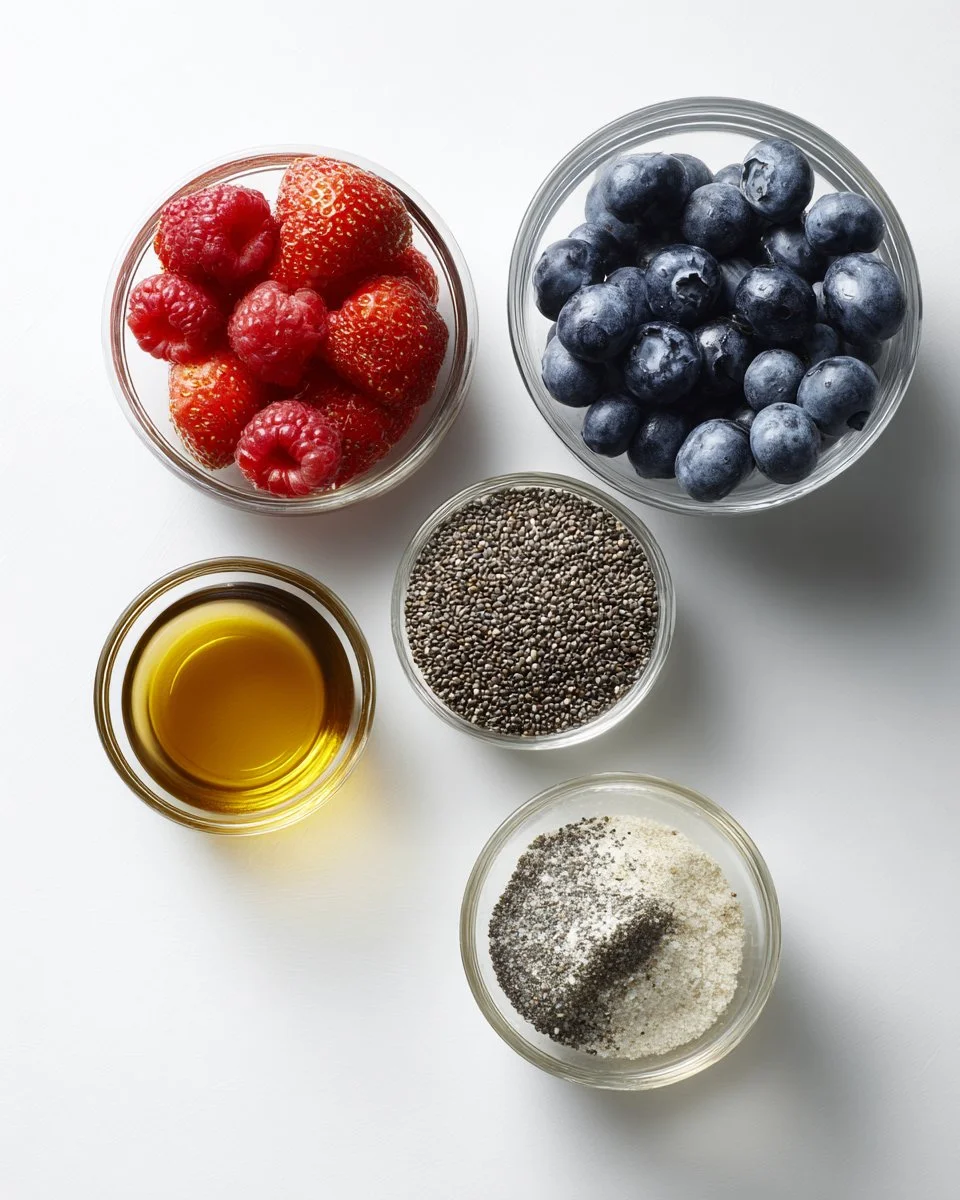
Ingredients
1 cup berries (fresh or frozen): Choose what you love! Strawberries, blueberries, raspberries, or a medley make fantastic jams. Feel free to experiment with seasonal options!
2 tablespoons chia seeds: Chia seeds are essential; they work their magic by absorbing liquid and creating that luscious texture. Look for organic brands for the best quality, such as Nutiva or Healthworks.
1-2 tablespoons maple syrup (to taste): This adds a natural sweetness. Depending on the tartness of your berries, adjust the sweetness to taste. You can also use honey or agave syrup as alternatives.
Prep Notes: If using frozen berries, allow them to thaw slightly beforehand for easier cooking.
Step-by-Step Instructions
Start Cooking the Berries: In a medium saucepan over medium heat, add the berries. Cook for about 5-7 minutes, stirring occasionally until they begin to break down. You’ll know they’re ready when they start releasing their juices and breaking apart.
Chef’s Tip: If you want chunkier jam, mash them less; for smoother jam, mash them more!
Mash the Berries: Remove from heat and gently mash the berries with a fork or potato masher but leave some small pieces for texture.
Stir in Chia Seeds and Sweetener: Sprinkle in the chia seeds and drizzle the maple syrup. Stir well until everything is mixed evenly, and you see the little seeds suspended in the berry mixture.
Let It Thicken: Let the mixture sit for about 10-15 minutes. The chia seeds will absorb the excess liquid and thicken the jam beautifully. You can give it a little stir halfway through.
Transfer and Chill: Once thickened, transfer the jam to a clean jar. Seal it tightly and store it in the fridge. It can last up to two weeks (though it usually doesn’t last that long in my house!).
Expert Tips & Tricks
Storage: Store your Chia Seed Jam in an airtight container in the refrigerator. It should last up to two weeks. For longer storage, you can freeze portions in ice cube trays and pop them out as needed!
Make-Ahead Instructions: Feel free to prepare it in advance for the week ahead. It’s an absolute lifesaver for breakfast and snacks.
Troubleshooting: If your jam isn’t thickening, allow it to sit a bit longer or add an extra teaspoon of chia seeds for good measure!
Flavor Infusion: For a fresh twist, consider adding a splash of vanilla extract or a sprinkle of cinnamon while cooking your berries!
Serving Suggestions
Your delicious chia seed jam opens up a world of serving options! Here are some of my favorites:
Toast: Spread it thick on whole-grain or sourdough toast for breakfast—add a dollop of cream cheese for extra indulgence!
Yogurt Parfaits: Layer it with your favorite yogurt and granola for a stunning breakfast or snack.
Pancakes/Waffles: A spoonful of Chia Seed Jam atop your pancakes or waffles can bring your brunch to the next level!
Dessert Finisher: Spoon over cheesecake or panna cotta for an elegant dessert presentation.
Variations & Substitutions
Flavor Combinations: Get creative! Mix strawberries and basil for a unique taste, or blueberries with lemon zest for a refreshing twist.
Dietary Adaptations: This recipe is naturally vegan and gluten-free. If you’re looking for a lower-sugar version, consider using mashed banana or stevia instead of syrup.
Seasonal Variations: Come summer, try peaches and mint, and in fall, you can’t go wrong with pear and ginger!
Nutrition & Storage Info
- Prep Time: 10 minutes
- Cook Time: 10 minutes
- Total Time: 20 minutes
- Yield: About 1 cup (4 servings)
- Estimated Calories: 50 kcal per serving
- Storage Instructions: Store in the refrigerator for up to 2 weeks or freeze for longer-lasting freshness.
FAQ Section
1. Can I use frozen berries for chia jam?
Absolutely! Frozen berries work perfectly—just allow them a little extra cooking time to break down.
2. How thick should the jam be?
The jam thickens as it cools. If it’s too runny, let it sit for a bit longer or add more chia seeds.
3. Can I adjust the sweetness?
Yes! Feel free to add more or less maple syrup based on your taste preferences.
4. Is this jam suitable for canning?
While Chia Seed Jam can be preserved in the fridge for about two weeks, for canning purposes, it’s best to use proper canning techniques to ensure safety.
5. Can I mix different fruits together?
Definitely! Mixing fruits like strawberries and kiwi creates vibrant flavors and beautiful colors in your jam.
6. Can I make Chia Seed Jam with other sweeteners?
Sure! Honey, agave syrup, or coconut sugar can all be substituted for maple syrup.
7. What do I do if I have leftover jam?
You’re unlikely to have leftovers, but if you do, it can be frozen in small portions for later use!
8. Will my kids like this jam?
Kids love it! It’s sweet, flavorful, and colorful—perfect for their breakfast or snacks.
9. How can I use Chia Seed Jam in baking?
Feel free to use it as a filling in pastries or as a topping on cupcakes and cakes!
10. Is this recipe suitable for diabetics?
While it’s lower in sugar than conventional jams, always consult a healthcare professional regarding dietary restrictions.

Conclusion
This Chia Seed Jam is truly special—not just for its taste, but for the memories associated with making it. It’s a simple recipe that invites creativity and health into your kitchen. I encourage you to dive in and try it out, experimenting with your favorite flavors. I’d love to hear how yours turned out! Share your thoughts or variations in the comments below, and don’t forget to check out my other delicious recipes on the blog for more kitchen inspiration. Happy jam-making!