Savory Delight: Cheddar Cheese Horseradish Cheese Ball Recipe
There’s something about the holiday season that makes me nostalgic for family gatherings. I fondly recall my grandmother in the kitchen, her hands mixing up a batch of her famous Cheddar Cheese Horseradish Cheese Ball. The aroma of sharp cheddar mingled with the peppery bite of horseradish wafting through the air was like a warm embrace, signaling that joyful times were ahead. These cheese balls became the staple of our family gatherings, always a crowd-pleaser and a conversation starter!
What makes my recipe special is that it balances the creamy texture of cream cheese with the robust flavors of aged cheddar and zesty horseradish. Unlike store-bought options, which can often feel bland or overly processed, this cheese ball brings a nostalgic home-cooked feel to any event (and trust me, your guests will notice the difference).
I’m excited to share my family’s cherished recipe with you. You’ll learn not only how to recreate this delightful Cheddar Cheese Horseradish Cheese Ball but also how to customize it to fit your preferences. Whether you’re hosting a holiday soirée or a weekend game night, this appetizer is sure to leave lasting memories—and maybe a few new family traditions along the way!
What Are Cheddar Cheese Horseradish Cheese Balls?
The Cheddar Cheese Horseradish Cheese Ball has its roots in classic American hors d’oeuvres, surfacing prominently at parties since the 1960s. A mixture of cream cheese, sharp cheddar, and horseradish, this tangy treat is both vibrant in flavor and easy to prepare. The taste is an enticing blend of creamy richness from the cream cheese and sharpness from the cheddar, all accented by the warm kick of horseradish that lingers just enough to make your taste buds dance.
This cheese ball is unique in the way it effortlessly marries robust flavor with comforting texture. Its versatility allows for enjoyment at various occasions, from formal gatherings to casual family game nights. I often whip it up when entertaining friends; it’s perfect for sharing and dipping, making it a quintessential appetizer.
Why You’ll Love This Recipe
- Bursting with Flavor: If you’ve ever purchased a store-bought cheese ball, you know they can lack that homemade taste. Here, the combination of sharp cheddar and zesty horseradish infuses each bite with incredible flavor that will keep your guests coming back for more!
- Cost-Effective: Making your own Cheddar Cheese Horseradish Cheese Ball is not only simple but also budget-friendly. The ingredients are pantry staples, and this recipe yields a generous amount, perfect for any gathering.
- Customization Options: Feel free to tailor the recipe to suit your taste! Want it spicier? Add more horseradish. Prefer milder flavors? Use a milder cheese. The possibilities are endless!
- Easy and Quick: This recipe requires only a few simple steps, making it achievable even for beginner cooks. In about 15 minutes of prep time, you can have this delicious dish in your fridge, ready to impress.
- Make-Ahead Friendly: Meal prep is always a win! You can easily make this cheese ball in advance and store it in the fridge for a day or two. Plus, it freezes perfectly if you’re planning for a future event.
{image_template}
Ingredients
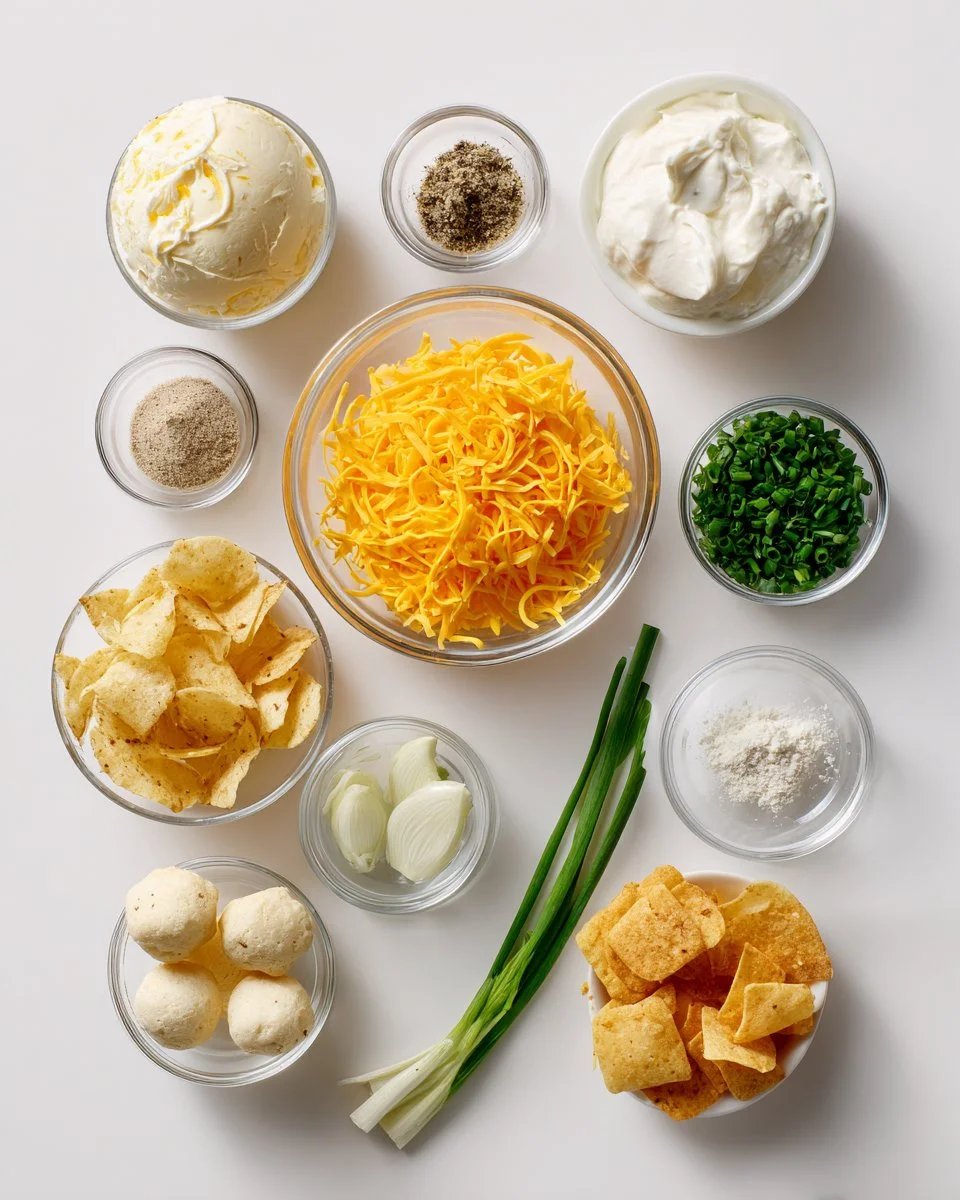
Here’s what you’ll need for your Cheddar Cheese Horseradish Cheese Ball:
- 8 oz cream cheese, softened: Room-temperature cream cheese will make it easier to blend with the other ingredients, giving you that smooth consistency.
- 2 cups sharp cheddar cheese, shredded: Aged cheddar works best; choose a good quality brand like Cabot or Tillamook for optimal flavor.
- 2-3 tbsp prepared horseradish: This gives your cheese ball that distinctive kick. Adjust to your preference!
- Salt, to taste
- Freshly ground black pepper, to taste
- Chopped fresh herbs (chives or parsley): These add freshness and a pop of color, plus you can use whatever herbs you have on hand.
- Assorted crackers, chips, and fresh vegetables for serving: Think crunchy and colorful—carrot sticks, bell pepper slices, or pita chips work beautifully!
Prep Notes:
- Ensure your cream cheese is at room temperature for easier mixing. You can set it out about an hour before you start or microwave it for 10 seconds for a quick fix (but don’t melt it!).
Step-by-Step Instructions
- Place the softened cream cheese in a mixing bowl. Ensure it’s really soft for easier blending.
- Add the shredded cheddar cheese and 2 tablespoons of prepared horseradish. If you’re feeling adventurous, this is the stage to taste and adjust the amount of horseradish.
- Mix with a sturdy spoon or hand mixer on low until smooth and evenly combined, scraping the bowl sides once or twice to incorporate everything nicely. This should take about 2-3 minutes.
- Taste and season with salt, pepper, and more horseradish if desired. It should have a kick without being overpowering.
- Shape the mixture into a ball or log using your hands or a small bowl to form it. If you prefer, you can also roll it in fresh herbs at this stage for extra flavor.
- Wrap tightly in plastic wrap and refrigerate for at least 1 hour to firm up. If you’re short on time, even 30 minutes will do, but longer yields better results.
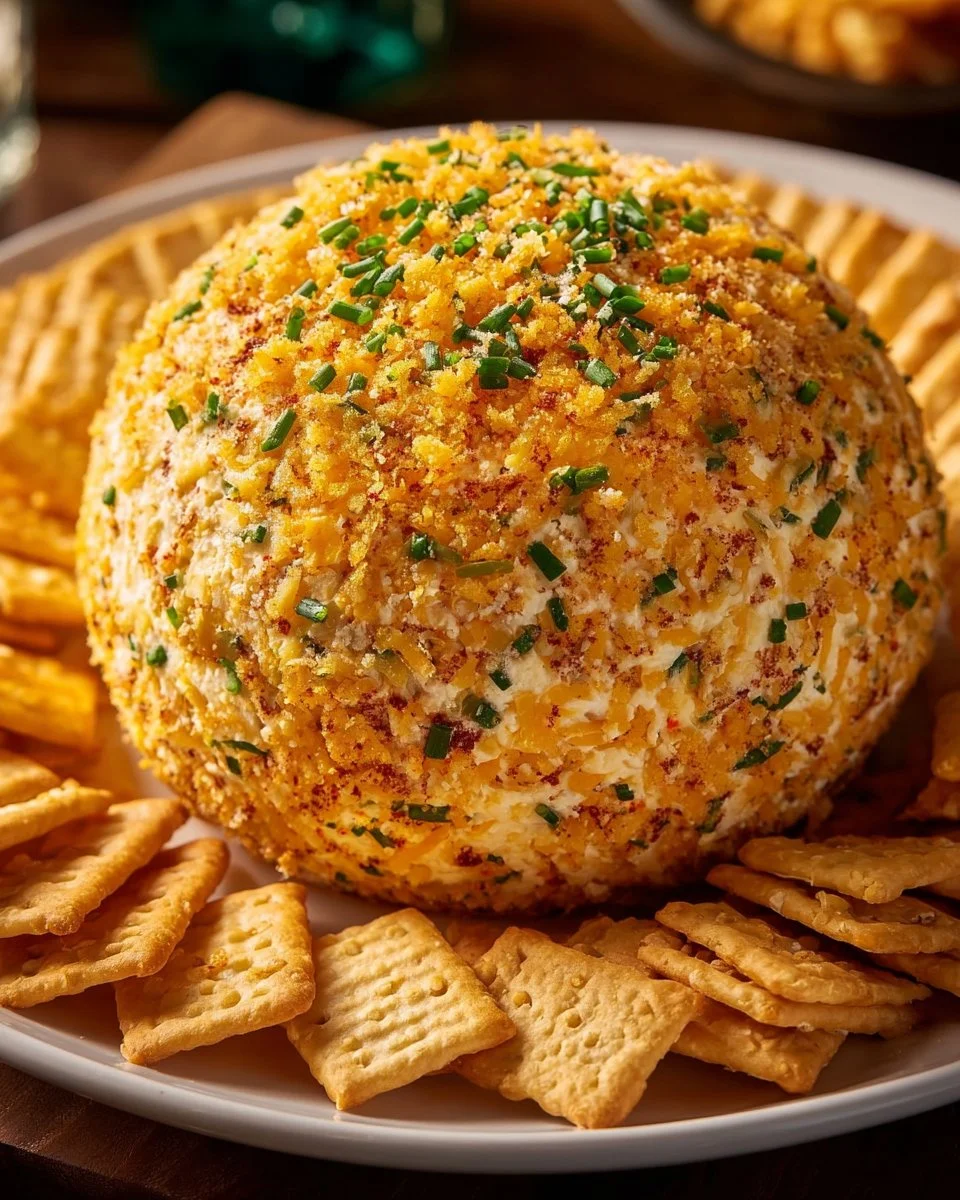
- Unwrap and place on a serving platter. The cheese ball should hold its shape beautifully and look inviting.
- Garnish with chopped chives or parsley and serve with assorted crackers, chips, and vegetable sticks for dipping. For a lighter version, consider using reduced-fat cream cheese and milder cheddar.
Pro Tip: You can freeze the shaped cheese ball for up to 1 month. Simply let it thaw in the fridge overnight before serving!
Expert Tips & Tricks
- Quality Ingredients Matter: For the best results, use high-quality cheese. Cheddar should be sharp and flavorful. For herbs, fresh is always better than dried.
- Customize Flavors: Explore different cheese combinations, like pepper jack for heat or feta for a tangy twist.
- Make-Ahead Wonder: Craft your cheese ball a day prior to your event and let it chill in the fridge, allowing the flavors to meld together beautifully.
- Troubleshooting: If your mixture seems too wet, try adding a bit more cheese or even some finely chopped nuts for texture.
- Storage Recommendations: Keep leftovers tightly wrapped in the fridge for up to one week.
Serving Suggestions
This cheese ball is incredibly versatile and pairs wonderfully with various accompaniments. Serve it alongside a vibrant charcuterie board, or present it with an array of colorful veggie sticks for a refreshing crunch. For a festive touch, use holiday-themed platters or garnishes like edible flowers. It’s a perfect addition to tailgates, holiday parties, or even a cozy movie night at home!
Variations & Substitutions
- Spicy Twist: Add in crushed red pepper flakes or diced jalapeños for an extra kick.
- Herb Variants: Try switching out herbs according to the season—basil in summer or rosemary in fall.
- Vegan/Dairy-Free: Use vegan cream cheese and nut-based cheese alternatives for a delectable vegan option.
Nutrition & Storage Info
- Prep Time: 15 minutes
- Chill Time: 1 hour
- Total Time: 1 hour 15 minutes
- Yield: Approximately 8 servings
- Estimated Calories: About 150 calories per serving (varies with serving sizes and specifics)
Storage Instructions:
- Room Temperature: For no more than 2 hours during serving.
- Fridge: Sealed for up to 1 week.
- Freezer: Can be frozen for up to 1 month. Thaw overnight in the fridge.
FAQ Section
- Can I use different types of cheese? Absolutely! Feel free to experiment with your favorites, but do keep an eye on the creaminess and flavor intensity.
- How long does it last in the fridge? Properly stored, it should stay fresh for about a week.
- Can I make it spicy? Yes! Adding more horseradish or even spices like cayenne pepper can kick up the heat.
- What can I serve with it? Great options include crackers, fresh veggies, or even pretzel chips!
- Can I use low-fat ingredients? Certainly! Reduced-fat cream cheese and cheese alternatives will work well, but the flavor may vary slightly.
- Is it okay to freeze? Yes! This cheese ball freezes well; just wrap it tightly and thaw in the fridge when ready to serve.
- What if my cheese ball is too soft? If it’s too soft to shape, consider chilling it for a little while longer to firm it up.
- Can I add nuts or fruits? Absolutely! Chopped nuts or dried fruits can add delightful texture and flavor too.
- What kind of herbs are best? Chives, parsley, and dill are excellent choices. Go for fresh as they provide brighter flavors.
- Can I double the recipe? Yes! Just adjust your mixing bowl size accordingly to accommodate the extra ingredients.
Conclusion
This Cheddar Cheese Horseradish Cheese Ball is more than just a recipe; it’s a heartfelt way to connect with loved ones over food that sparks joy and nostalgia. I encourage you to try making it and savor the moments you share around the table. I would love to hear your thoughts and experiences, so feel free to drop a comment. And don’t forget to check out my other festive recipes to keep the celebration going! Happy cooking!
{image_template}

Cheddar Cheese Horseradish Cheese Ball
Ingredients
Method
- Place the softened cream cheese in a mixing bowl and ensure it's very soft for easier blending.
- Add the shredded cheddar cheese and 2 tablespoons of prepared horseradish. Taste and adjust the amount of horseradish.
- Mix with a sturdy spoon or hand mixer on low until smooth and evenly combined, about 2-3 minutes.
- Taste and season with salt, pepper, and more horseradish if desired.
- Shape the mixture into a ball or log, optionally rolling it in fresh herbs.
- Wrap tightly in plastic wrap and refrigerate for at least 1 hour.
- Unwrap and place on a serving platter. Garnish with chopped chives or parsley, and serve with assorted accompaniments.