The Ultimate Viennese Schnitzel: A Crispy, Golden Comfort Food Delight
There’s something magical about the aroma of freshly fried Viennese Schnitzel wafting through the kitchen. It takes me back to my childhood, where laughter and the clinking of cutlery mingled with the tender sound of my grandmother expertly frying breaded veal. Her secret recipe was an heirloom, handed down through generations, and every bite was a comforting reminder of family gatherings and shared stories around the dinner table. But what truly makes my version of Viennese Schnitzel special is the love and nostalgia infused into the cooking process.
You might wonder why my recipe stands out from the rest, and I assure you, it’s not just about the crunch; it’s about evoking those warm familial memories with every bite. The combination of perfectly pounded veal, a golden crust, and a squeeze of fresh lemon transports you back to those sun-kissed afternoons spent with loved ones.
In this blog post, I’ll share not just a recipe, but a way to recreate those tender moments filled with comfort and joy. You’ll learn how to prepare crispy, golden Viennese Schnitzel that’ll delight your taste buds and warm your heart. Let’s dive in and make some magic together!
What Are Viennese Schnitzel?
Viennese Schnitzel, known as “Wiener Schnitzel” in its native Austria, is more than just a dish; it’s a culinary experience with deep cultural roots. Traditionally made from veal, this iconic meal features thinly pounded meat that is seasoned, breaded, and fried to exquisite perfection. Imagine a thin, delicate cutlet that bursts with flavor and crunch – that’s what you’ll get when you try your hand at making an authentic Viennese Schnitzel.
The taste is a sublime harmony of savory, buttery, and slightly tangy flavors, while the texture offers a delightful contrast between the crispy exterior and the tender interior. It’s unique not only for its method but also for the quality of the ingredients used. The classic approach involves using clarified butter for frying, which enhances the richness of the dish and adds to that golden-brown allure.
So, why whip up a batch of these delightful schnitzels? Perfect for family dinners, festive gatherings, or even a cozy weeknight meal, they are sure to impress and satisfy any craving for comfort food.
Why You’ll Love This Recipe
Get ready to fall in love with my Viennese Schnitzel recipe for several compelling reasons:
- Authenticity in Every Bite: Unlike store-bought or restaurant versions that can be overly greasy or lack seasoning, my recipe ensures a perfectly seasoned cutlet wrapped in crispy breadcrumbs that will remind you of the resolute yet gentle touch of a family kitchen.
- Cost-Effective: Making Schnitzel at home is surprisingly budget-friendly! With just a few ingredients—like veal, flour, and eggs—you can create a spectacular dish that usually costs a fortune at restaurants.
- Customization Options: This recipe serves as a fantastic base. Want to spice things up? Add some Italian herbs to the breadcrumbs or try using pork or chicken instead of veal for a delightful twist.
- Ease of Preparation: If you’ve dabbled in cooking before, this recipe is straightforward yet rewarding. You’ll impress yourself and others without feeling overwhelmed. I promise you’ll have crispy schnitzels on your plate in less than an hour!
- Perfect for Any Occasion: Whether you’re hosting a holiday dinner or planning a cozy date night, Viennese Schnitzel makes for an elegant yet homey dish that pleases everyone. Pair it with a green salad or some roasted potatoes, and you have the ultimate meal.
Ready to discover how to bring this delightful dish to life? Let’s get cooking!
{image_template}
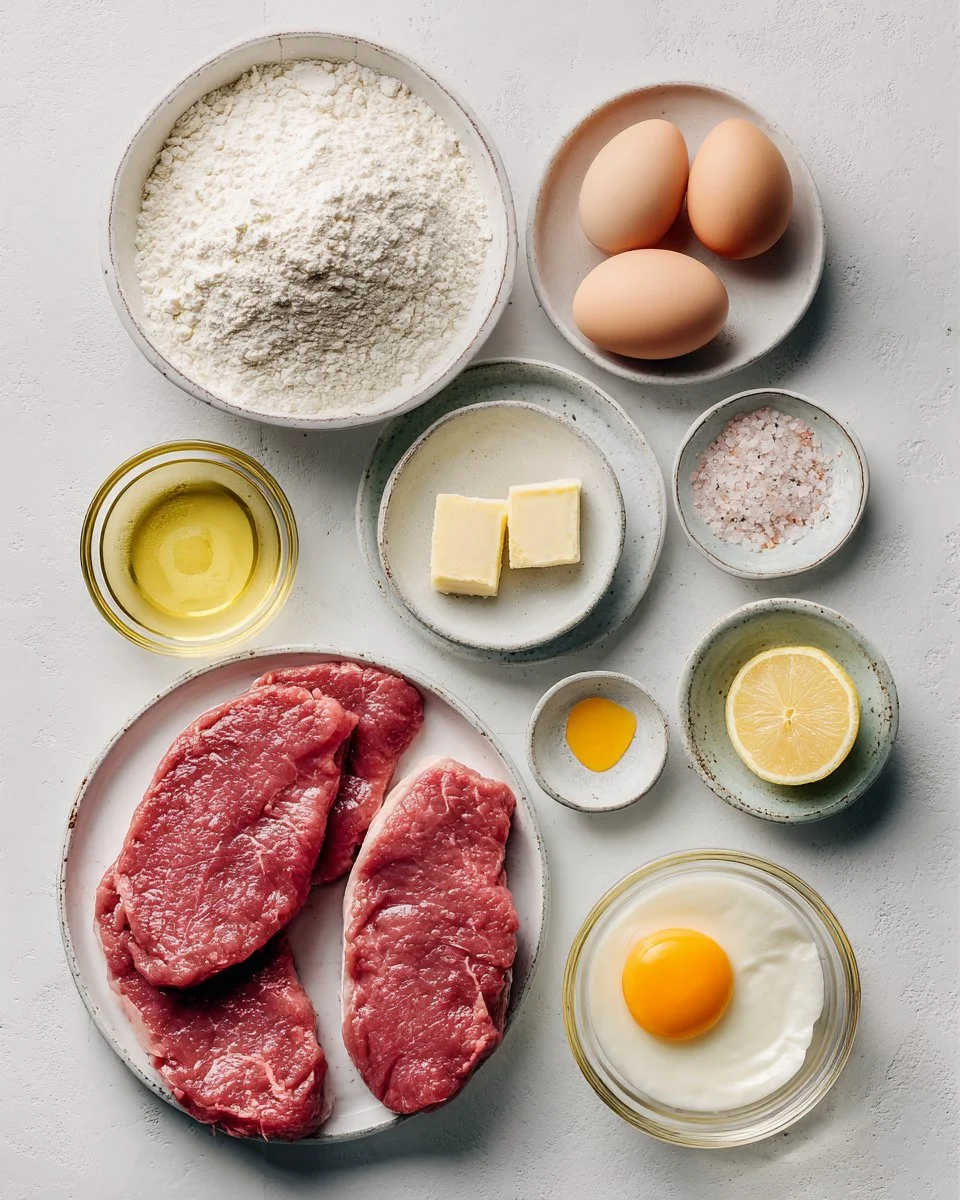
Ingredients
- 4 veal cutlets (about 150g each)
- 1 cup all-purpose flour
- 2 eggs, beaten
- 1 cup breadcrumbs (use fresh for the best crunch!)
- Salt and pepper to taste
- 1/2 cup clarified butter or oil for frying
- Lemon wedges for serving
Notes on Ingredients Quality:
- Veal: Look for high-quality, grass-fed veal for the best flavor and tenderness. If you can’t find veal, lean pork or chicken cutlets work surprisingly well.
- Bread Crumbs: Fresh breadcrumbs will give your schnitzel a crunchier coating than store-bought versions. If you’re feeling adventurous, try panko breadcrumbs for an extra crunch.
- Clarified Butter: This enhances both flavor and cooking temperature. If you can’t find it, good-quality vegetable oil will do the trick.
Prep Notes:
- Allow the veal to come to room temperature before cooking for even results.
- If using clarified butter, ensure it’s at a medium-high temperature before frying for that perfect golden-brown crust.
Step-by-Step Instructions
- Prep the Veal: Begin by placing a veal cutlet between two sheets of plastic wrap or parchment paper and pound it gently using a meat mallet or rolling pin. Aim for a thickness of about 1/4 inch. This will help the meat cook evenly and ensure a tender bite.
- Chef’s Tip: Use a light touch; you don’t want to tear the meat. Start from the center and work your way out for even thickness.
- Season: Generously season both sides of each cutlet with salt and pepper. Don’t skip on this—seasoning is key to flavor!
- Dredge: Create a dredging station with three shallow bowls. Place flour in the first bowl, beaten eggs in the second, and breadcrumbs in the third. Dredge each cutlet in flour, shaking off any excess. Then dip it in the beaten eggs, coating it well. Finally, roll it in breadcrumbs, pressing lightly to ensure an even coating.
- Common Mistake to Avoid: Make sure to shake off the excess flour; otherwise, the breadcrumbs won’t stick properly!
- Heat the Pan: In a large skillet, heat the clarified butter or oil over medium-high heat. To check if it’s hot enough, drop a few breadcrumbs into the oil; if they sizzle and turn golden brown quickly, you’re ready to go.
- Fry the Cutlets: Gently place the cutlets in the hot oil, being careful not to overcrowd the pan. Fry them for about 2-3 minutes per side, or until they reach a beautiful golden-brown color.
- Chef’s Tip: Use a slotted spoon to gently move them around for even cooking.
- Drain: Once cooked, transfer the schnitzels to a plate lined with paper towels to absorb any excess oil.
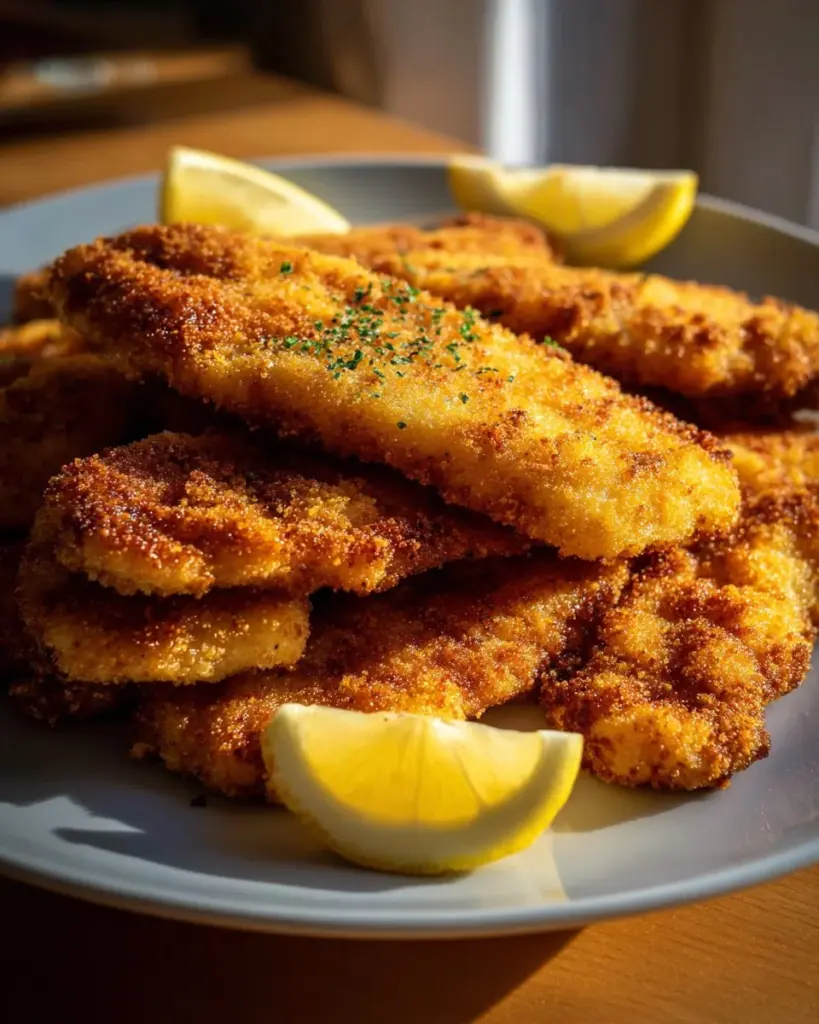
- Serve: Plate the schnitzels with fresh lemon wedges on the side. Squeeze some lemon juice over the top for that refreshing zing right before digging in!

Expert Tips & Tricks
- Storage Recommendations: Leftover schnitzel can be stored in the fridge for up to 2 days, covering it with foil to keep it from drying out. Reheat in a skillet over medium heat for that crispy goodness!
- Make-Ahead Instructions: You can prep the cutlets and breadcrumb them in advance. Store them laid out on a baking sheet in the fridge for up to 4 hours before frying.
- Troubleshooting Common Problems: If the schnitzel begins to brown too quickly, lower the heat slightly. If the breading is falling off during frying, make sure to dredge properly in flour and ensure both the egg and breadcrumbs are well-coated.
- Incorporating Flavors: Feel free to add grated Parmesan cheese to the breadcrumbs for an extra cheesy kicker or try some dried herbs for added flavor.
- Don’t Skip the Lemon: The citrus cuts through the richness of the schnitzel, elevating the overall flavor.
Serving Suggestions
Viennese Schnitzel pairs beautifully with a tangy potato salad, classic cucumber salad, or some simple roasted vegetables. For a festive touch, consider serving it with a side of creamy spaetzle or herby mashed potatoes.
Presentation Ideas:
- A sprinkle of fresh parsley over the top adds color.
- Serve with a side of homemade lingonberry jam for a touch of sweetness that complements the savory schnitzel beautifully.
This dish is perfect for family gatherings, holiday dinners, or simply when you’re craving some crispy comfort food.
Variations & Substitutions
Don’t be afraid to get creative with your schnitzel:
- Flavor Combinations: Add spices like paprika or garlic powder to the breadcrumbs for an extra kick.
- Dietary Restrictions: Make a gluten-free version by using almond flour or gluten-free breadcrumbs.
- Seasonal Variations: In the fall, consider a pumpkin-spiced version by adding nutmeg to your breadcrumb mixture!
Nutrition & Storage Info
- Prep Time: 10 minutes
- Cook Time: 15 minutes
- Total Time: 25 minutes
- Yield: 4 Servings
- Estimated Calories per Serving: 400-500 calories depending on the frying method.
Storage Instructions:
- Room Temp: Generally, schnitzel is best enjoyed fresh. However, can be kept at room temperature for up to 2 hours.
- Fridge: Once cooled, cover and refrigerate for up to 2 days.
- Freezer: Freeze the uncooked breaded schnitzels for up to 1 month. You can fry them straight from frozen; just add a couple of minutes to the cooking time.
FAQ Section
- Can I use chicken instead of veal?
- Absolutely! Chicken breasts work excellently and create a lighter schnitzel.
- How can I keep my schnitzel crispy after frying?
- Place them on a wire rack instead of a plate to allow air circulation.
- Can I make this in advance?
- Yes, you can prepare and bread the schnitzels in advance, but frying is best done just before serving.
- What oil is best for frying?
- Clarified butter is traditional, but vegetable oil or a mix of butter and oil can also work well.
- Why is my schnitzel not crispy?
- Ensure that your oil is hot enough and that you properly dredged the cutlet in flour, eggs, and breadcrumbs.
- Can I bake schnitzel instead of frying?
- While frying is traditional for that crispiness, baking is an option! Just coat with oil and bake at 400°F for 20-25 minutes.
- How do I know when the schnitzel is cooked?
- The internal temperature should reach 165°F when using chicken; for veal, it should be cooked through but still tender.
- What should I serve with schnitzel?
- It pairs excellently with a fresh salad, potato side dishes, or sauerkraut to balance the richness.
- Can I freeze leftover schnitzel?
- Yes, just store it in an airtight container. It’ll keep in the freezer for up to one month.
- How long do leftovers last in the fridge?
- They can be stored for up to 2 days in the refrigerator.
Conclusion
Recreating the comforting and delicious experience of Viennese Schnitzel at home has never been easier or more rewarding. With this guide, I hope you feel equipped to embark on your schnitzel-making journey, bringing joy to your kitchen and heart with every crunch. Try this recipe, share your thoughts, and let me know how it turned out! From family dinners to special occasions, this classic dish deserves a place on your table.
And if you’re interested in more comforting recipes, check out my blog for delightful offerings like creamy potato salad and tangy cucumber salad—a perfect complement to your Viennese Schnitzel! Happy cooking!
Viennese Schnitzel
Ingredients
Method
- Begin by placing a veal cutlet between two sheets of plastic wrap or parchment paper and pound it gently using a meat mallet or rolling pin to a thickness of about 1/4 inch.
- Season both sides of each cutlet generously with salt and pepper.
- Set up a dredging station with three shallow bowls. Place flour in the first bowl, beaten eggs in the second, and breadcrumbs in the third.
- Dredge each cutlet in flour, shaking off any excess, then dip in beaten eggs, and finally roll in breadcrumbs, pressing lightly for an even coating.
- In a large skillet, heat the clarified butter or oil over medium-high heat.
- When the oil is hot enough (you can check by dropping breadcrumbs in), gently place the cutlets in, avoiding overcrowding.
- Fry for about 2-3 minutes per side, until they are golden-brown.
- Transfer the schnitzels to a plate lined with paper towels to absorb any excess oil.
- Plate the schnitzels with fresh lemon wedges on the side and serve immediately.