Delightful Strawberry Thumbprint Cookies: A Sweet Journey to Nostalgia
There’s something magical about the smell of cookies wafting through the house, and for me, that warmth often comes from my beloved Strawberry Thumbprint Cookies. I remember as a child, nestled in the kitchen with my grandmother, watching her roll out the dough like it was a treasured secret. Those moments were not just about baking; they were about creating memories, and every cookie carried a piece of our shared laughter and sweetness.
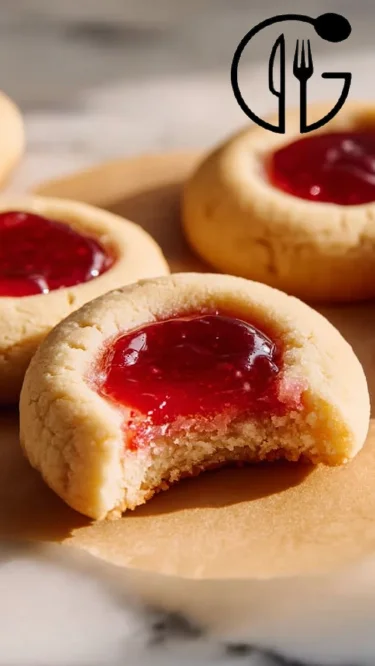
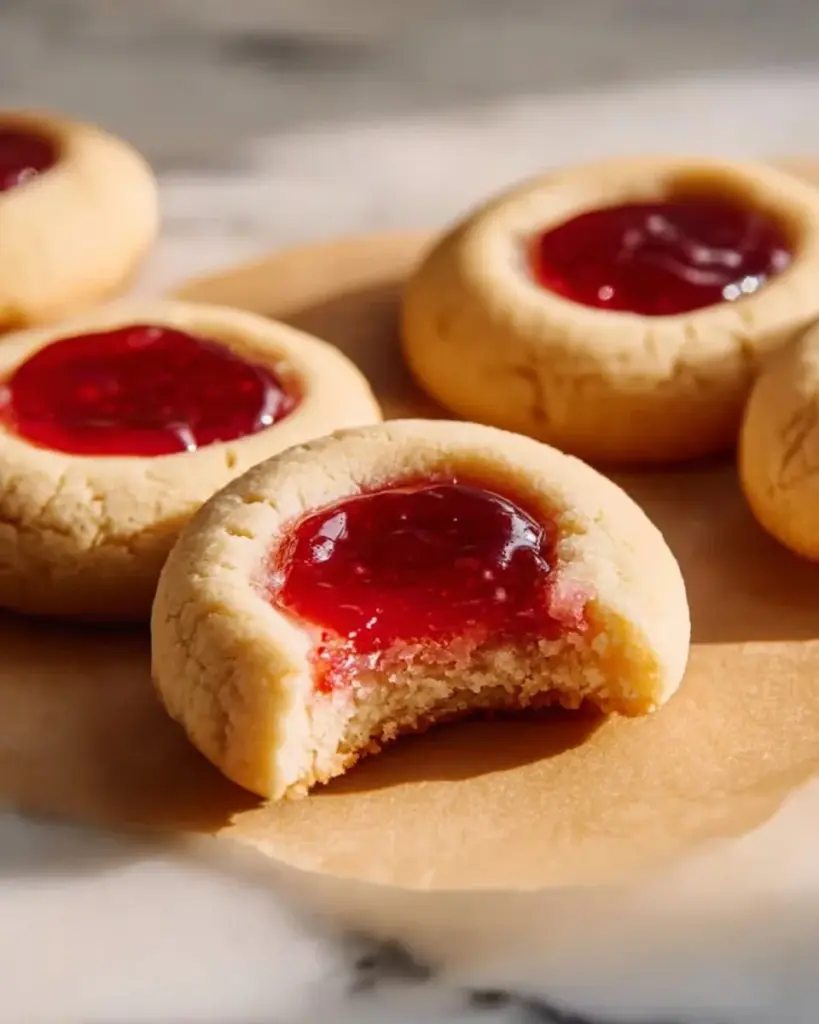
And let me tell you, these Strawberry Thumbprint Cookies are not your average treat. What makes them truly special is their soft, buttery texture paired with a burst of delicious strawberry jam in the center. Each bite is a delightful combination of melt-in-your-mouth goodness and fruity sweetness that simply dances on your palate. Unlike the store-bought options that often leave you unsatisfied, this recipe is made from quality ingredients, ensuring that each cookie is worthy of sharing (or keeping all to yourself!).
In this post, I’ll walk you through how to create your own unforgettable batch. You’ll learn the secrets to achieving the perfect texture, how to customize your flavors, and why this true classic deserves a place in your kitchen. So grab your apron, and let’s get started on making memories, one cookie at a time!
What Are Strawberry Thumbprint Cookies?
Strawberry Thumbprint Cookies have a charming story rooted in traditional baking. With origins tracing back to European cookie recipes, these delightful treats have captured the hearts and palates of many across generations. The concept is simple yet brilliant: a buttery cookie dough is formed into balls, then gently pressed with your thumb to make an impression, before being filled with fruity jam.
These cookies are a true treat for the senses: think of the tender, crumbly texture that melts in your mouth, contrasted with the vibrant, sticky sweetness of strawberry jam. It’s as if you’re savoring a moment of pure bliss because there’s something uniquely comforting about the familiarity of this classic.
They’re perfect for any occasion; whether it’s a holiday gathering, a casual afternoon tea, or simply a cozy evening at home—the joyful act of making (and enjoying) these cookies brings people together.
Why You’ll Love This Recipe
Homemade Goodness: Unlike store-bought cookies, these Strawberry Thumbprint Cookies are made from scratch with no preservatives. You know exactly what goes in, and the taste is out of this world.
Cost-Effective: Baking your own treats is not only rewarding but also kind on your wallet. With just a handful of pantry staples, you can whip up a batch that would cost much more at a bakery.
Customize to Your Heart’s Content: While this recipe calls for strawberry jam, the beauty of thumbprint cookies lies in their versatility. You can swap in your favorite preserves—think raspberry, apricot, or even lemon curd.
Easy to Make: If you’re new to baking, fear not! These cookies are beginner-friendly, and I’ll guide you every step of the way.
Perfect for Sharing: Whether you’re baking for friends, family, or a friendly neighborhood treat exchange, these cookies are a surefire way to impress. They look beautiful on a platter and taste even better than they look!
Ingredients Section
Before we dive into baking, let’s gather our ingredients. Here’s what you need for the most delightful Strawberry Thumbprint Cookies you’ll ever make:
- 2 cups all-purpose flour (I recommend using King Arthur Flour for consistent results)
- 1/2 teaspoon baking powder (ensure it’s fresh for the best rise)
- 1/4 teaspoon salt (don’t skip this; it enhances the cookie’s flavor)
- 1 cup unsalted butter, softened (room temperature for easy creaming; I love using Land O’Lakes)
- 3/4 cup granulated sugar (you can also use organic cane sugar)
- 1 large egg yolk (helps with richness; save the white for meringues!)
- 1 teaspoon vanilla extract (go for pure vanilla for the best flavor)
- 1/2 cup strawberry jam (look for a high-quality brand—homemade preserves work wonders!)
- Powdered sugar for dusting (optional, but adds a lovely finish)
Prep Notes: Make sure your butter is at room temperature—this makes it easier to cream with the sugar, resulting in a lighter texture.
Step-by-Step Instructions
Now that we have our ingredients ready, it’s time to bring them together and make some magic happen! Follow these easy steps:
Preheat your oven to 350°F (175°C). Line a baking sheet with parchment paper to prevent sticking.
In a bowl, whisk together flour, baking powder, and salt until well combined.
In a separate bowl, cream the softened butter and granulated sugar until light and fluffy—this usually takes about 3-4 minutes. You’ll know it’s ready when it looks pale and has increased in volume.
Beat in the egg yolk and vanilla extract until fully incorporated.
Gradually add the flour mixture to the butter mixture, mixing until just combined. Avoid over-mixing to keep your cookies tender.
Scoop tablespoon-sized balls of dough (using a cookie scoop is helpful) and place them on the lined baking sheet, leaving space between each.
Use your thumb (or the back of a teaspoon) to create an indentation in the center of each cookie.
Fill each indentation with strawberry jam, but avoid overfilling to prevent spills.
Bake for 12-15 minutes, or until the edges are lightly golden.
Allow the cookies to cool on the baking sheet for about 5 minutes before transferring them to a wire rack to cool completely.
(Optional) Dust with powdered sugar before serving for a beautiful touch!
Chef’s Tips:
- If you find the dough too sticky, chill it in the fridge for 30 minutes before shaping.
- Keep an eye on your cookies; all ovens vary slightly in temperature!

Expert Tips & Tricks
Want to make Strawberry Thumbprint Cookies like a pro? Here are some expert tips to ensure you get the best results:
Use Quality Ingredients: The better your ingredients, the better your cookies. Always opt for fresh, high-quality butter and jam.
Don’t Rush the Creaming Process: Creaming butter and sugar incorporates air, leading to a lighter cookie. Take your time with this step.
Adjust Baking Time: Depending on your oven, you may need to adjust the bake time slightly. Watch for golden edges and a slightly soft center; they will firm up as they cool.
Storage Recommendations: Store cookies in an airtight container at room temperature for up to a week. To freeze, layer them between sheets of parchment paper in an airtight container for up to three months.
Make-Ahead Instructions: You can make the dough ahead of time and refrigerate for up to 3 days before baking, making them even easier for spontaneous cravings.
Troubleshooting Common Problems: If your cookies spread too much, try chilling the dough before baking. If they are too dry, reduce the flour slightly next time.
Serving Suggestions
These Strawberry Thumbprint Cookies are delightful on their own, but you can elevate your serving experience with a few simple ideas:
- Pair these cookies with a warm cup of tea or coffee for a perfect afternoon pick-me-up.
- Present them on a beautiful platter at gatherings, dusted with powdered sugar for an elegant touch.
- They’re excellent for any occasion, from holiday parties to simple weekday treats. Serve them alongside a scoop of vanilla ice cream for dessert!
Variations & Substitutions
The beauty of Strawberry Thumbprint Cookies lies in their versatility:
Flavor Combinations: Swap strawberry jam for your favorite flavor like raspberry, blueberry, or even pumpkin spice for a seasonal twist!
Dietary Adaptations: For gluten-free options, use a 1:1 gluten-free flour blend. To make them vegan, substitute the butter with coconut oil and the egg with flaxseed meal.
Seasonal Variations: In the fall, consider adding a pinch of cinnamon to the dough, or for the holidays, try using orange marmalade instead of strawberry jam.
Nutrition & Storage Info
- Prep Time: 20 minutes
- Cook Time: 15 minutes
- Total Time: 35 minutes
- Yield: Approximately 24 cookies
- Estimated Calories per Serving: About 120 calories per cookie
- Storage Instructions: Store at room temperature in an airtight container for up to 1 week. You can also freeze the cookies for up to 3 months.
FAQ Section
Can I use other types of jam aside from strawberry?
Absolutely! Feel free to use any fruit preserves you enjoy, such as raspberry or apricot.Why did my cookies spread too much during baking?
If your cookies spread, it might be due to warm dough. Make sure to chill the dough before baking, especially in warmer weather.How can I ensure my cookies are soft and chewy?
Avoid overbaking! They should be slightly soft in the center when you take them out of the oven.Can I make the dough in advance?
Yes! You can refrigerate the dough for up to 3 days before baking.What should I do if my jam leaks during baking?
To prevent spills, don’t overfill the indentations. Always leave a little space at the edges.Is there a gluten-free version of this recipe?
Yes, simply substitute the all-purpose flour with a 1:1 gluten-free flour blend.Can these cookies be frozen?
Yes, these cookies freeze well! Layer them with parchment paper and store in an airtight container for up to three months.Why did my cookies turn out dry?
This could be due to over-measuring the flour. Always spoon the flour into your measuring cup and level it off.What’s the secret to perfect thumbs?
If you want clear impressions in your cookies, try dipping your thumb in a little flour before pressing!How can I add a decorative touch to my cookies?
You can drizzle melted chocolate over cooled cookies or use colored icing for a festive look!
Conclusion
I hope this recipe for Strawberry Thumbprint Cookies brings as much joy to your kitchen as it does to mine. There’s a kind of magic in making cookies from scratch, especially when they remind you of cherished memories. I encourage you to try this recipe and let it spark a new favorite tradition in your home.
Don’t forget to share your thoughts in the comments below—I love hearing about your baking adventures! And if you’re craving more sweet delights, be sure to explore other related recipes on the blog. Happy baking!
Strawberry Thumbprint Cookies
Ingredients
Method
- Preheat your oven to 350°F (175°C). Line a baking sheet with parchment paper to prevent sticking.
- In a bowl, whisk together flour, baking powder, and salt until well combined.
- In a separate bowl, cream the softened butter and granulated sugar until light and fluffy, about 3-4 minutes.
- Beat in the egg yolk and vanilla extract until fully incorporated.
- Gradually add the flour mixture to the butter mixture, mixing until just combined.
- Scoop tablespoon-sized balls of dough and place them on the lined baking sheet, leaving space between each.
- Use your thumb to create an indentation in the center of each cookie.
- Fill each indentation with strawberry jam, avoiding overfilling.
- Bake for 12-15 minutes, or until edges are lightly golden.
- Allow the cookies to cool on the baking sheet for about 5 minutes before transferring to a wire rack to cool completely.
- (Optional) Dust with powdered sugar before serving.