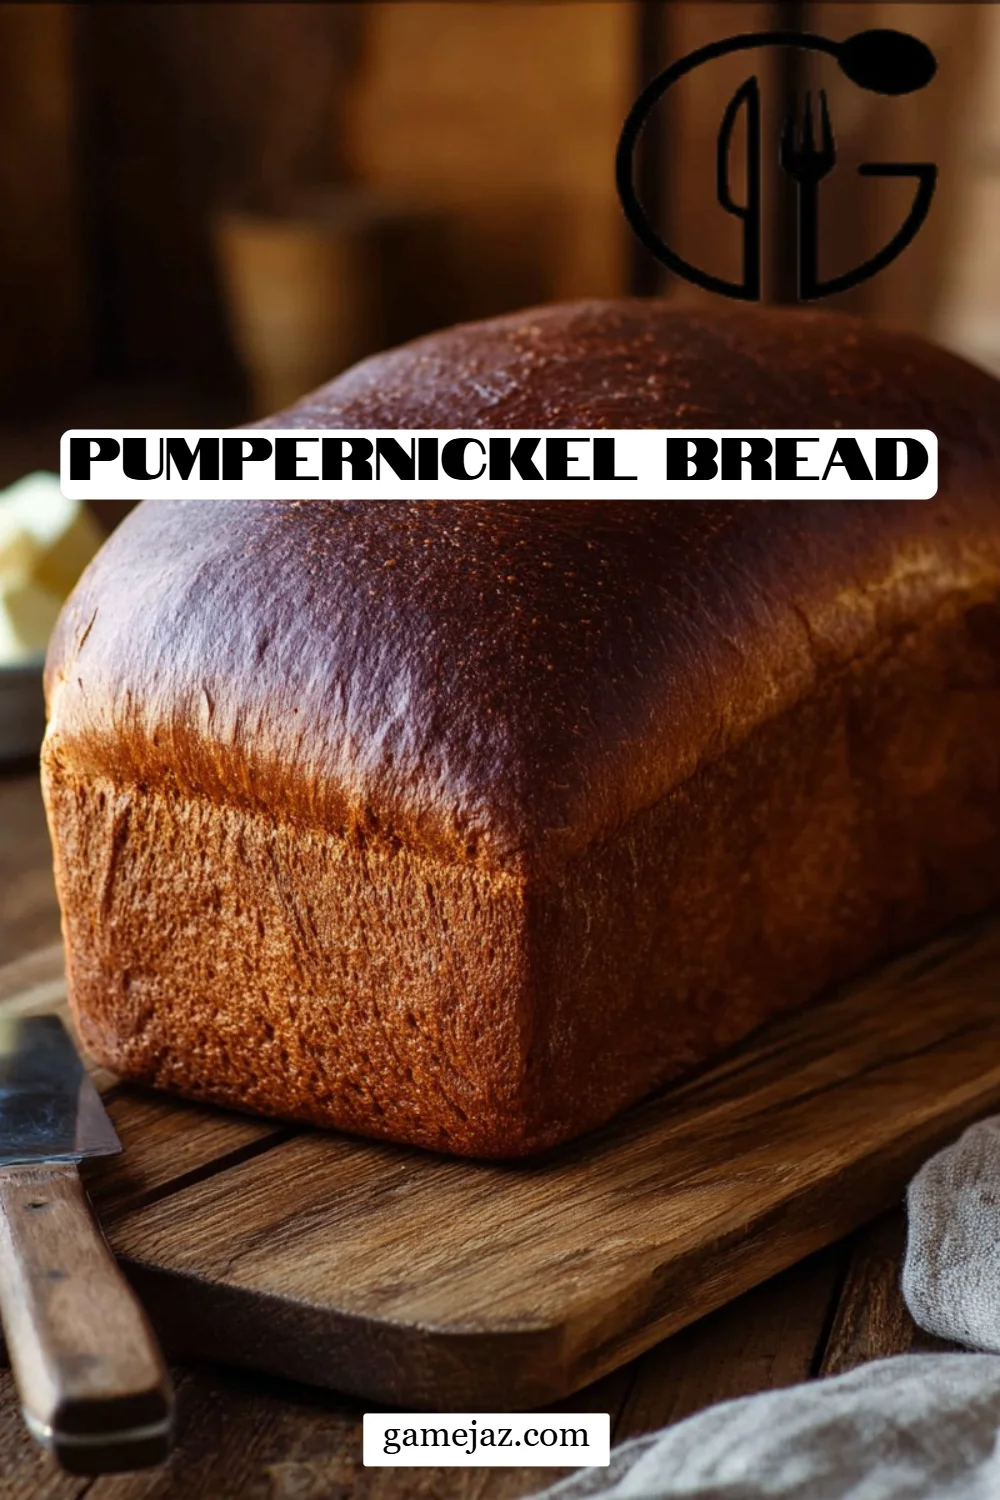
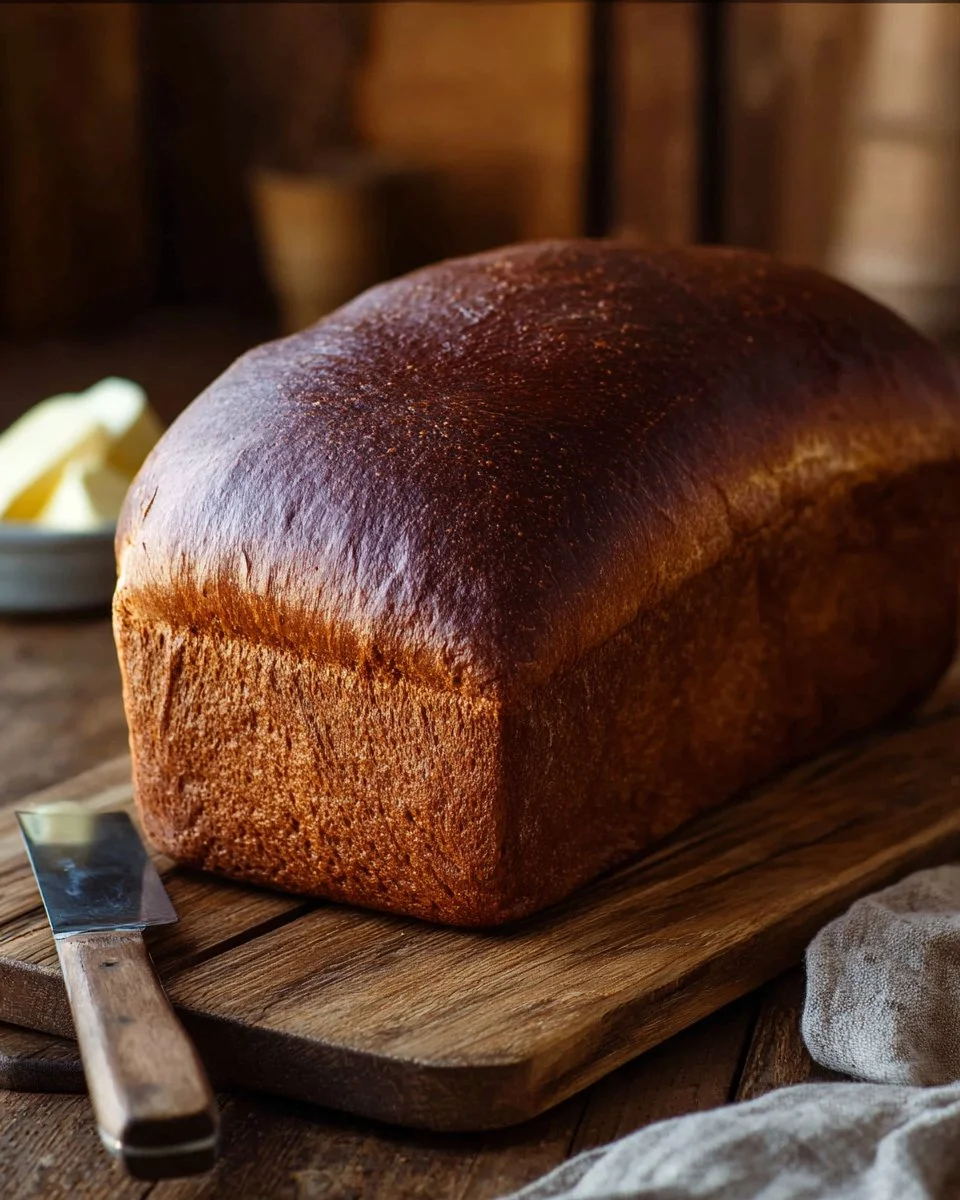
There’s something inherently comforting about the smell of fresh-baked bread wafting through the kitchen. Growing up in a family that cherished Sunday dinners, I can vividly recall my grandmother bustling about her kitchen, proudly pulling out a beautiful loaf of pumpernickel bread from the oven. The earthy aroma filled our home, mingling with the scent of simmering soups and roasted meats. Pumpernickel bread became our family’s special treat – its rich, dark color and unique flavor made it the perfect accompaniment to many meals.
You see, what makes my pumpernickel bread recipe so special is the perfect balance of flavors and textures that elevates it above store-bought options. With the addition of rye flour and a touch of molasses, the depth of flavor in this bread warms the heart, promising every bite is an experience. Unlike mass-produced versions that often sacrifice taste for convenience, this homemade version is truly baked with love.
In this post, I’ll share everything you need to know to create this artisanal treat in your own kitchen. You’ll learn about the ingredients, step-by-step instructions, and even some expert tips to ensure you nail it on your first try. So, roll up your sleeves and let’s get started!
What are Pumpernickel Bread?
Pumpernickel bread has a storied origin that dates back to Germany, where it was traditionally made from coarsely ground rye flour and baked slowly to achieve its dark color and unique flavor profile. The name “pumpernickel” itself is derived from the German words “pumpern” (to fart) and “Nickel” (a nickname for the devil), reflecting the bread’s hearty reputation.
The taste? It’s a delightful mix of slightly sweet and nutty, with a dense and moist texture that melts in your mouth. Pumpernickel is known for its rich flavors that come from the long baking process and the fermentation of the dough, which adds to its complexity. This bread is not only delicious on its own but pairs exceptionally well with cheeses, meats, and spreads.
Consider making pumpernickel bread for gatherings, holiday meals, or simply to elevate your everyday sandwiches. The unique flavor will impress your family and friends, making every meal feel special.
Why You’ll Love This Recipe
Homemade Goodness: This pumpernickel bread recipe allows you to enjoy the authentic taste of homemade bread that far surpasses store-bought varieties. Plus, there’s something rewarding about kneading dough and watching it transform into a loaf.
Cost-Effective: You’ll be amazed at how budget-friendly it is to bake your own bread. With simple ingredients, it’s less expensive compared to artisanal loaves at the bakery.
Customizable: The base recipe is incredibly versatile! You can easily add seeds, nuts, or even spices like caraway or fennel to tailor the flavors to your liking.
Quick and Simple: While the process might seem daunting, I promise it’s not! The total hands-on time is under 2 hours (includes rising and baking), making it manageable even for busy schedules.
Family Connection: Baking this pumpernickel bread can become a beloved family activity. I often involve my kids in the process – they love mixing the ingredients and shaping the dough, all while enjoying the warmth of togetherness.
Ingredients
Here’s what you’ll need for this delicious pumpernickel bread recipe:
- 2 1/2 cups all-purpose flour: For a stretchy, airy texture.
- 1 cup bread flour: This adds chewiness, which is essential for bread.
- 1 cup medium rye flour: The star of pumpernickel, bringing that authentic taste.
- 2 tablespoons unsweetened cocoa powder: Adds depth in flavor and color.
- 5 teaspoons instant yeast: Insures a good rise without lengthy proofs.
- 1 tablespoon granulated sugar: Helps feed the yeast and enhances flavor.
- 1 tablespoon kosher salt: Essential for balance and enhancing the natural flavors.
- 1 1/2 cups warm water (105°F to 115°F): This activates the yeast and starts the magic.
- 1/2 cup molasses: For that characteristic sweetness and depth of flavor.
- 2 tablespoons vegetable oil: Keeps the bread moist and adds richness.
Ingredient Quality and Substitutions
Using high-quality ingredients can make a difference in your bread. I recommend King Arthur Flour for the flours and Brer Rabbit or Grandma’s for molasses for that authentic taste. Ensure your yeast is fresh – it’s essential for a good rise.
If you need a gluten-free version, you can experiment with gluten-free flours, but note that pumpernickel’s unique taste and texture may require specific blends or xanthan gum for binding.
Prep Notes
Let’s ensure your ingredients are at room temperature before starting, particularly the water, as it’ll activate the yeast perfectly, ensuring that your loaf rises beautifully!
Step-by-Step Instructions
Prep the Pan: Spray a 9×5-inch loaf pan with nonstick cooking spray and set aside.
Mix Dry Ingredients: In a large bowl, whisk together all-purpose flour, bread flour, rye flour, cocoa powder, instant yeast, granulated sugar, and kosher salt.
Combine Wet Ingredients: In the bowl of a stand mixer fitted with a dough hook attachment, mix together the warm water, molasses, and vegetable oil.
Incorporate Dry to Wet: Gradually add the dry ingredients to the wet mixture, mixing on low speed until a dough forms (about 1-2 minutes).
Knead the Dough: Knead the dough for 5-8 minutes until smooth and elastic, or hand-knead for about 8-10 minutes on a floured surface.
First Rise: Place the dough in a clean oiled bowl, cover with a damp cloth, and let it rise in a warm place until doubled in size (60-90 minutes).
Shape the Dough: Roll out the dough on a lightly floured surface into a rectangle (about 10×14 inches).
Roll and Seal: Starting from the short end, roll the dough tightly to form a log and pinch the seams to seal well.
Second Rise: Place the rolled dough seam-side down into the prepared pan, cover, and let it rise until doubled (about 45 minutes).
Preheat the Oven: Preheat your oven to 375°F (190°C).
Bake the Bread: Bake for 50-55 minutes, until the bread sounds hollow when tapped.
Cool Down: Remove from the oven and cool completely on a wire rack before slicing. For optimal freshness, store at room temperature for up to 3 days or freeze for up to 8 weeks.
Chef’s Tips:
- Kneading long enough is crucial; the dough should feel elastic but not sticky.
- Use a thermometer to check your water temperature; it’s vital for proper yeast activation.
- Avoid overbaking; keep an eye on your bread during the last few minutes.
Expert Tips & Tricks
Storage Recommendations: Keep your fresh pumpernickel bread wrapped in plastic or in a bread box to maintain its moisture. It can last up to 3 days at room temperature, but I recommend slicing and freezing any leftovers for later.
Make-Ahead Instructions: Consider preparing the dough a day ahead and leaving it to rise overnight in the fridge for more developed flavors. Just let it come to room temperature and proceed with shaping and the second rise.
Troubleshooting: If your loaf doesn’t rise as expected, check that your yeast is fresh, and your water was warm enough but not too hot. Cold water can slow down the process, and hot water can kill the yeast!
Serving Suggestions
Pumpernickel bread is incredibly versatile! I love to pair it with creamy cheese spreads, hearty soups, or even savory meats for sandwiches. For a cozy evening, serve slices warm with a side of butter or homemade apple butter.
Presentation can be simple yet elegant. Consider slicing the bread in a rustic fashion, displaying it on a wooden cutting board with a small bowl of butter or olive tapenade for an inviting look.
This bread is your go-to for holiday gatherings, themed brunches, or simply a satisfying weeknight side.
Variations & Substitutions
Feeling adventurous? Here are a few ideas to customize your pumpernickel bread:
- Herb-Infused: Add chopped fresh herbs like dill or thyme for a unique flavor.
- Cheese Lovers’ Delight: Mix in shredded cheeses like cheddar or gouda into the dough for a cheesy twist.
- Spicy Kick: Incorporate a tablespoon of caraway seeds or fresh ground black pepper to enhance the flavor profile.
For those with dietary restrictions, consider:
- Using a gluten-free all-purpose flour blend for gluten intolerance.
- Replacing the sugar with honey for a more natural sweetener.
Nutrition & Storage Info
- Prep Time: 30 minutes
- Cook Time: 50-55 minutes
- Total Time: About 2 hours (includes rising time)
- Yield: 1 standard loaf (about 12-15 slices)
- Estimated Calories: Approximately 120 calories per slice
- Storage Instructions: Store at room temperature for up to 3 days, refrigerate for a week, or freeze for up to 8 weeks.
FAQ Section
1. Can I use all rye flour instead?
- While possible, pure rye flour will yield a denser loaf; mix it with wheat flour for the best result.
2. How do I know when the bread is done?
- Tap the bottom of the loaf after baking; it should sound hollow.
3. Can I use active dry yeast instead of instant?
- Yes! Just proof it in warm water with sugar first before mixing.
4. What can I do with leftover bread?
- Make croutons, bread pudding, or French toast – the options are endless!
5. Can I bake this bread in a different pan?
- Yes, but adjust the baking time depending on the size and shape of the pan.
6. Why is my bread too dense?
- This could be due to too much flour or not kneading enough. Measure ingredients carefully!
7. Can I add seeds or nuts to the dough?
- Absolutely! Feel free to incorporate sunflower seeds, walnuts, or pumpkin seeds directly into the dough.
8. How does pumpernickel bread compare to other breads?
- Pumpernickel is denser and richer, with a distinctive flavor from rye, contrasting with lighter, fluffier white or whole grain breads.
9. Is this recipe beginner-friendly?
- Yes! While it requires a bit of time, the steps are straightforward and rewarding.
10. Can I use a bread machine?
- You can adapt the recipe for use in a bread machine; just add ingredients as per your machine’s instructions.
Conclusion
This homemade pumpernickel bread recipe is not just about baking; it’s an experience filled with nostalgia, warmth, and love. Its unique flavor, delightful texture, and versatility make it a bread you’ll want to share with your loved ones. I encourage you to try it yourself and immerse in the joy of homemade bread.
Please share your thoughts or any variations you tried in the comments below! If you loved this recipe, you might also enjoy our sourdough bread or Sriracha Chicken Burrito Bowls that are equally delicious.
Happy baking!

Pumpernickel Bread
Ingredients
Method
- Spray a 9×5-inch loaf pan with nonstick cooking spray and set aside.
- In a large bowl, whisk together all-purpose flour, bread flour, rye flour, cocoa powder, instant yeast, granulated sugar, and kosher salt.
- In the bowl of a stand mixer fitted with a dough hook attachment, mix together the warm water, molasses, and vegetable oil.
- Gradually add the dry ingredients to the wet mixture, mixing on low speed until a dough forms (about 1-2 minutes).
- Knead the dough for 5-8 minutes until smooth and elastic, or hand-knead for about 8-10 minutes on a floured surface.
- Place the dough in a clean oiled bowl, cover with a damp cloth, and let it rise in a warm place until doubled in size (60-90 minutes).
- Roll out the dough on a lightly floured surface into a rectangle (about 10×14 inches).
- Starting from the short end, roll the dough tightly to form a log and pinch the seams to seal well.
- Place the rolled dough seam-side down into the prepared pan, cover, and let it rise until doubled (about 45 minutes).
- Preheat your oven to 375°F (190°C).
- Bake for 50-55 minutes, until the bread sounds hollow when tapped.
- Remove from the oven and cool completely on a wire rack before slicing.