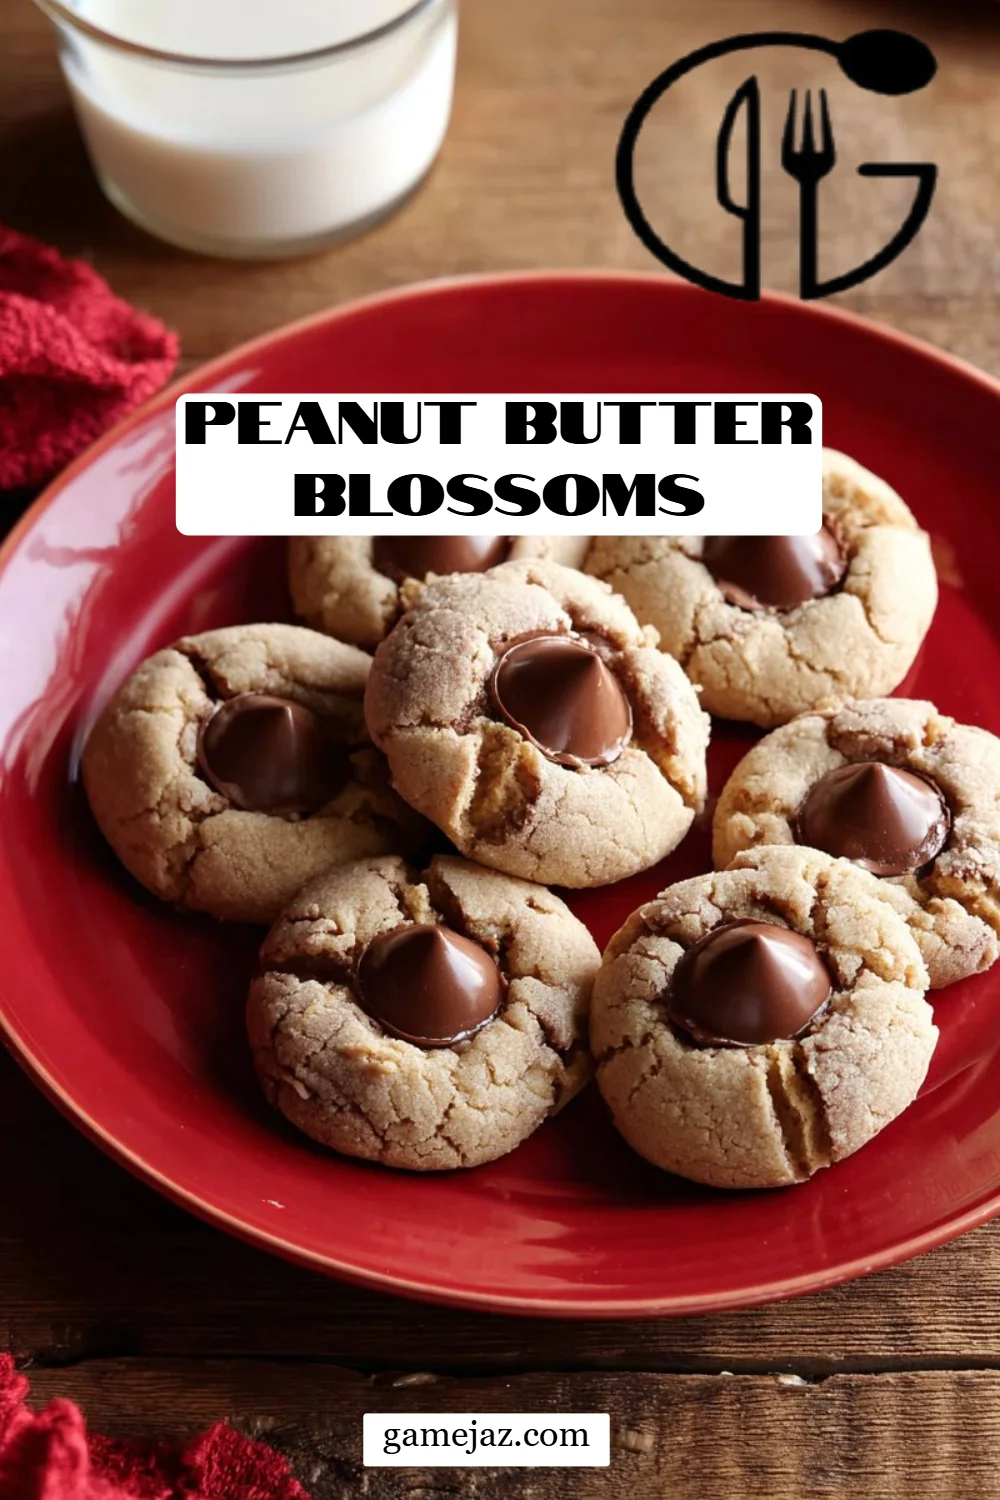
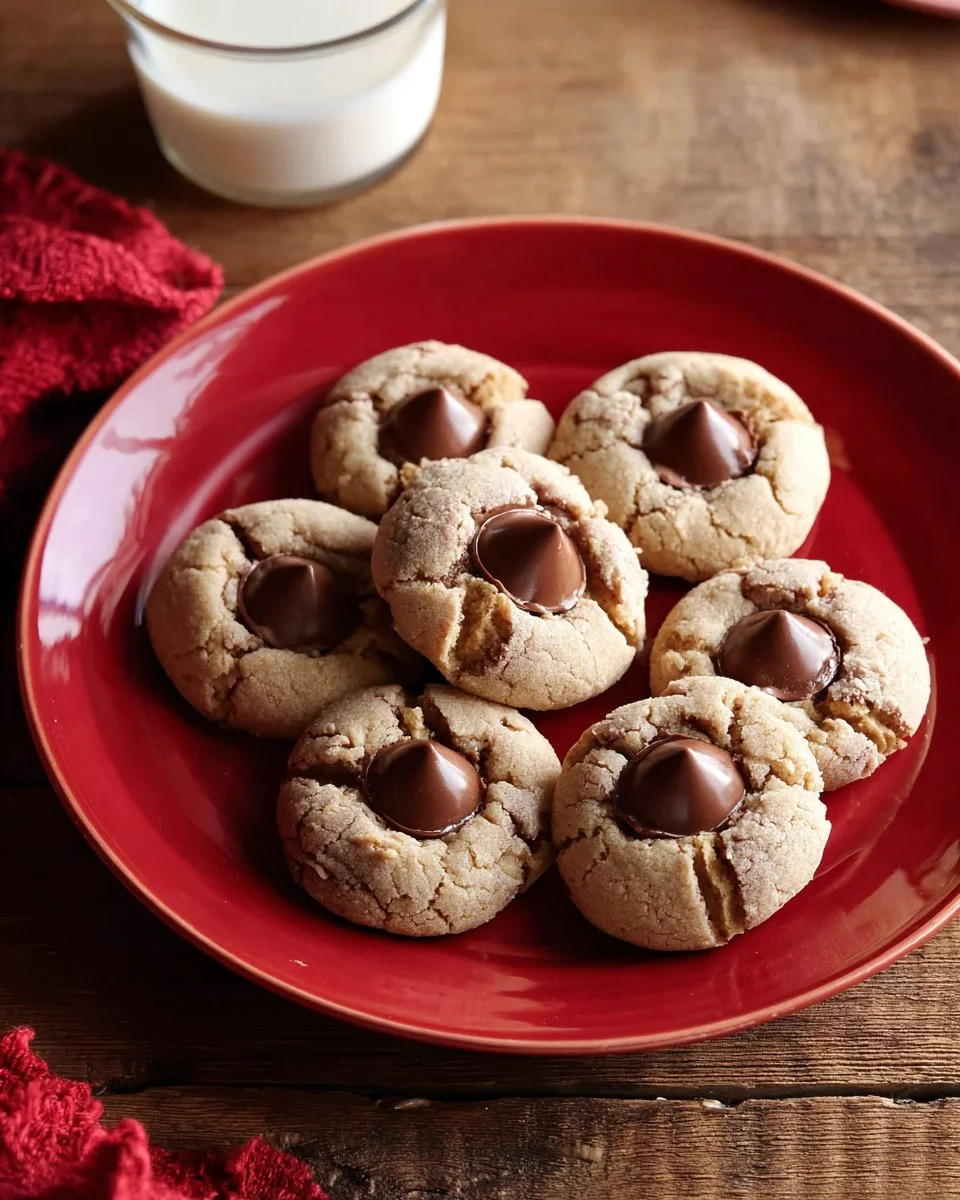
I still remember the sweet, warm aroma wafting through my childhood home every holiday season. The centerpiece of it all? My grandmother’s famous Peanut Butter Blossoms. These classic cookies, with their soft, chewy centers and the irresistible surprise of a chocolate kiss on top, have been a beloved tradition in my family for generations. As a little girl, I would stand on tiptoe, peering over the kitchen counter, eagerly waiting for the moment I could press those delicious chocolate kisses into the warm cookie dough.
What makes these Peanut Butter Blossoms so special isn’t just their delightful taste; it’s the memories we create around them. Each batch brings back a flood of nostalgia, reminding me of laughter, family gatherings, and the holiday spirit. There are countless recipes out there, but I promise you, this one is tailored with love and care—the secret family tweaks make all the difference.
In this post, I’ll share with you how to whip up these scrumptious cookies, along with some tips and tricks that elevate them to the next level. Get ready to fill your kitchen with happiness and maybe even create a few new traditions of your own!
What Are Peanut Butter Blossoms?
Peanut Butter Blossoms are simply magic—the perfect blend of crispy edges and soft, melty chocolate, all juxtaposed against the nutty flavor of peanut butter. Originating in the United States, these cookies have been delighting taste buds since the 1950s. The traditional method involves rolling dough balls in sugar and baking them to golden perfection, then punctuating each cookie with a chocolate kiss while they’re still warm.
What makes them unique is that they manage to be both rich and light, giving you that comforting feeling without weighing you down. Ideal for holiday celebrations, bake sales, or just a cozy day at home, you can whip them up in no time and impress your family and friends like a baking pro!
Why You’ll Love This Recipe
1. A Taste of Tradition:
These Peanut Butter Blossoms are more than just cookies; they are a symbol of love and nostalgia. The combination of creamy peanut butter and rich chocolate creates a mouthwatering duo that’s hard to resist.
2. Gourmet at Home:
Why settle for store-bought cookies? This method is incredibly cost-effective and produces high-quality cookies that rival any café. Plus, you can customize the chocolate—choose dark chocolate kisses for a richer flavor or even flavored chocolates for a twist!
3. Easy to Make:
Unlike some intricate cookie recipes, these are straightforward and perfect for bakers of all skill levels. With a little over 30 minutes, you can impress your friends or family without breaking a sweat.
4. Endless Customization:
Feel free to play with the flavors! You could add a sprinkle of sea salt on top for that sweet-and-salty combo, or even mix in some chopped nuts if you like a bit more crunch.
5. Perfect for Gift-Giving:
These cookies are gorgeous and delicious—ideal for sharing. Package them in festive tins during the holidays, and you’ll be the hit of the cookie exchange!
Ingredients Section
To make these delightful Peanut Butter Blossoms, you’ll need the following ingredients:
- 1/2 cup granulated sugar: for sweetness
- 1 cup packed brown sugar: adds moisture and that chewy texture
- 1 cup creamy peanut butter: the heart of the cookie
- 1 cup salted butter, room temperature: for that rich buttery flavor
- 2 large eggs, room temperature: binding agents that help with texture
- 3 cups all-purpose flour, sifted: provides the structure
- 1 1/2 teaspoons baking soda: helps the cookies rise
- 1 teaspoon baking powder: gives additional lift
- 2 tablespoons granulated sugar (for rolling): for a sweet outer crust
- 1 bag Hershey’s Kisses milk chocolates: the perfect chocolate crown for each cookie
Notes on Ingredients:
- Opt for high-quality peanut butter for the best flavor—brand recommendations include Jif or Skippy.
- Ensure your butter and eggs are at room temperature for a smoother batter.
- If you prefer, you can swap equal parts of almond butter for a nutty twist.
Step-by-Step Instructions
Preheat Your Oven: Heat your oven to 375 degrees F to ensure even baking.
Mix the Wet Ingredients: In the bowl of your stand mixer (or in a bowl with a hand-held mixer), beat together 1/2 cup granulated sugar, 1 cup packed brown sugar, 1 cup creamy peanut butter, 1 cup salted butter, and 2 eggs until creamy and well combined. This should take about 2-3 minutes at medium speed. Chef’s Tip: Don’t skimp on mixing; you’re aiming for a fluffy texture!
Combine Dry Ingredients: In a separate bowl, whisk together 3 cups sifted all-purpose flour, 1 1/2 teaspoons baking soda, and 1 teaspoon baking powder. Gradually add this dry mixture to the wet ingredients. Mix on low speed until just combined—avoid overmixing for a tender cookie.
Shape the Dough: Using your hands, roll the dough into marble-sized balls, about 1 inch in diameter. Then roll them in 2 tablespoons of granulated sugar. Place them about 2 inches apart on an ungreased cookie sheet.
Bake the Cookies: Bake for 8 to 10 minutes or until the edges are light brown. Keep an eye on them to prevent overbaking!
Add the Chocolate: Remove from the oven and immediately press a chocolate kiss in the center of each cookie. Allow them to cool on the sheet for about 5 minutes before transferring to a cooling rack.
Expert Tips & Tricks
Room Temperature Ingredients Hold the Key: Ensure your butter and eggs are at room temperature to mix more easily, leading to a smooth batter.
Store Effectively: These cookies can last up to one week at room temperature in an airtight container and are freezer-friendly for up to 3 months.
Make Ahead: Prepare the cookie dough in advance and refrigerate it for up to 2 days. Just remember to bring it back to room temperature before baking.
Troubleshooting: If your cookies spread too much, add a bit more flour to the dough; if they’re too thick, reduce the flour slightly. Baking requires some finesse!
Get Creative with Toppings: Beyond chocolate kisses, you can press in melted caramel candies or even a cherry for a unique touch.
Serving Suggestions
Peanut Butter Blossoms shine bright on their own, but you can elevate your dessert game even further! Serve them warm with a scoop of vanilla ice cream for an indulgent treat or pair them with a glass of cold milk. For a lovely presentation, stack a few cookies in a mason jar tied with a festive ribbon – perfect for holiday gatherings or as thoughtful gifts!
Variations & Substitutions
- Nut-Free Option: Substitute peanut butter with sunflower seed butter for a safe, nut-free alternative.
- Holiday Variations: For Christmas, sprinkle crushed peppermint candies on top before baking or mix in festive chocolate chunks.
- Vegan Twist: Use flax eggs or applesauce in place of eggs and dairy-free butter to make these cookies vegan-friendly.
Nutrition & Storage Info
- Prep Time: 15 minutes
- Cook Time: 10 minutes
- Total Time: 25 minutes
- Yield: Approximately 24 cookies
- Estimated Calories: 120 calories per cookie (may vary based on specific substitutions)
- Storage Instructions: Store at room temperature in an airtight container for up to one week; freeze for up to 3 months.
FAQ Section
Can I use crunchy peanut butter instead of creamy?
- Absolutely! It adds a delightful crunch and texture.
How do I prevent my cookies from flattening too much?
- Ensure your butter isn’t too soft and chill the dough for about 30 minutes before baking.
Can I make these cookies gluten-free?
- Yes, substitute all-purpose flour with a gluten-free blend, ensuring it’s suited for baking!
What’s the best way to melt the chocolate for decorating?
- Use a microwave at low power, heating in short intervals and stirring until smooth, or use a double boiler.
How do I know when my cookies are done?
- Look for lightly browned edges and a set center; they will continue to bake slightly on the tray.
Can I freeze the cookie dough?
- Yes! Freeze rolled dough balls in a single layer on a baking sheet, then transfer to a freezer bag once solid.
What’s the origin of Peanut Butter Blossoms?
- They gained popularity in the U.S. during the 1950s and have since become a holiday staple.
How can I make these cookies more chocolatey?
- Mix chocolate chips into the dough and top with kisses for an extra chocolate punch.
Do these cookies need to be refrigerated?
- No, they are best stored at room temperature but can be refrigerated for extended freshness.
Can I add other mix-ins, like nuts or dried fruit?
- Absolutely! Just be careful not to overdo it, as it can affect the dough’s structure.
Conclusion
These Peanut Butter Blossoms are not just delicious—they carry with them the essence of warmth, love, and memories of family joy. I encourage you to give this recipe a try; I promise you’ll find delight in each bite. Leave your thoughts and feedback in the comments; I love hearing your stories! And for more scrumptious recipes, check out my blog where I share everything from classic chocolate chip cookies to festive holiday treats.
Happy baking!

Peanut Butter Blossoms
Ingredients
Method
- Preheat your oven to 375 degrees F to ensure even baking.
- In the bowl of your stand mixer, beat together 1/2 cup granulated sugar, 1 cup packed brown sugar, 1 cup creamy peanut butter, 1 cup salted butter, and 2 large eggs until creamy and well combined, about 2-3 minutes at medium speed.
- In a separate bowl, whisk together 3 cups sifted all-purpose flour, 1 1/2 teaspoons baking soda, and 1 teaspoon baking powder.
- Gradually add the dry mixture to the wet ingredients. Mix on low speed until just combined—avoid overmixing.
- Roll the dough into marble-sized balls, about 1 inch in diameter. Roll them in 2 tablespoons of granulated sugar and place them 2 inches apart on an ungreased cookie sheet.
- Bake for 8 to 10 minutes or until the edges are light brown.
- Remove from the oven and immediately press a chocolate kiss in the center of each cookie.
- Allow cookies to cool on the sheet for about 5 minutes before transferring to a cooling rack.