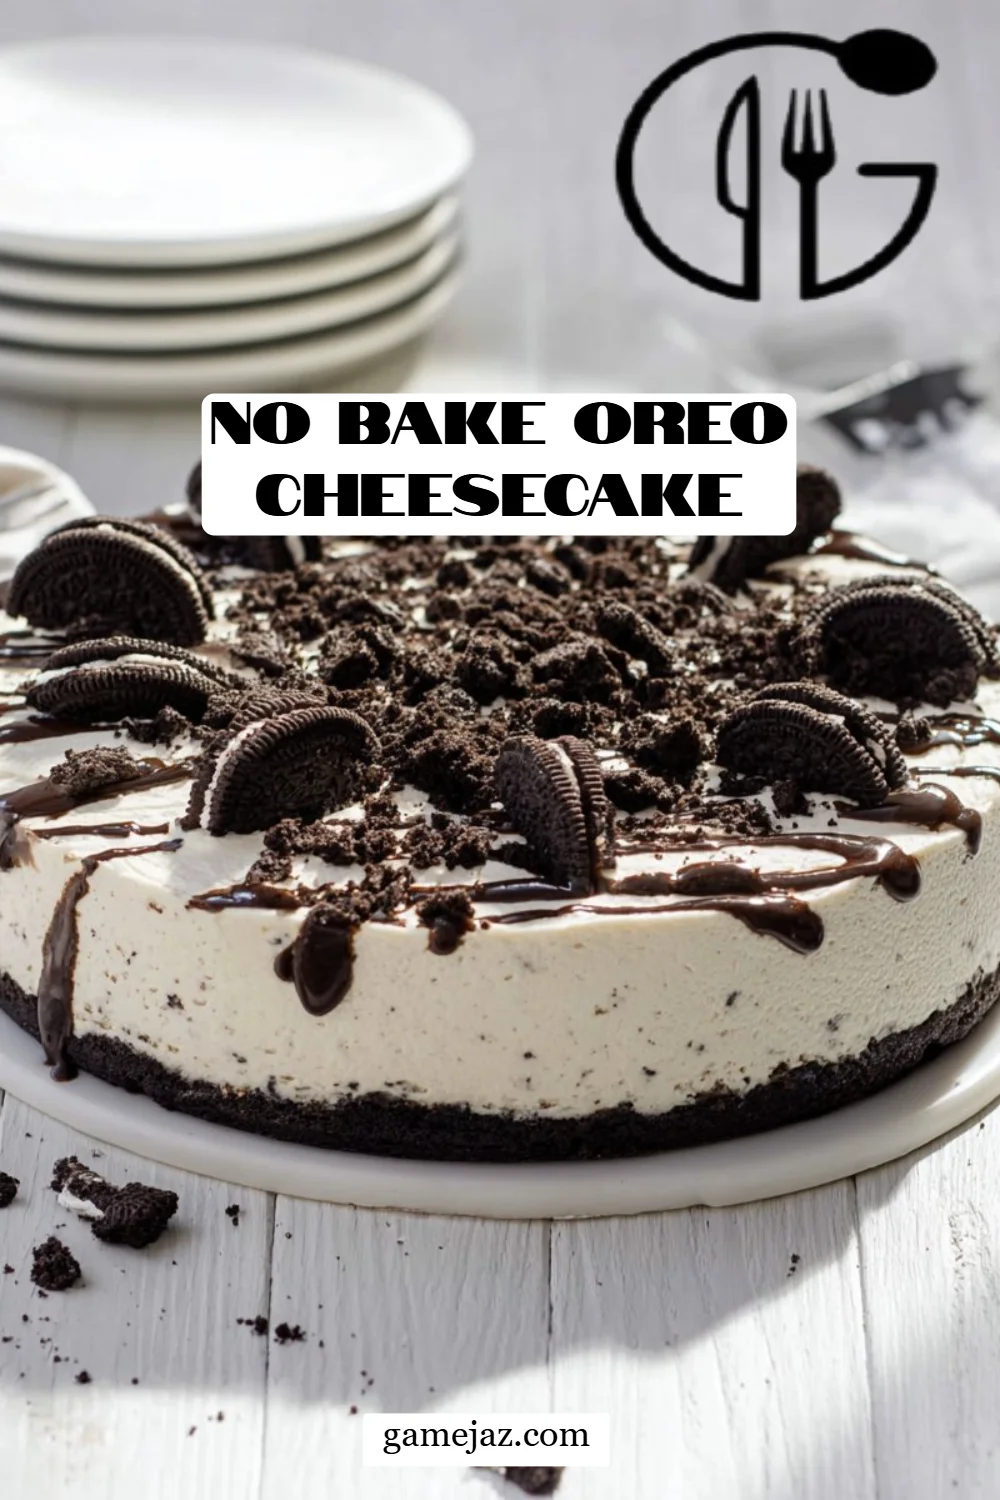
Irresistible No Bake Oreo Cheesecake: A Dreamy Dessert to Delight Your Taste Buds
As a passionate dessert lover and home baker, there’s a special place in my heart for the No Bake Oreo Cheesecake. This recipe captures all the nostalgia of childhood favorites, turning those iconic chocolatey cookies into a luxurious dessert that feels like a warm hug. Picture this: a gathering of family and friends, laughter filling the air, and everyone’s eyes lighting up as they take the first bite of this creamy, dreamy cheesecake. The crunch of the Oreo crust paired with the silky filling creates a harmony of textures and flavors that simply cannot be matched by store-bought options.
What sets my No Bake Oreo Cheesecake apart from others is the attention to detail and the love poured into it. Each ingredient serves a purpose, enhancing the overall flavor without overpowering that classic Oreo taste we know and love. This recipe not only brings back cherished memories but also guarantees happy faces around the table. If you’re ready to impress your own loved ones (or yourself!) with a dessert that’s as easy as it is delicious, stick around. I promise you’ll learn how to create this Oreo wonder with simple steps and the tips I’ve gathered from making it countless times.
What Are No Bake Oreo Cheesecakes?
No Bake Oreo Cheesecakes are a no-fuss dessert that brings the flavors of a traditional cheesecake but skips the oven time. Originating as a quick and easy treat for those warm summer days—or any day, really—these cheesecakes are loved by many for their rich, creamy texture and deliciously chocolatey flavor. Imagine savoring a slice that melts in your mouth, the crunchy Oreo base offering the perfect contrast.
What makes them unique is their simplicity; no baking required means they’re perfect for beginners and anyone pressed for time. Not to mention, they’re incredibly versatile and can be prepared for any occasion—birthdays, holidays, or just a casual Friday night when you need a sweet pick-me-up. You can whip up a No Bake Oreo Cheesecake in no time, making it a go-to recipe for when you need to impress or simply indulge yourself.
Why You’ll Love This Recipe
Easier Than Pie: If you’ve ever been intimidated by baking a cheesecake, rejoice! This No Bake Oreo Cheesecake requires no oven or complicated techniques. Just mix, fold, and chill for a heavenly dessert that anyone can master.
Cost-Effective: When compared to store-bought cheesecakes, this homemade version saves you quite a bit of cash. Plus, you get to control the quality of your ingredients. No more overpriced desserts that don’t satisfy!
Customization Galore: Want to switch things up? You can easily customize this cheesecake by swapping out the Oreos for your favorite cookie or adding flavors like mint or peanut butter. The options are endless!
Perfect for Any Occasion: Whether you’re hosting a dinner party, celebrating a birthday, or just treating yourself on a Tuesday night, this cheesecake fits right in. It’s an all-time favorite that never fails to impress.
Quick Assembly: With a prep time of under 30 minutes and a chill time that can be flexible, you can make this cheesecake in a flash. Just plan for a few hours of chilling, and you’re good to go!
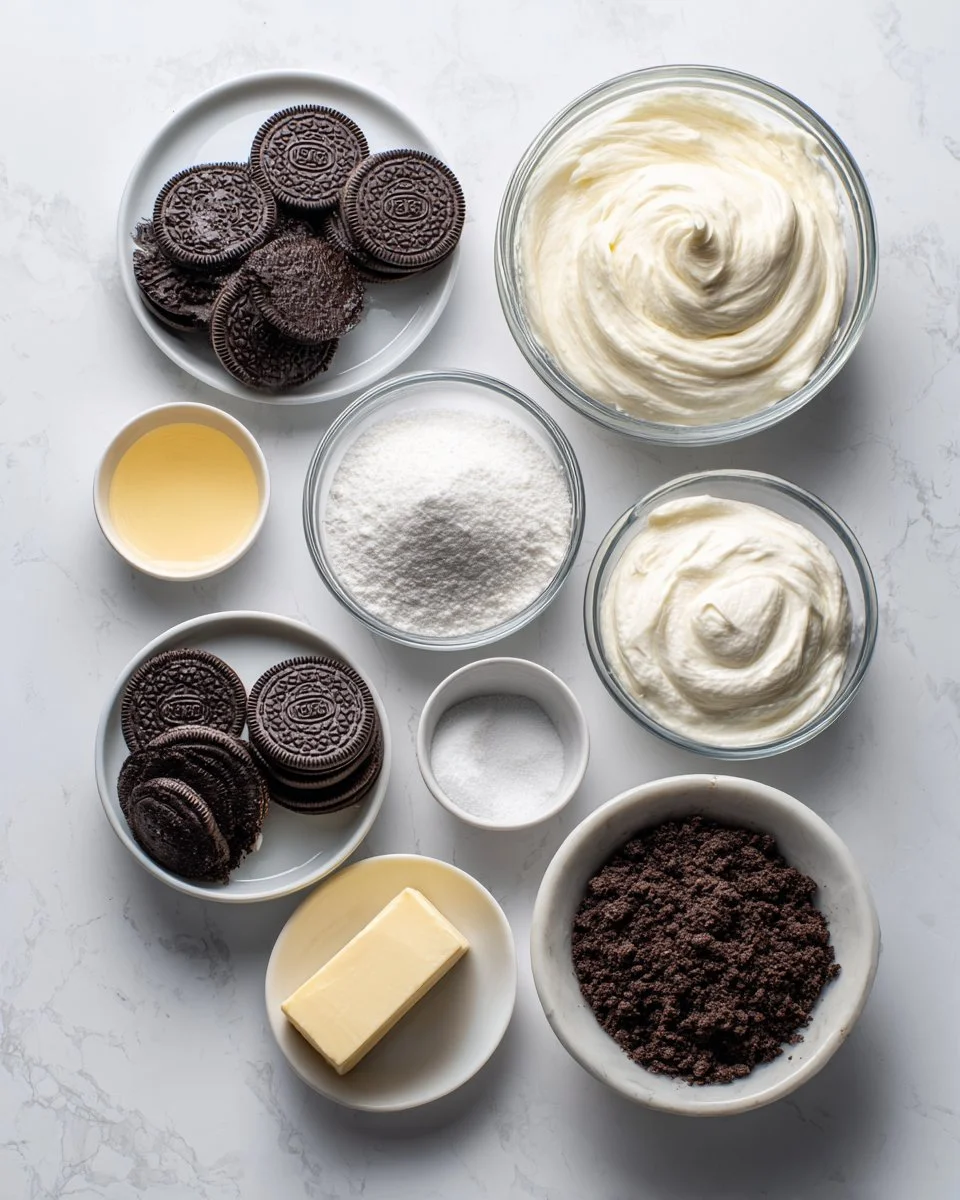
Ingredients
- 24 Oreo cookies, filling removed and reserved (try using Double Stuff for an extra creamy texture)
- 6 tablespoons melted butter (unsalted, for optimal flavor)
- 16 ounces cream cheese, softened (I recommend Philadelphia for its creaminess)
- 1/2 cup granulated sugar
- 1 teaspoon vanilla extract
- 2 1/2 cups heavy whipping cream (the key to that fluffy texture)
- 1 1/2 cups confectioners’ sugar
- 15 crushed Oreo cookies (divided, for that extra crunch)
- Hot fudge, for drizzling on top (store-bought or homemade)
Prep Notes: Make sure your cream cheese is at room temperature for easier blending. If you can, bring your ingredients out of the fridge an hour prior. This ensures everything mixes together flawlessly.
Step-by-Step Instructions
Prepare the Oreo Crust: In a food processor, pulse 24 Oreos until finely crushed. In a mixing bowl, combine the crushed Oreos with 6 tablespoons melted butter and mix until the texture resembles wet sand. Press this mixture evenly into the bottom and up the sides of a prepared 9-inch springform pan. Chill in the refrigerator while you prepare the filling. (You want it firm but not overly hard; about 30 minutes should do.)
Make the Creamy Filling: In a large mixing bowl, beat 16 ounces cream cheese on medium speed until light and fluffy. Gradually add in 1/2 cup granulated sugar, 1 teaspoon vanilla extract, and the reserved Oreo filling. Beat until fully incorporated and smooth (about 2 minutes).
Whip the Cream: In a separate bowl, whip 2 1/2 cups heavy whipping cream on high speed until it starts to thicken. Gradually sprinkle in 1 1/2 cups confectioners’ sugar and continue beating until stiff peaks form (this usually takes about 2-3 minutes). Be careful not to overbeat!
Combine Mixtures: Gently fold 2 cups of the whipped cream into the cream cheese mixture. Then, fold in 15 crushed Oreos (saving about 1/4 cup for garnish). The goal is to keep that airy texture while combining everything.
Chill: Pour the filling over your chilled Oreo crust, smoothing it out evenly. Cover the springform pan with plastic wrap and chill in the refrigerator for at least 3-4 hours—overnight is even better for the flavors to meld.
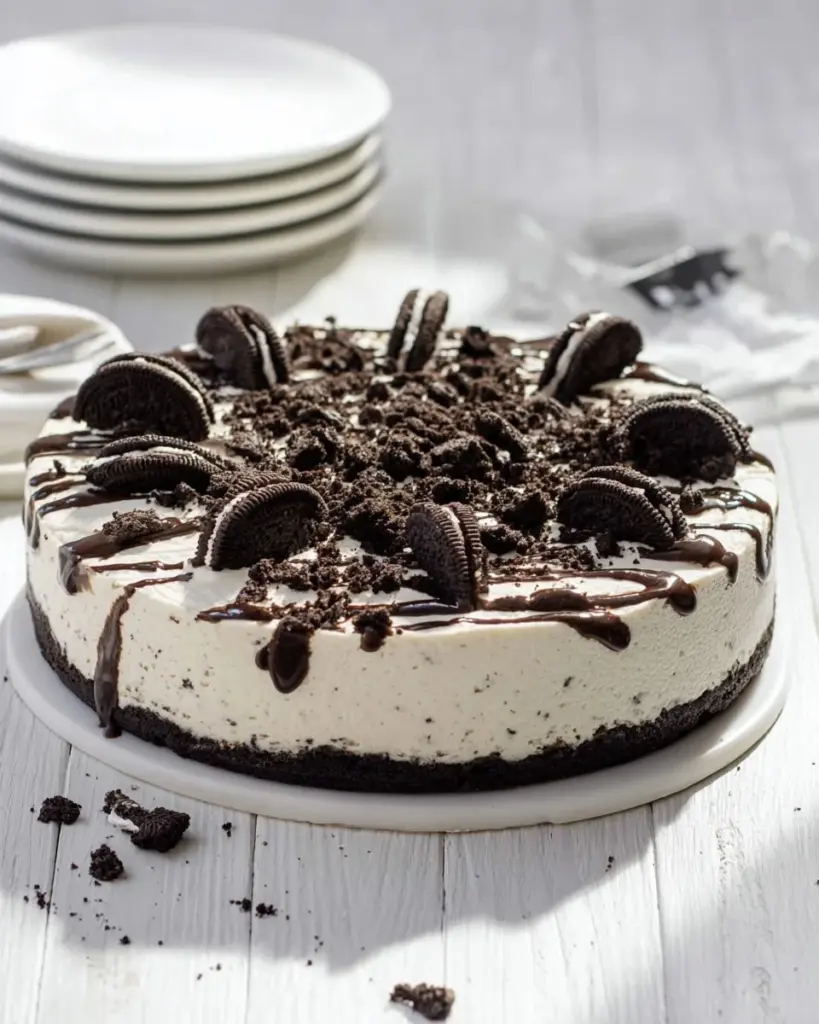
Garnish and Serve: Once set, garnish with the remaining whipped cream, sprinkle on the reserved crushed Oreos, and drizzle hot fudge over the top. Remove the cheesecake from the springform pan, slice, and enjoy your culinary masterpiece!

Expert Tips & Tricks
- Cream Cheese Must Be Soft: Always ensure your cream cheese is at room temperature to avoid lumps in your mixture.
- Storage: Store your No Bake Oreo Cheesecake covered in the fridge for up to five days. You can also freeze it; just allow it to thaw in the refrigerator overnight before serving.
- Make Ahead: Perfect for prepping ahead of time, you can assemble your cheesecake one to two days in advance.
- Common Pitfalls: Avoid overwhipping the cream—know when to stop. Overwhipped cream can turn grainy.
- Troubleshooting: If your cheesecake doesn’t set properly, it might need a bit longer in the fridge, or ensure the cream was whipped to stiff peaks.
Serving Suggestions
To elevate your No Bake Oreo Cheesecake experience, consider pairing it with a scoop of vanilla ice cream or fresh berries. Beautifully plate it with a drizzle of chocolate sauce for a touch of elegance, or serve it with a dollop of homemade whipped cream. This dessert is always a hit, whether it’s a casual family dinner or a special celebration.
Variations & Substitutions
- Flavor Combinations: Try incorporating different Oreo flavors like mint or Red Velvet for a seasonal twist.
- Dietary Adjustments: Substitute gluten-free Oreos for a gluten-free version or use dairy-free cream cheese and whipping cream for a lactose-free option.
- Seasonal Inspiration: In the fall, add a hint of pumpkin spice to your filling for a festive twist!
Nutrition & Storage Info
- Prep Time: 30 minutes
- Chill Time: 3-4 hours or overnight
- Total Time: About 4 hours and 30 minutes
- Yield: 10-12 servings
- Estimated Calories: Approximately 400 calories per slice
- Storage Instructions: Store covered in the refrigerator for up to 5 days. Can freeze for up to 2 months; thaw overnight in the fridge.
FAQ Section
Can I use different cookies for the crust?
Absolutely! Try using chocolate graham crackers or even Nilla Wafers for a unique flavor.What if my cheesecake won’t set?
If it’s not setting, it may need more chilling time. Sometimes, the cream needs to be whipped to stiffer peaks for better structure.Can I make this cheesecake in advance?
Yes! This cheesecake actually tastes better after a day of chill time, allowing all the flavors to meld beautifully.How do I prevent cracks on top?
A longer chill time helps. Always ensure your ingredients are at the proper temperature before mixing.Can I decorate the cheesecake beforehand?
It’s best to add garnishes just before serving to maintain their freshness and presentation.What if I don’t have a springform pan?
You can use a regular pie dish or an 8×8 inch baking dish; just be cautious when serving.Is it okay to use light cream cheese?
Light cream cheese works in a pinch, but it may alter the texture slightly, making it less rich.Can I use whipped topping instead of whipping cream?
Yes, just make sure to adjust the amount accordingly, and beat it until it’s spreadable but not overly soft.How do I freeze leftover cheesecake?
Wrap it tightly in plastic wrap, then foil, and store in the freezer. Thaw in the fridge before serving.What if I want to add chocolate?
You can fold in mini chocolate chips or melt chocolate into the filling for an extra indulgent treat!
Conclusion
This No Bake Oreo Cheesecake isn’t just a dessert; it’s a delightful experience, weaving together memories, flavors, and love with every bite. It invites you to gather with friends and family around the table and creates moments worth savoring. I encourage you to try this recipe and share your thoughts—did it win over hearts and taste buds? I’d love to hear your stories! If you enjoyed this, check out other recipes on my blog, like my velvety No Bake Peanut Butter Pie or classic Chocolate Chip Cookies. Happy baking!
No Bake Oreo Cheesecake
Ingredients
Method
- In a food processor, pulse 24 Oreos until finely crushed. Combine crushed Oreos with 6 tablespoons melted butter until the texture resembles wet sand. Press mixture into the bottom and up the sides of a prepared 9-inch springform pan. Chill for 30 minutes.
- In a large mixing bowl, beat 16 ounces cream cheese on medium speed until light and fluffy. Gradually add in 1/2 cup granulated sugar, 1 teaspoon vanilla extract, and the reserved Oreo filling. Beat until fully incorporated (about 2 minutes).
- In a separate bowl, whip 2 1/2 cups heavy whipping cream on high speed until it thickens. Gradually sprinkle in 1 1/2 cups confectioners' sugar and continue beating until stiff peaks form (about 2-3 minutes).
- Gently fold 2 cups of the whipped cream into the cream cheese mixture and then fold in 15 crushed Oreos, saving about 1/4 cup for garnish.
- Pour the filling over the chilled Oreo crust, smoothing it out evenly. Cover with plastic wrap and chill for at least 3-4 hours, or overnight for best results.
- Garnish with remaining whipped cream, reserved crushed Oreos, and drizzle hot fudge over the top before serving.