Finger-Lickin’ Homemade Fried Chicken: A Love Letter to Kentucky Fried Chicken
Ah, nothing says comfort like a plate of homemade, crispy fried chicken! As a child, I’d eagerly anticipate family dinners where my grandma served her famously juicy fried chicken. The aroma would fill the air, washing over us like a warm hug. I have fond memories of sitting at the table, my fingers sticky with crumbs as laughter bounced around the room. Now, as I recreate those joyous moments in my own kitchen, there’s one inspiration that always comes to mind: Kentucky Fried Chicken.
But let me tell you, while restaurant fried chicken is undeniably tasty, my homemade version takes things to a whole new level. The secret? It’s not just about the crispy coating or the juicy meat; it’s about the love and care you pour into each piece. This recipe is elevated by marinating the chicken in buttermilk and a blend of spices, ensuring perfect tenderness and flavor in every bite.
In today’s post, I’ll guide you through my go-to fried chicken recipe that captures all the nostalgia of family gatherings and backyard barbecues. You’ll learn about the techniques that ensure a golden exterior while keeping the insides delectably juicy and full of flavor. Prepare to impress yourself and your loved ones with this fried chicken that’s better than anything you’d find at a certain Colonel’s establishment!
What are Kentucky Fried Chicken?
Kentucky Fried Chicken, or KFC as many of us affectionately call it, has roots that trace back to the 1930s when Colonel Harland Sanders first perfected his secret recipe of 11 herbs and spices in Corbin, Kentucky. This flavorful concoction became a sensation, beloved by folks longing for a crispy crunch that held onto juicy, savory chicken.
The taste is a delightful marriage of spice and comfort, with a pleasantly crispy texture that yields to tender meat beneath. The unique blend of spices is a carefully guarded secret that makes fried chicken a classic comfort food enjoyed by generations, often reserved for celebrations or lazy Sunday dinners.
When should you whip up a batch of homemade fried chicken? Any occasion that calls for happiness! Whether it’s a family gathering, a barbecue, or simply a Tuesday night craving, there’s no wrong time to indulge in this Southern classic.
Why You’ll Love This Recipe
Here are 5 compelling reasons why this fried chicken recipe will become your new favorite:
Unmatched Flavor: Unlike store-bought options or fast food, this recipe allows you to control the ingredients and customize flavors to your liking. It’s bursting with freshly mixed spices that will dance on your taste buds.
Cost-Effective: Making your own Kentucky Fried Chicken at home is far more budget-friendly than dining out. You’d be surprised by how far one whole chicken and a few pantry staples can go!
Customization Options: Feel free to play around with the spices! Want it spicier? Add cayenne. Prefer a milder taste? Tone it down. You’ll have the freedom to tweak the recipe to suit your family’s palate perfectly.
Satisfaction of Homemade: There’s a palpable joy that comes with creating something from scratch. When you pull that crispy chicken from the fryer, the pride of your culinary accomplishment will make every bite taste sweeter.
Simple Steps: While it might look intimidating, frying chicken is easier than you think. This recipe includes step-by-step guidance to ensure you feel confident in your cooking skills in the process.
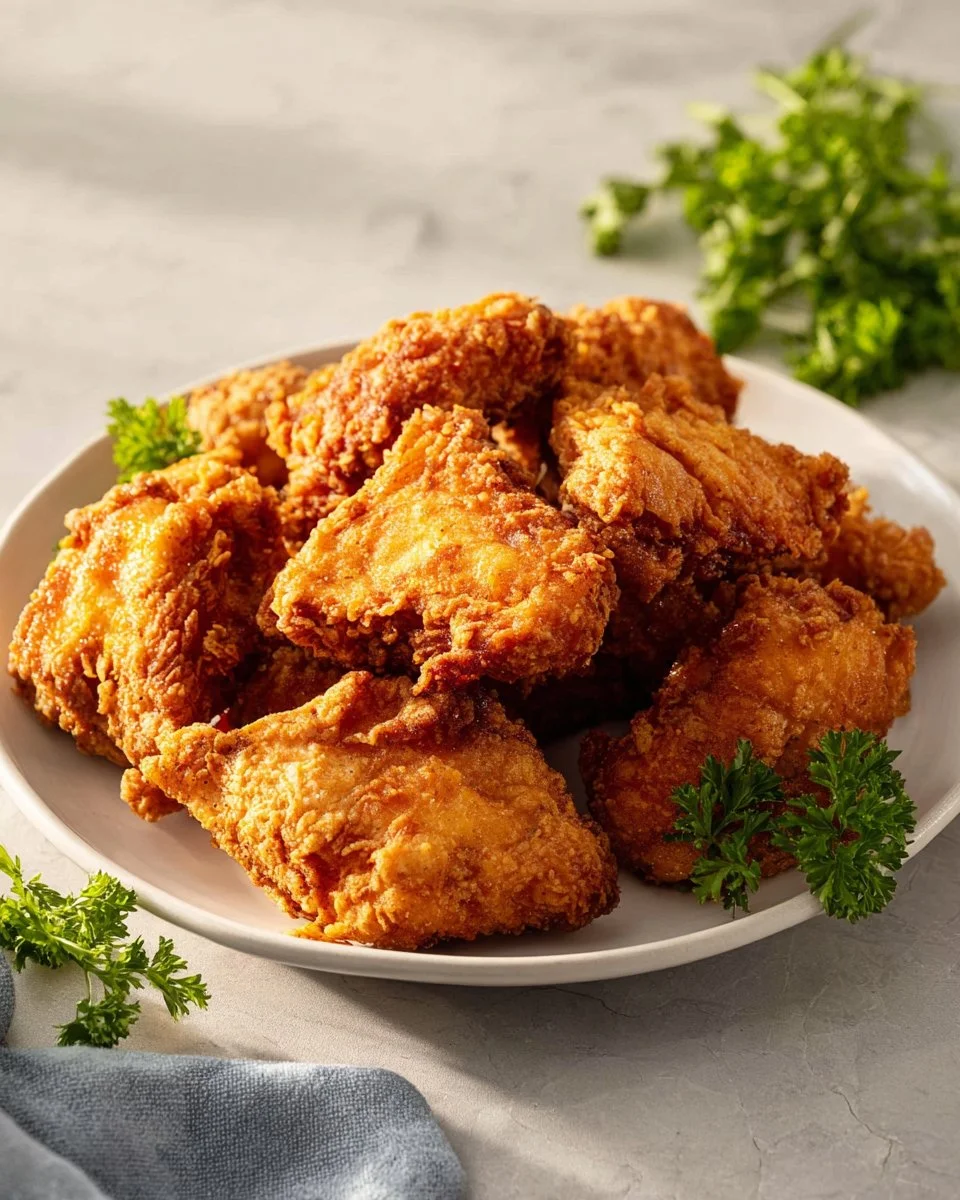
Ingredients Section
{image_template}
For the Fried Chicken
- 1 whole chicken (cut into 8 pieces)
- 1 cup buttermilk (adds moisture and flavor)
- 1 large egg (beaten)
- 2 cups all-purpose flour
- ¼ cup ground paprika
- 2 tablespoons garlic powder
- 2 tablespoons ground white pepper
- 1 tablespoon celery salt
- 1 tablespoon ground black pepper
- 1 tablespoon dry ground mustard
- 2 teaspoons kosher salt
- 2 teaspoons onion powder
- 2 teaspoons dried thyme
- 2 teaspoons dried basil
- 1½ teaspoons dried oregano
- 1 teaspoon ground ginger
- ½ teaspoon MSG (optional)
- Vegetable oil (for frying)
Notes on Ingredient Quality/Substitutions
- Chicken: Fresh chicken works best for flavor. If you want a healthier option, consider using organic or free-range.
- Buttermilk: If you don’t have buttermilk, simply mix regular milk with a tablespoon of vinegar or lemon juice and let it sit for 10 minutes.
- Spices: I highly recommend using fresh herbs and quality spices for the best taste. My favorites come from Penzeys or McCormick.
Prep Notes
- Allow your chicken to sit at room temperature for about 30 minutes before cooking to ensure even cooking.
Step-by-Step Instructions
Cut Chicken: Start by cutting the chicken into 8 pieces, discarding the carcass. This can be done easily with kitchen shears or a sharp knife.
Marinate: In a large bowl, whisk together buttermilk and beaten egg. Add the chicken pieces, ensuring they’re well-coated. Cover and refrigerate for anywhere from 30 minutes to overnight for maximum flavor and tenderness.
Prepare Flour Mixture: In another large bowl, mix the flour with all the spices and seasoning, creating a flavorful coating for your chicken.
Heat Oil: Preheat your oven to 175°F and prepare a baking sheet with a wire rack. Heat about 3 inches of vegetable oil in a deep fryer or Dutch oven to 350°F. A chef’s thermometer will help you get the temperature just right!
Fry Chicken: Remove chicken pieces from the buttermilk marinade and coat them thoroughly in the flour mixture, shaking off any excess. Fry 3–4 pieces at a time for 12–15 minutes, flipping halfway through for even cooking.
Transfer: Once cooked, transfer the fried chicken to the wire rack on the prepared baking sheet, allowing excess oil to drain. Keep the chicken in the oven while frying the remaining pieces to stay warm.
Check Temperature: Once all pieces are fried, ensure they’ve reached an internal temperature of 165°F before serving. Allow them to rest for about 10-15 minutes to lock in juices.

Expert Tips & Tricks
- Brining for Extra Juiciness: For even juicier chicken, consider brining your chicken in a saltwater solution before the buttermilk soak.
- Oil Temperature: Keep an eye on your oil temperature; if it’s too hot, the coating will burn before the chicken cooks through. If it’s too cool, you’ll end up with greasy chicken.
- Storage: Fried chicken can be stored in an airtight container. Warm it back up in the oven at 350°F to retain crispiness.
- Make-Ahead: Looking to save time? You can marinate the chicken a day in advance and fry it when you’re ready.
- Troubleshooting: If you encounter soggy skin, try letting the chicken rest on a wire rack after frying, allowing air movement to keep it crispy.
Serving Suggestions
Fried chicken pairs beautifully with a range of sides. Nothing beats classic mashed potatoes swimming in gravy or tangy coleslaw! Consider offering a cold, crisp cucumber salad for a refreshing contrast. For presentation, place the fried pieces on a large platter garnished with fresh herbs—a perfect centerpiece for your dining table!
Variations & Substitutions
- Spicy Chicken: Looking to spice things up? Add cayenne pepper or hot sauce to the buttermilk marinade for a fiery kick.
- Herb Variations: Experiment with different herbs like rosemary or sage for a unique twist.
- Gluten-Free Fried Chicken: Substitute all-purpose flour with gluten-free flour blend, ensuring a similar texture.
Nutrition & Storage Info
- Prep time: 30 minutes (plus marinating time)
- Cook time: 30 minutes
- Total time: 1 hour (including resting)
- Yield: 4-6 servings
- Estimated calories per serving: Approximately 350 calories
- Storage: Store at room temperature for up to 2 hours, then refrigerate for up to 3 days. In the freezer, it lasts about 3 months.
FAQ Section
Can I bake this chicken instead of frying?
- Yes! Bake at 375°F for 30-35 minutes, flipping halfway through, but know that the texture will differ from frying.
What’s the best oil for frying chicken?
- Peanut oil or canola oil has a high smoke point and neutral flavor, making them excellent choices for frying.
Why do I need buttermilk?
- Buttermilk tenderizes the chicken and adds flavor while creating a deliciously crispy crust when combined with flour.
How do you keep fried chicken crispy?
- Always place your fried chicken on a wire rack instead of paper towels to prevent steam buildup.
What dipping sauces pair well?
- Try pairing with classic ranch, honey mustard, or a zesty hot sauce for a mouthwatering combination.
Can I cut the recipe in half?
- Absolutely! Just adjust the proportion of ingredients and the marinating time as needed.
What if I can’t find MSG?
- No worries! It’s optional in this recipe. The seasoning blend will still be delicious without it.
Do I need to use a whole chicken?
- You can use specific parts like drumsticks or thighs if you prefer, though adjust cooking times accordingly.
How can I reheat leftover fried chicken?
- To preserve the crispiness, reheat in the oven at 350°F for about 15-20 minutes.
Can this recipe be doubled?
- Absolutely, but make sure your frying equipment can handle the extra pieces without overcrowding.
Conclusion
In a world where dining out can be tempting, nothing beats the heartfelt flavor of homemade fried chicken. This recipe not only brings back fond memories but also allows you to craft your own culinary traditions. I can’t wait for you to try it! Let me know how yours turns out, and feel free to share any of your unique twists. Don’t forget to check out my other comfort food recipes on the blog, where nostalgia and flavor collide!

Homemade Fried Chicken
Ingredients
Method
- Cut the chicken into 8 pieces, discarding the carcass.
- In a large bowl, whisk together buttermilk and beaten egg. Add the chicken pieces, ensuring they’re well-coated. Cover and refrigerate for anywhere from 30 minutes to overnight.
- In another large bowl, mix the flour with all the spices and seasoning.
- Preheat your oven to 175°F and prepare a baking sheet with a wire rack.
- Heat about 3 inches of vegetable oil in a deep fryer or Dutch oven to 350°F.
- Remove chicken pieces from the buttermilk marinade and coat them thoroughly in the flour mixture.
- Fry 3–4 pieces at a time for 12–15 minutes, flipping halfway through.
- Once cooked, transfer the fried chicken to the wire rack on the prepared baking sheet.
- Check the internal temperature of chicken; it should reach 165°F.
- Allow fried chicken to rest for about 10-15 minutes before serving.