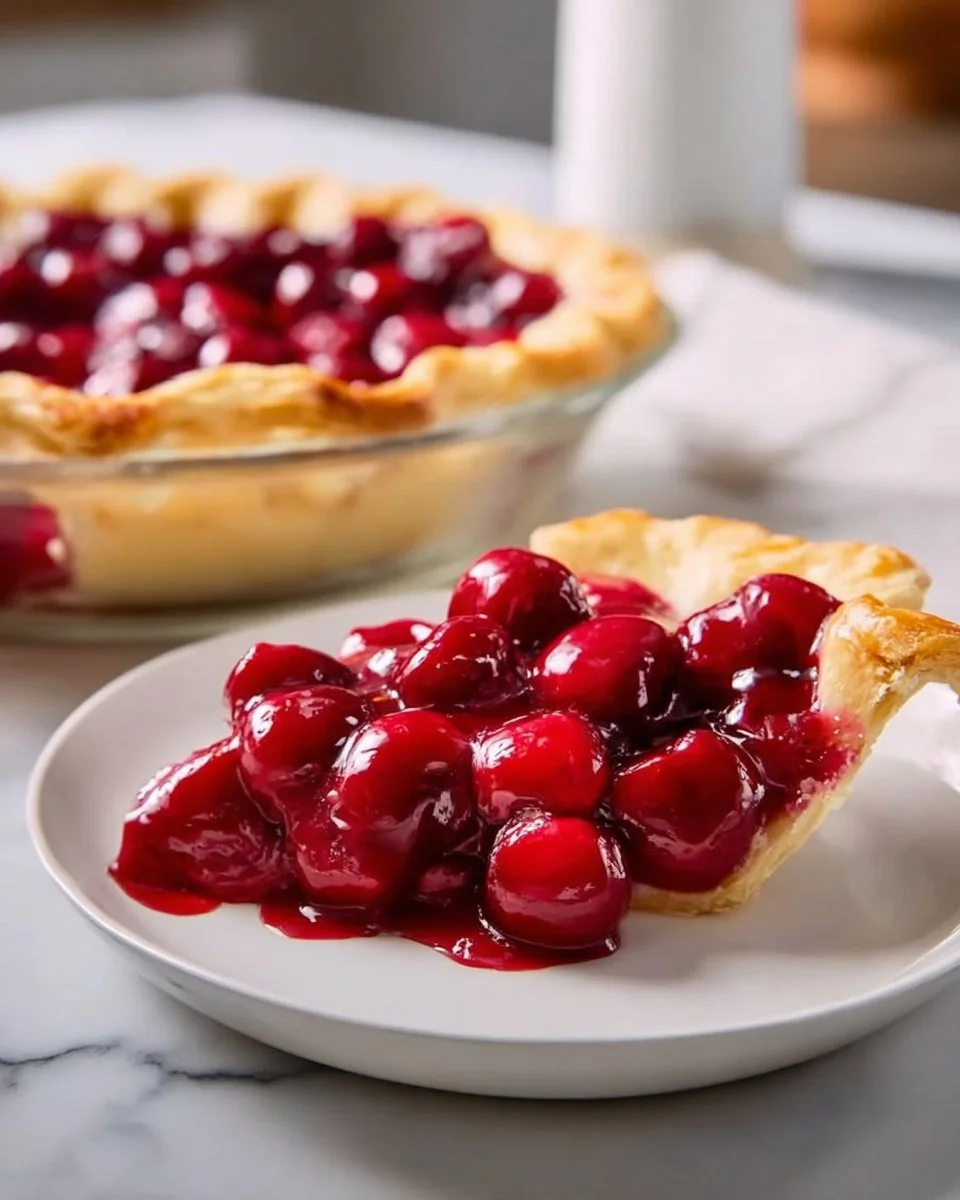
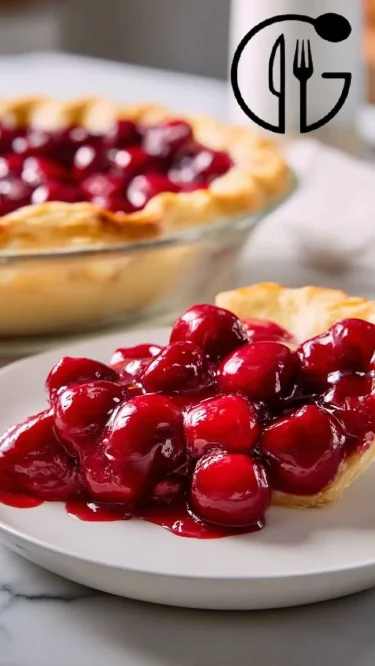
Delightfully Delicious Homemade Cherry Pie Filling: A Recipe That’s Sure to Capture Your Heart!
Ah, the sweet aroma of cherry pie filling simmering on the stove takes me right back to my grandmother’s kitchen. I remember summer afternoons when we’d pluck the juiciest cherries from her backyard tree, our fingers stained pink from the juice, and laughter echoing as we prepared to turn those beautiful fruits into something magical. Homemade cherry pie filling has a way of evoking nostalgia, riches of flavor, and deliciousness that store-bought brands simply can’t replicate.
What makes this recipe so special? Well, it’s not just the bright, luscious cherries combined with just the right amount of sweetness; it’s the love and memories infused in every spoonful. The texture is elegantly thick, with just the right balance of tartness and sweetness, and that alluring hint of almond extract makes it a true standout. Plus, this filling can elevate not just pies, but turnovers, hand pies, and so much more.
In this post, I’m excited to guide you through creating your own homemade cherry pie filling from scratch, teaching you all the tips and tricks to get it just right. So grab your apron, and let’s get started; your taste buds are in for a delightful treat!
What is Homemade Cherry Pie Filling?
Homemade cherry pie filling is a sweet, thick mixture made primarily of fresh, pitted cherries, sugar, and a few simple ingredients that help bind it together. Traditionally, it’s associated with summer harvesting, as families make their way to sweet cherry orchards in search of those plump, juicy fruits.
The taste is a beautiful dance between sweet and tart, providing a burst of flavor with each spoonful. When cooked, the cherries soften but still hold their shape, creating a remarkable texture that’s both juicy and luxurious. The richness from the almond extract and a hint of lemon juice elevate the overall flavor, making this filling truly unique.
This cherry filling is not only perfect for a classic pie but can also be used for breakfast pastries, ice cream toppings, or simply enjoyed on a spoon for that nostalgic comfort. Make it for special occasions to celebrate summer or cozy winter nights—this versatile recipe is perfect for any time of the year.
Why You’ll Love This Recipe
Unmatched Flavor: Homemade cherry pie filling bursts with flavor far beyond anything you’ll find on grocery store shelves. The fresh cherries provide a vibrant tartness that perfectly complements the sweetness, resulting in a truly irresistible treat.
Cost-Efficient: Making your cherry filling at home is a budget-friendly alternative to store-bought versions. It requires only a handful of affordable ingredients, and it’s especially economical if you can pick cherries in season.
Customizable to Your Tastes: This recipe grants you the freedom to tweak it according to your preferences. Whether you adore almond extract or want to experiment with spices like cinnamon or nutmeg, it’s your kitchen to play in!
Easy and Rewarding: This recipe is super straightforward, making it accessible for bakers of all levels. It takes just about 30 minutes from start to finish, plus the satisfaction of creating something homemade from scratch is irreplaceable.
Endless Uses: Once you’ve made your homemade cherry pie filling, the possibilities are endless! Use it in everything from traditional pies to turnovers, hand pies, or spooned over yogurt for a delightful breakfast or dessert.
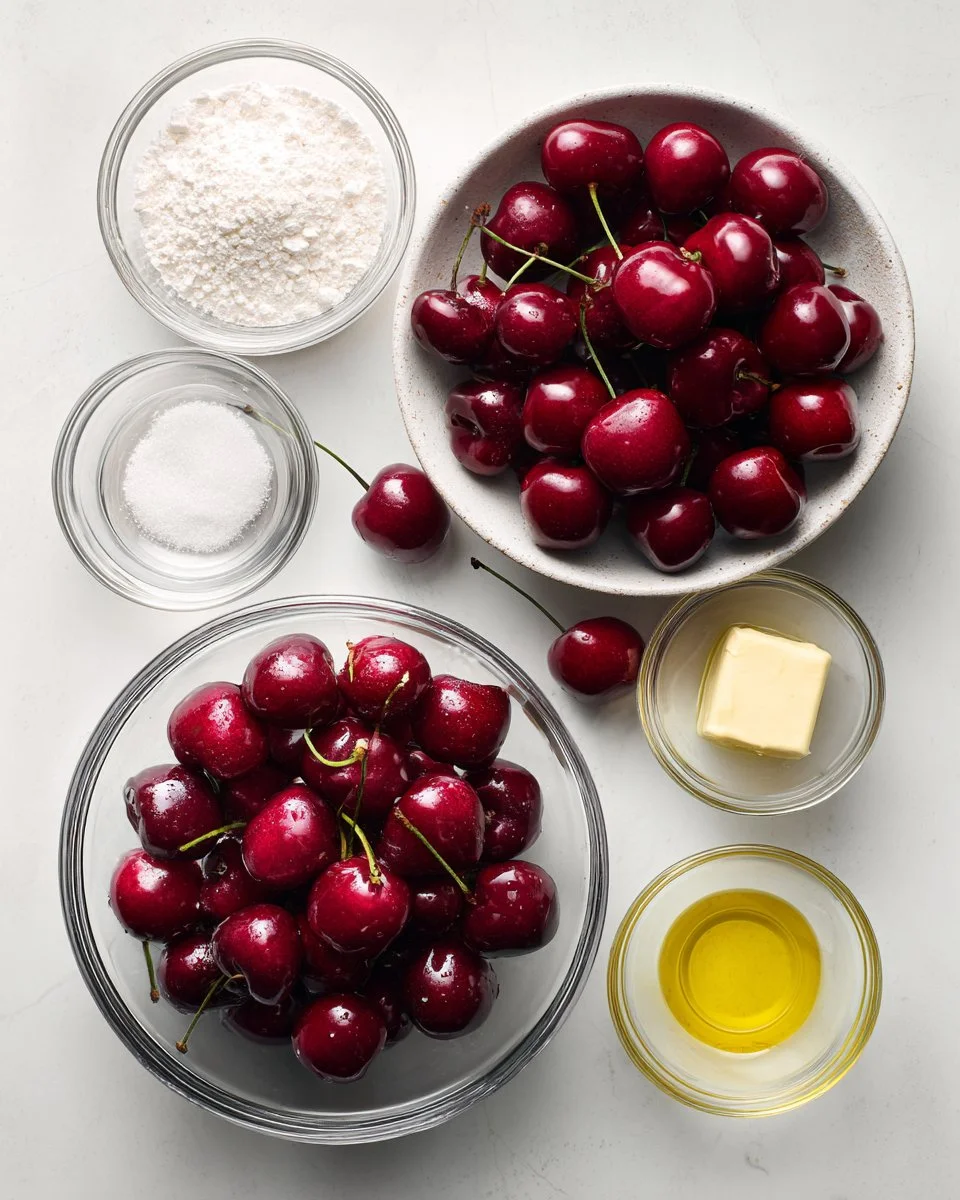
Ingredients
- 2 lbs fresh cherries, pitted (You can use sweet Bing cherries or tart Montmorency cherries for a balanced flavor)
- 1 cup sugar (Adjust based on the sweetness of your cherries; if they’re very sweet, you might want to reduce the sugar slightly)
- 1/4 cup cornstarch (This thickens the filling beautifully; you can substitute with arrowroot powder for a gluten-free version)
- 1/4 teaspoon almond extract (Gives a lovely, nutty flavor; feel free to replace it with vanilla extract if preferred)
- 1 tablespoon lemon juice (Brightens the overall flavor; freshly squeezed is always best)
- 1 tablespoon butter (For a bit of richness; room temperature to mix in easily)
Prep Notes: Make sure your cherries are fully pitted and washed. Bring your butter to room temperature before starting the recipe for easy incorporation.
Step-by-Step Instructions
Prepare the Cherry Mixture:
In a medium saucepan, combine the pitted cherries, sugar, and lemon juice over medium heat. Stir frequently until the mixture reaches a gentle boil (about 5-7 minutes). The cherries will soften, and juices will start to be released—oh, the fragrance!Chef’s Tip: Use a wooden spoon to stir carefully, scraping down any sugar that might stick to the bottom. This keeps the mixture from burning.
Make the Cornstarch Slurry:
In a separate bowl, mix the cornstarch with a couple of tablespoons of cold water until smooth, creating a slurry. This will help thicken your cherry mixture without clumps.Thicken the Filling:
Once the cherry mixture is boiling, slowly stir in the cornstarch slurry. Continue to cook, stirring for another 2-3 minutes until the mixture thickens and becomes glossy. It should easily coat the back of a spoon.Common Mistake to Avoid: Don’t add the cornstarch too quickly; pouring it all in at once can lead to clumps!
Add the Finishing Touches:
Remove the saucepan from heat and gently stir in the almond extract and butter until evenly distributed and melted in the hot mixture.Cool Down:
Allow the cherry pie filling to cool for at least 30 minutes before using it as a filling for your pies, turnovers, or hand pies. If you’re storing it, transfer it to a clean jar, allowing it to come to room temperature.

Expert Tips & Tricks
Storage Recommendations: Your homemade cherry pie filling can be stored in an airtight container in the fridge for up to a week or frozen for up to three months.
Make-Ahead Instructions: This filling can be made several days in advance, allowing the flavors to meld beautifully. Just make sure to cool and refrigerate it properly.
Troubleshooting: If your filling seems too watery, continue cooking it on low heat; if it’s too thick, simply add a splash of water or cherry juice while stirring until it reaches the desired consistency.
Serving Suggestions
Your homemade cherry pie filling is perfect for a classic cherry pie, but consider pairing it with a scoop of vanilla ice cream for a delightful dessert pairing. Want to get creative? Spread it on pancakes, spoon it over yogurt with granola, or use it in a layered parfait for an eye-catching presentation. Ideal for summer picnics and cozy brunches alike, this filling is the star of any occasion!
Variations & Substitutions
Get adventurous in the kitchen! Here are some ways to customize your cherry pie filling:
Other Fruits: Play with different fruits like blueberries, peaches, or strawberries for a mixed fruit pie filling.
Dietary Restrictions: Make it gluten-free by using cornstarch and vanilla extract instead of almond. You can also reduce sugar for a healthier option or use sugar substitutes if needed.
Seasonal Twist: Try adding pumpkin pie spice in the fall for a festive twist or a splash of bourbon for a sophisticated flavor kick.
Nutrition & Storage Info
- Prep Time: 10 minutes
- Cook Time: 15 minutes
- Total Time: 25 minutes
- Yield: About 4 cups of filling (enough for two 9-inch pies)
- Estimated Calories: 125 calories per 1/4 cup
- Storage Instructions: Store covered in the fridge for up to a week or freeze in airtight bags for up to three months. Thaw overnight in the fridge before using.
FAQ Section
Can I use frozen cherries for this recipe?
Absolutely! Just remember to thaw and drain any excess liquid before adding to the mix.How do I know when the cherry filling is thick enough?
It should coat the back of a spoon and hold its shape when scooped. If in doubt, err on the side of continuing to cook a little longer!Can I adjust the sweetness of the filling?
Yes! Taste the mixture while cooking and adjust the sugar to your preference.Is this recipe suitable for canning?
Yes, with proper canning methods, you can preserve this filling for long-term storage.What is the best way to thaw frozen cherry filling?
Thaw it slowly in the refrigerator overnight for the best texture.Can I use this filling for something other than pie?
Absolutely! It works great for turnovers, pastries, or even toppings for ice cream and yogurt.Can I use another thickening agent besides cornstarch?
Yes! You can substitute with arrowroot powder or tapioca starch.How long does this filling last in the freezer?
Up to three months in proper airtight packaging.Can I make this filling spicier?
Adding a pinch of cinnamon or nutmeg can create a warm, spiced filling.Does this recipe work with sour cherries?
Yes, sour cherries are actually a classic choice for pies; just adjust the sugar to balance the tartness.
Conclusion
Homemade cherry pie filling is not just a recipe; it’s a doorway to cherished memories and delightful treats. By crafting this filling at home, you unlock flavors far beyond what you find in jars at the stores. I invite you to try this recipe and share in the joy it brings; I’d love to hear how it turns out for you! Don’t forget to explore my other related recipes for more delicious inspiration on the blog. Happy baking!